Canonical Ubuntu and other popular Linux distributions that come with the GNOME desktop environment have a built-in (Rygel Home Media Solution) feature that converts the system into a full-fledged home media server.
Once you enable this feature, you can listen to music or watch pictures and videos stored on the server, either locally or remotely. It uses DLNA/UPnP, which automatically transcodes the media files to a format compatible with client devices like Android, iOS, Sony PlayStation, Microsoft Xbox, and smart TVs.
In this quick tutorial, I'll show you how to enable this feature on Ubuntu or any other Linux distribution with the GNOME desktop environment and then access your media files on client devices.
How to Enable Rygel Home Media Server on Ubuntu
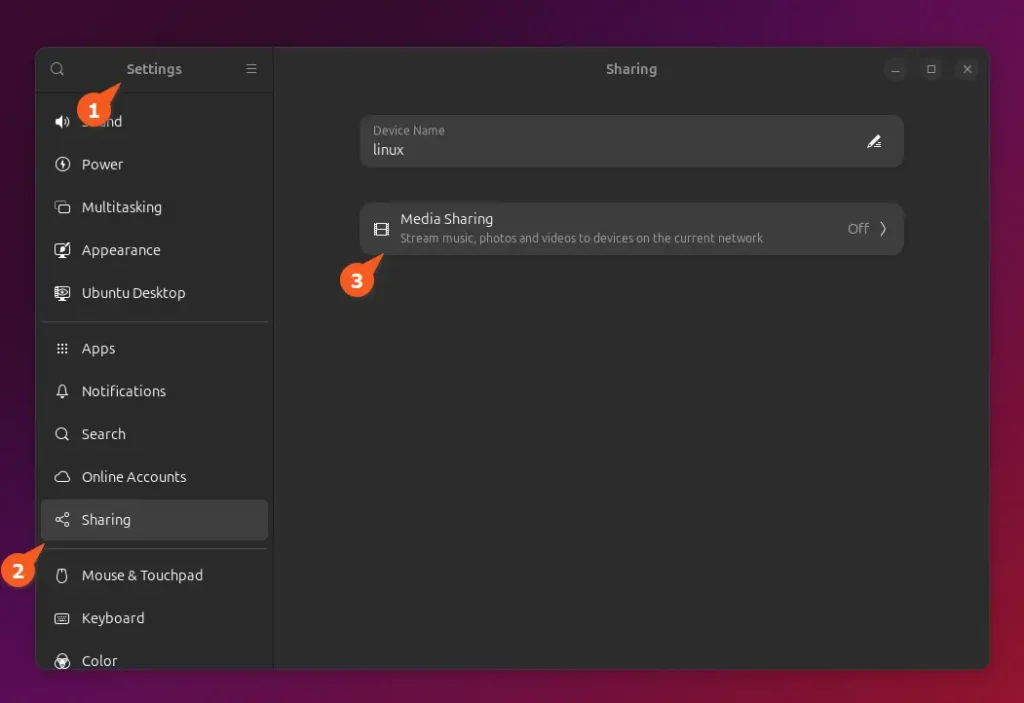
As mentioned, it's a built-in feature disabled by default for security reasons. So, to enable it, just open "Settings", go to "Sharing" in the left pane, and click on the "Media Sharing" entry in the right pane.
It will open a dialog box where you first need to enable "Media Sharing", then you can add/remove folders for media sharing, and finally, under "Network", toggle on/off to select which network interface to listen to.
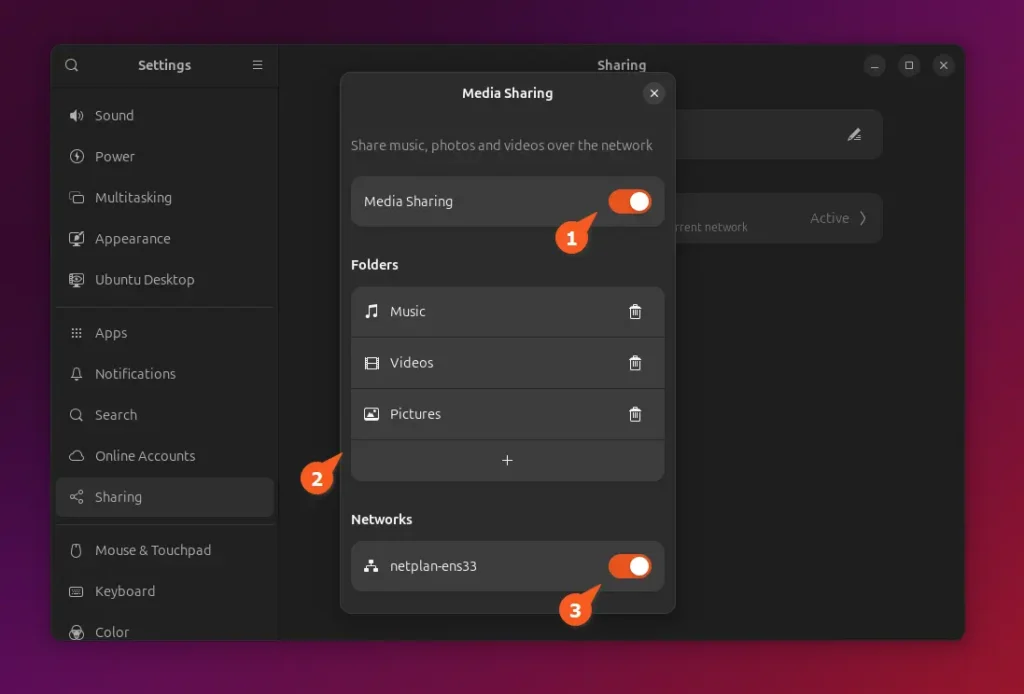
You have now finished setting up the Rygel media server on Ubuntu.
Access the Media Server on Client Devices
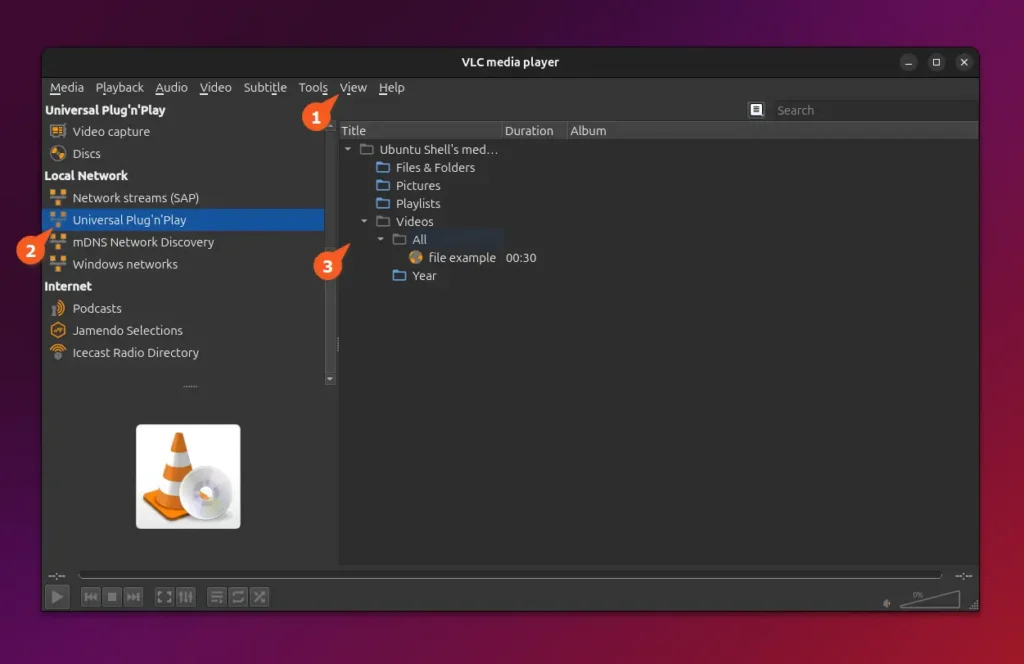
Once the media server is set up, you can access the shared media files locally or remotely on UPnP-supported devices. For demonstration, I have a Fedora system on the same network with VLC installed; to access the shared content, I can open the VLC media player, navigate to "View", then "Playlist", and select "Universal Plug'n'Play".
It will scan the entire network for our media server and, once discovered, list all shared media files.
That's it!
Wrap Up
Today, you've learned how to easily set up a home media server on Ubuntu without any external tools. While this method was originally workable only for GNOME DE, you can still use it on KDE DE, though it requires manual installation and some workarounds that are not within the scope of this article and will be discussed separately.
If you have any questions regarding the topic, feel free to comment.

 and 443 (HTTPS) in UFW")
