Adding multiple users with access control is one of the main advantages of using Linux. Whenever creating new users in Linux, we need to take care of what type of permission or authorization is being provided to that user.
In Linux, you can easily create a new user using the useradd or adduser command. Further, you can assign a group to that user (ex: sudo) or set an expiry date on that account, which we will cover today.
How Does the UserAdd Command Work?
The general syntax for the useradd command in Linux is as follows:
📝 Note
Creating a new user account requires root privileges or an account with sudo privileges.
- useradd [options] username
When you execute the useradd command in your system, it performs three different things, as listed below.
- It populate
/etc/passwd,/etc/shadow,/etc/group, and/etc/gshadowfiles for the newly created user account. - Setup permissions and privileges for that new user account.
- Create a new home directory for that new user account at
/home/<newuser>(only theaddusercommand does that; we will talk about it more later).
Whenever a new user is created, an automatically new entry for that user is added at the /etc/passwd file. This file stores all the current user information in your system.
To check the entry for the newly created user in /etc/passwd, use the below command.
- cat /etc/passwd | grep username
Below is the behavior of the above command.
The above output contains seven entries from the user, separated with ":". Let’s discuss each one of them.
- Username: This entry contains information about the user login name in the system. It should be in the range of 1 to 32 characters.
- Password: The "x" is referencing to user password stored at
/etc/shadowfile in an encrypted format. - User ID (UID): Every newly created user is attached to a unique user ID (User Identification Number). The 0 UID is reserved for the root user, while the UID from 1-99 is reserved for predefined accounts. Further UIDs ranging from 100 to 999 are reserved for system accounts and groups.
- Group ID (GID): Every user also has their own group id in the
/etc/groupfile. - Description: This field is not required, but you can store information related to the user, like their full name, phone number, etc.
- Home Directory: Every newly created account creates a new home directory at the
/home/usernamepath. This field stores the user's newly created home directory path. - Shell: The absolute path of the user login shell.
Now that you understand the basic workings of the useradd command, the adduser command will be a lot easier for you to understand. But still, we will talk about some differences between them.
What Is the Difference Between UserAdd and Adduser Commands?
That is an important question to know. The main difference between useradd and adduser is that the useradd command just creates the user in your Linux system, while the adduser command also creates a user but also sets up user home directories and other functionalities and also asks for information related to the user such as a password, full name, location, etc. at the time of creation.
📝 Note
Some distributions don’t provide the adduser command; in that case, we have to use the core useradd command to create a new user. On which we are mostly going to focus.
Another important component to know is that the useradd command is binary-compiled with the system. But adduser is the Perl script that utilizes the useradd command in the backend.
The adduser command is more user-friendly and interactive than the useradd command, but in terms of its core value, there is no difference in what one can or cannot do.
Today, you will learn basic to advanced ways to create a new user account in Linux with practical examples using the useradd command.
1. How to Create a New User in Linux
To add or create a new user account in Linux, you have to follow the useradd or adduser command with your new username.
Ensure the new user name is unique and that any existing users do not have the same user account name to avoid any conflict at the time of creation.
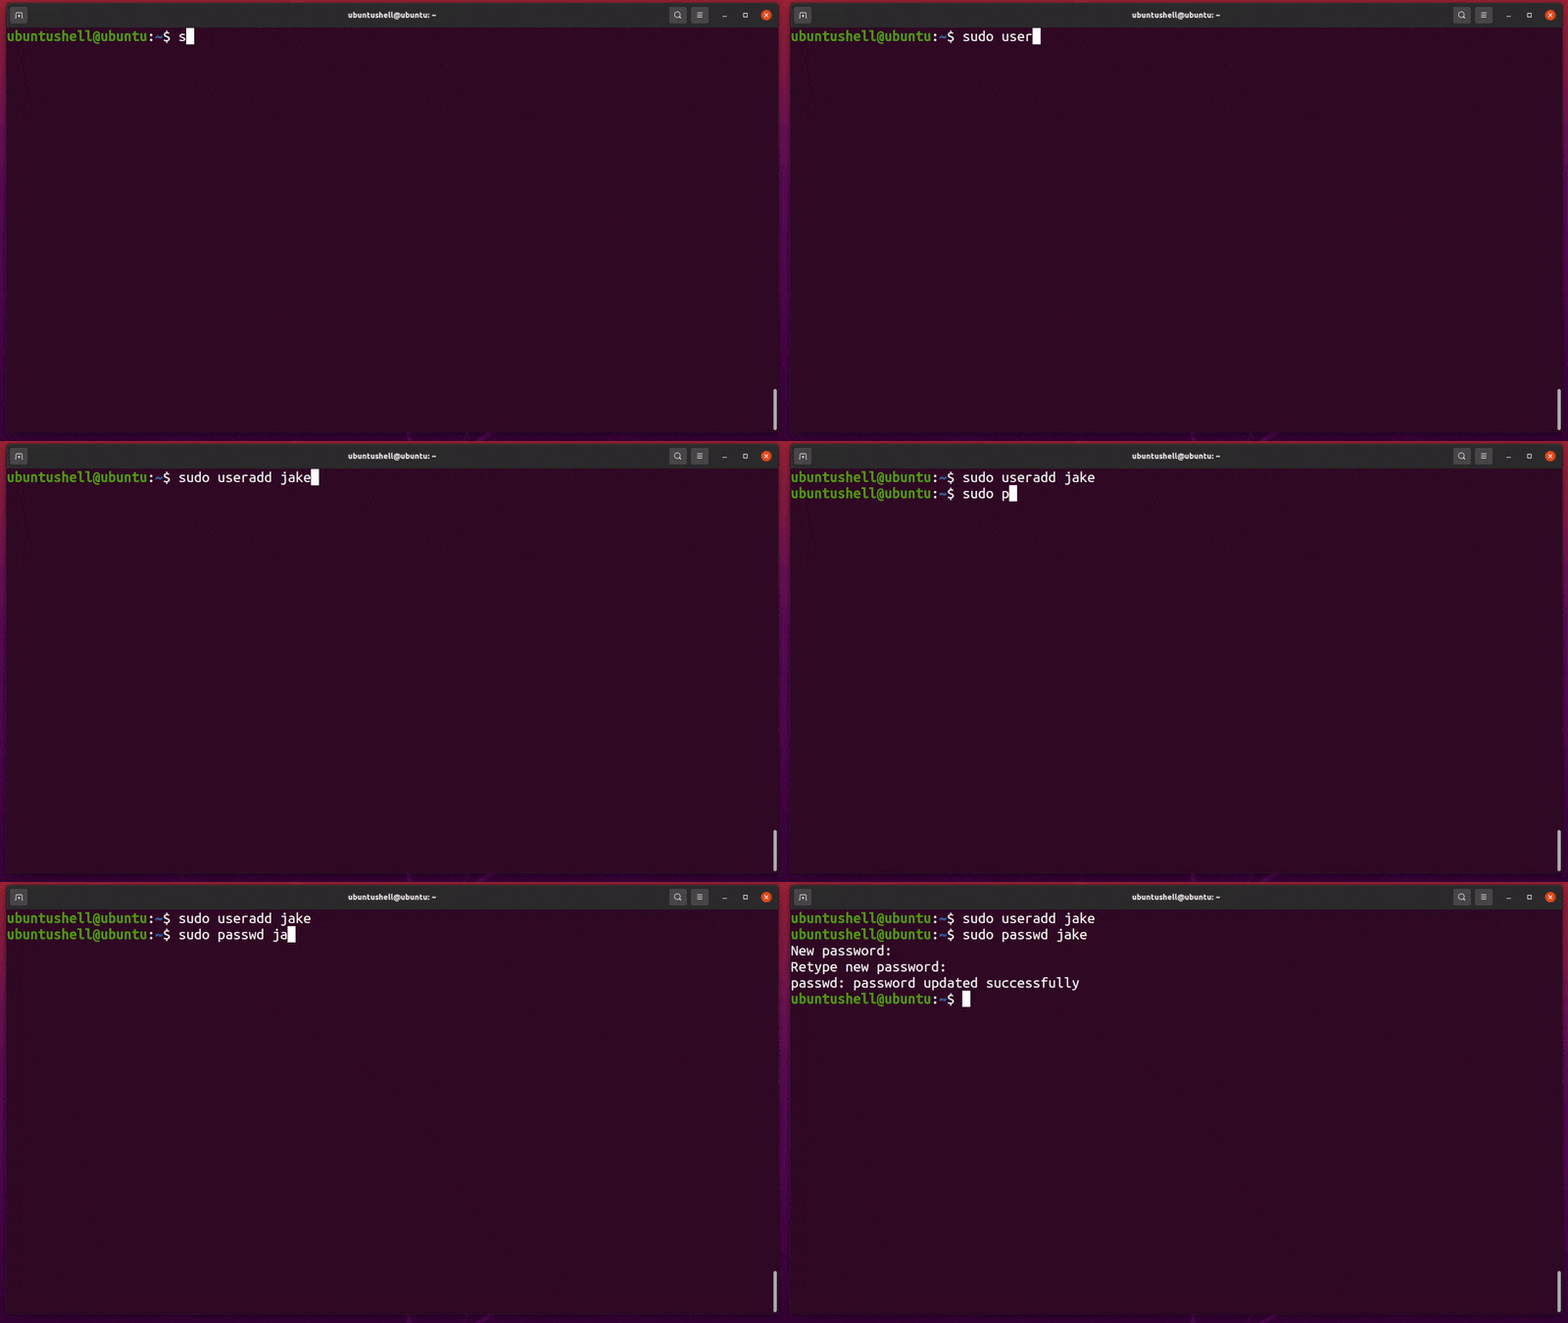
For example, to create a new user account with the name "jake", follow the below command.
- sudo useradd jake
The above command creates the new user in a locked state, meaning an account without a password. To set a custom password, use the passwd command after useradd, as shown below.
- sudo passwd jake
Below is the behavior of the useradd and passwd commands.
Once the account is created, you can check the new entry of that user at the /etc/passwd file.
- cat /etc/passwd | grep jake
Below is the behavior of the above command.
2. Creating a New User with a Different Home Directory
By default, the useradd command creates a new user's home directory at the /home/ path. If you look above, you can see that the new user "jake" has a new home directory at the /home/jake path.
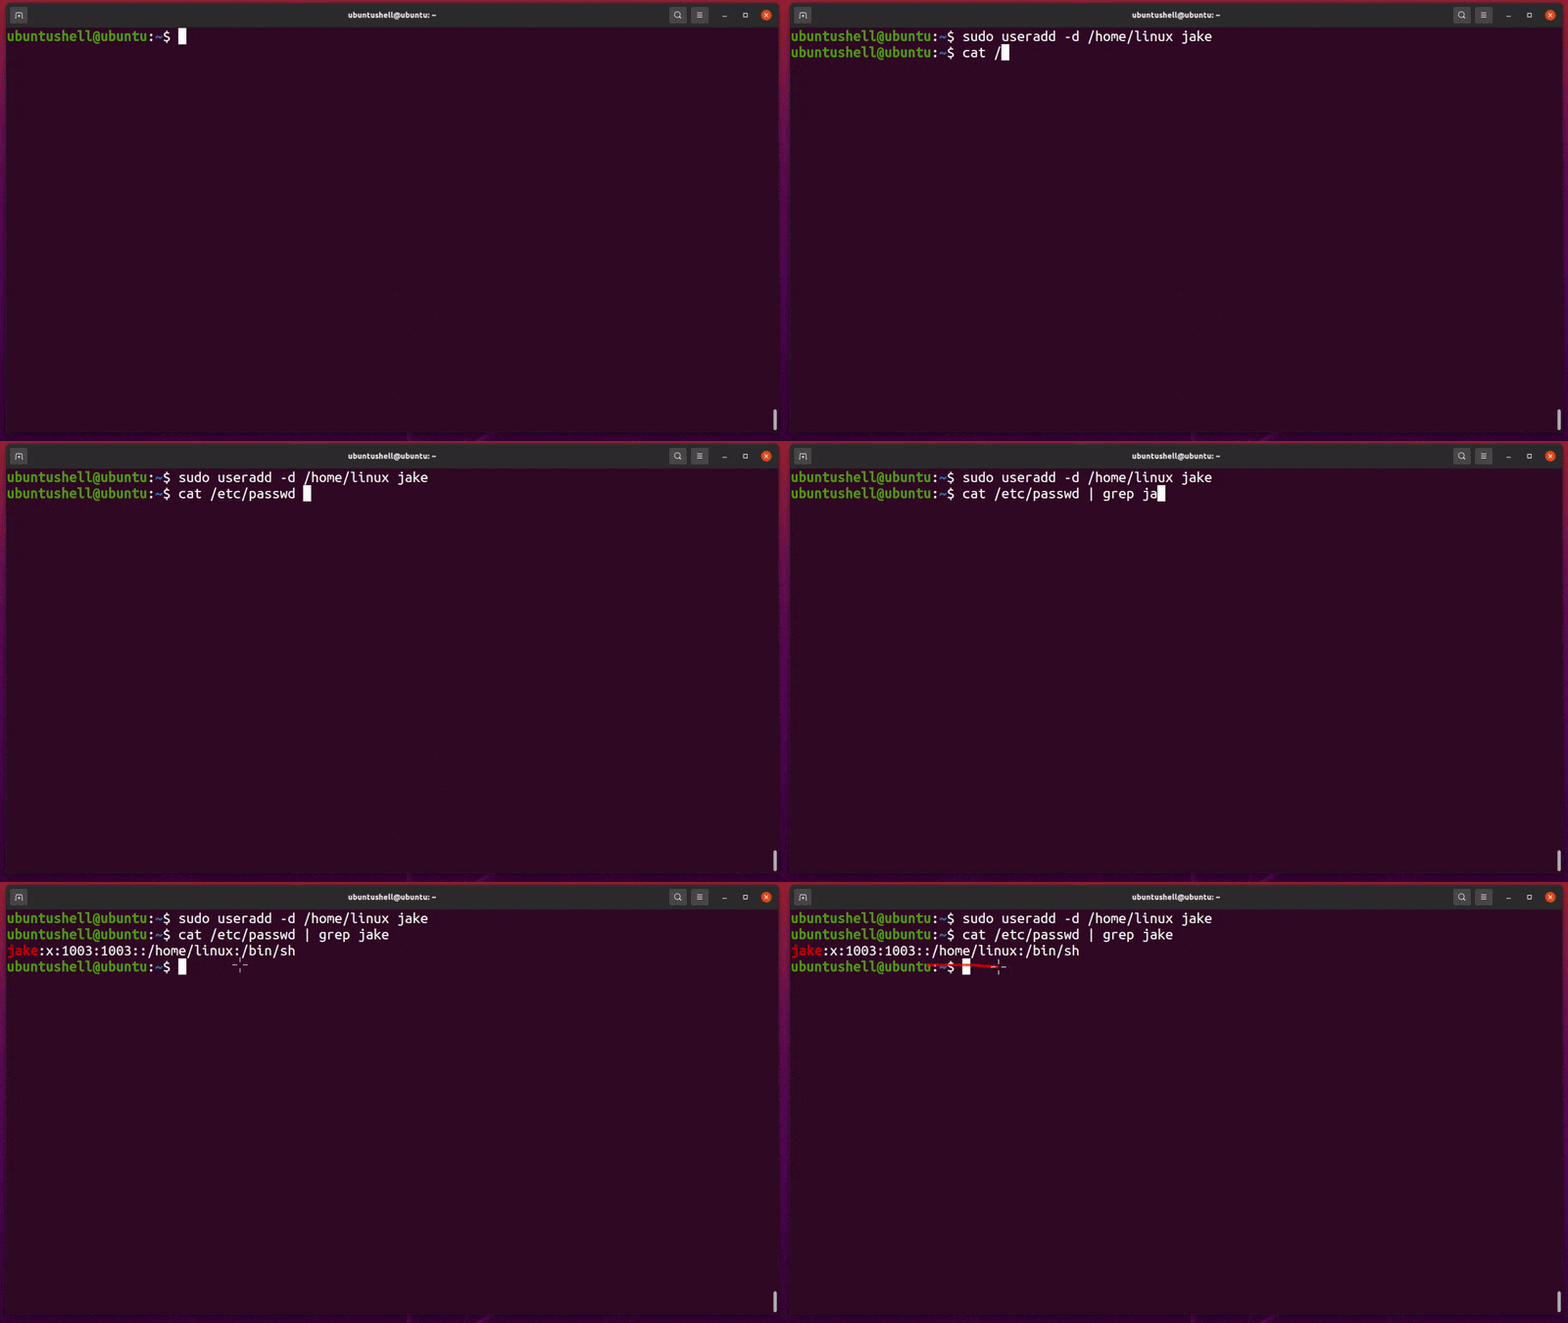
Instead of new, if you want to attach an existing home directory to the newly created user, then use the -d flag along with the useradd command as below.
- sudo useradd -d /home/linux jake
View the /etc/passwd to verify the path is attached or not to the new user, as shown below.
- cat /etc/passwd | grep jake
Below is the behavior of both commands.
3. Create a New User with a Specific User ID
In Linux, every new user is dynamically assigned a unique UID (Unique Identification Number) ranging from 100 to 999.
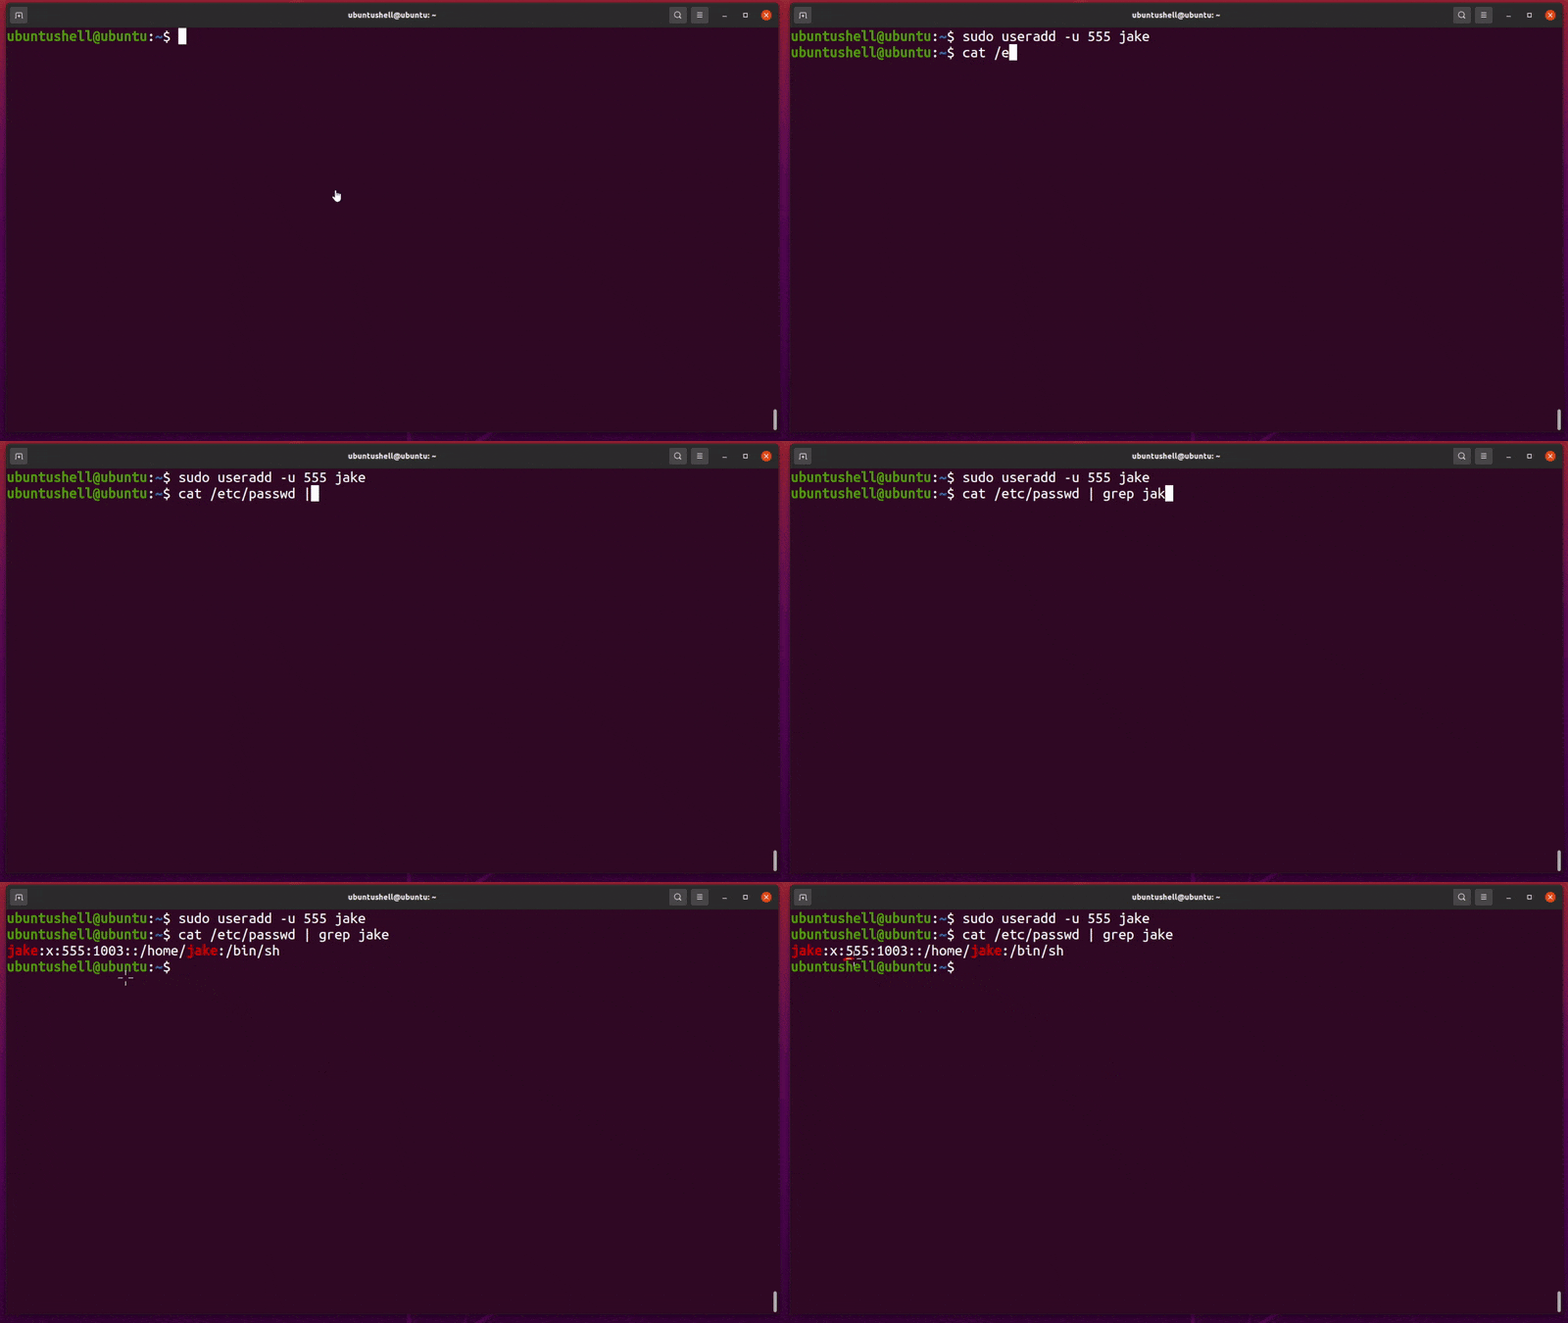
It can be manipulated using a custom UID by using the -u flag along with the useradd command, as shown below.
- sudo useradd -u 555 jake
View the /etc/passwd to verify the UID is assigned or not to the new user, as shown below.
- cat /etc/passwd | grep jake
Below is the behavior of both commands.
4. Create a New User with a Specific Group ID
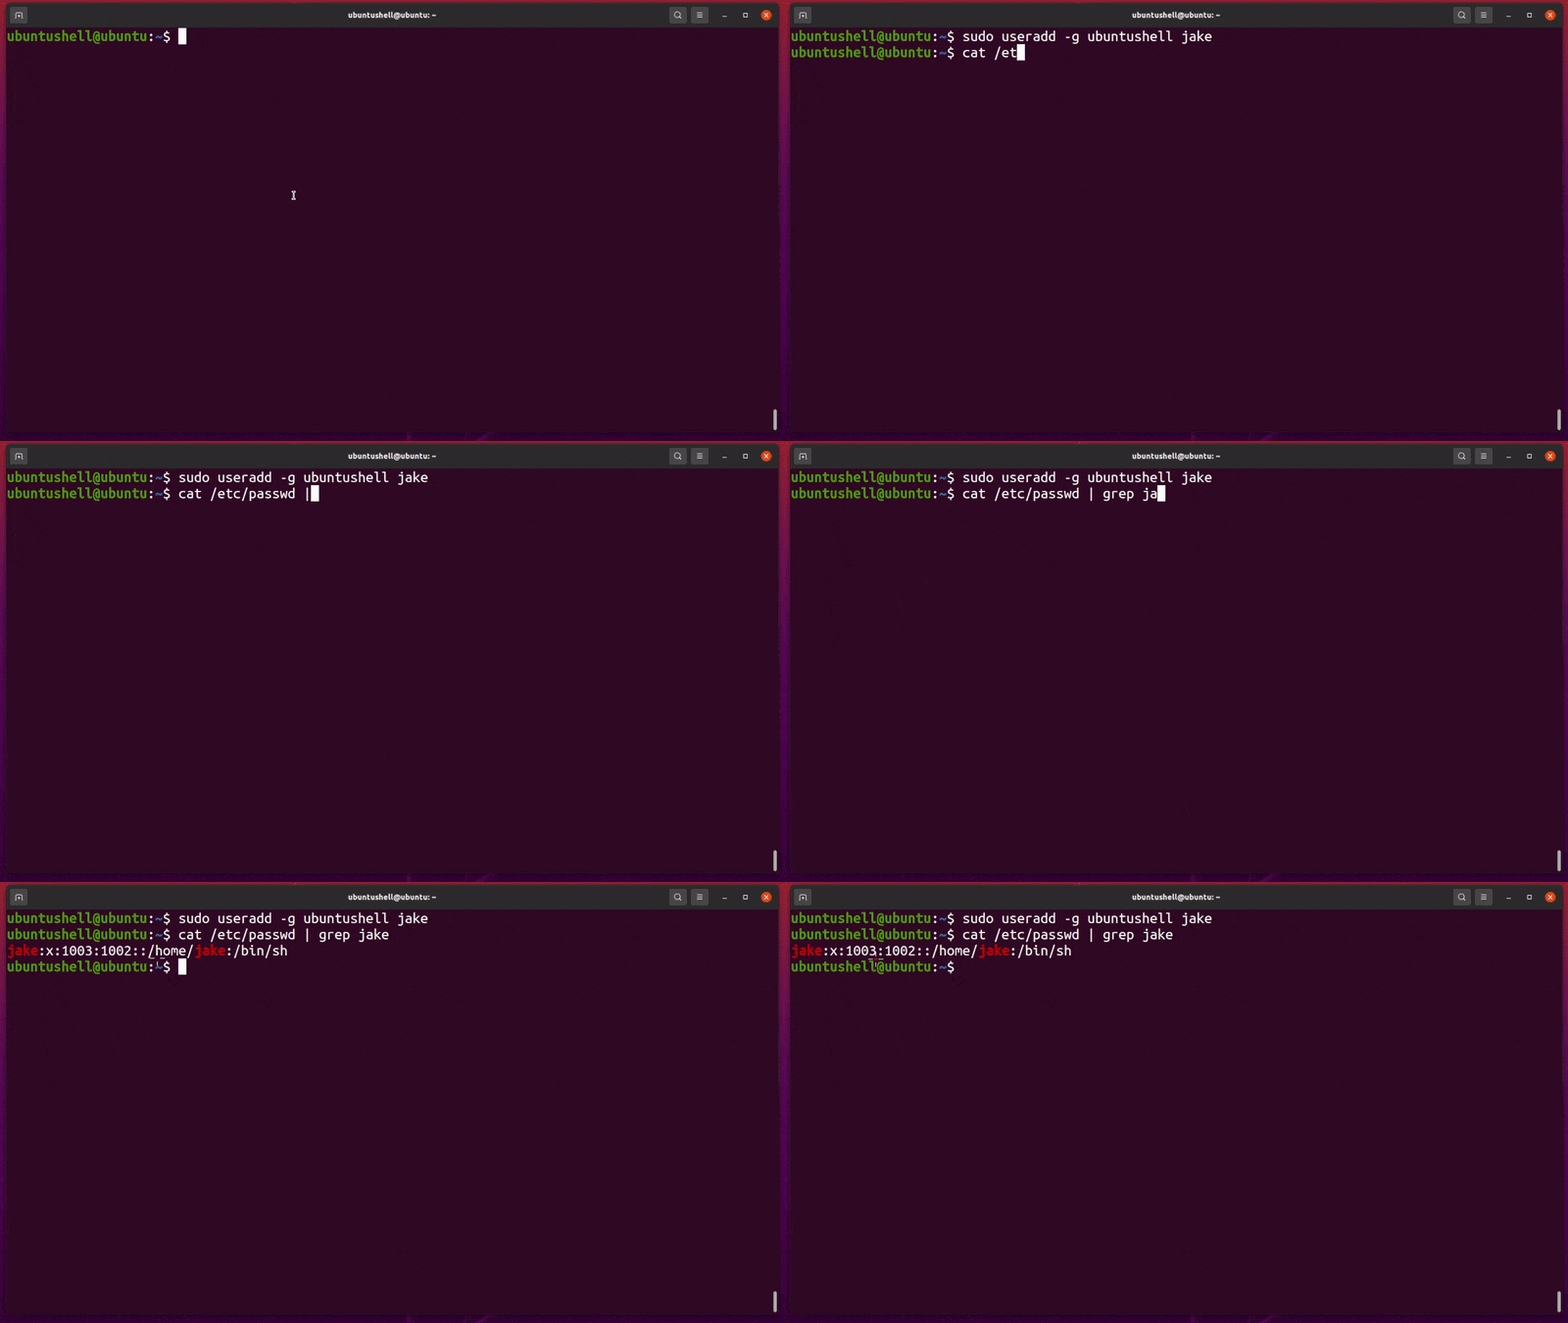
In Linux, every new user has their own unique GID (Group Identifier). The -g flag helps us attach different GIDs to the newly created user.
Example: I want to attach the "ubuntushell" UID, which is "1002", to the "jake" GID. For that, I will follow the below command.
💡 Tip
If you want to attach multiple groups to the newly created user, then separate each group with "," in between.
- sudo useradd -g ubuntushell jake
View the /etc/passwd to verify whether the GID is assigned or not to the new user, as shown below.
- cat /etc/passwd | grep jake
Below is the behavior of both commands.
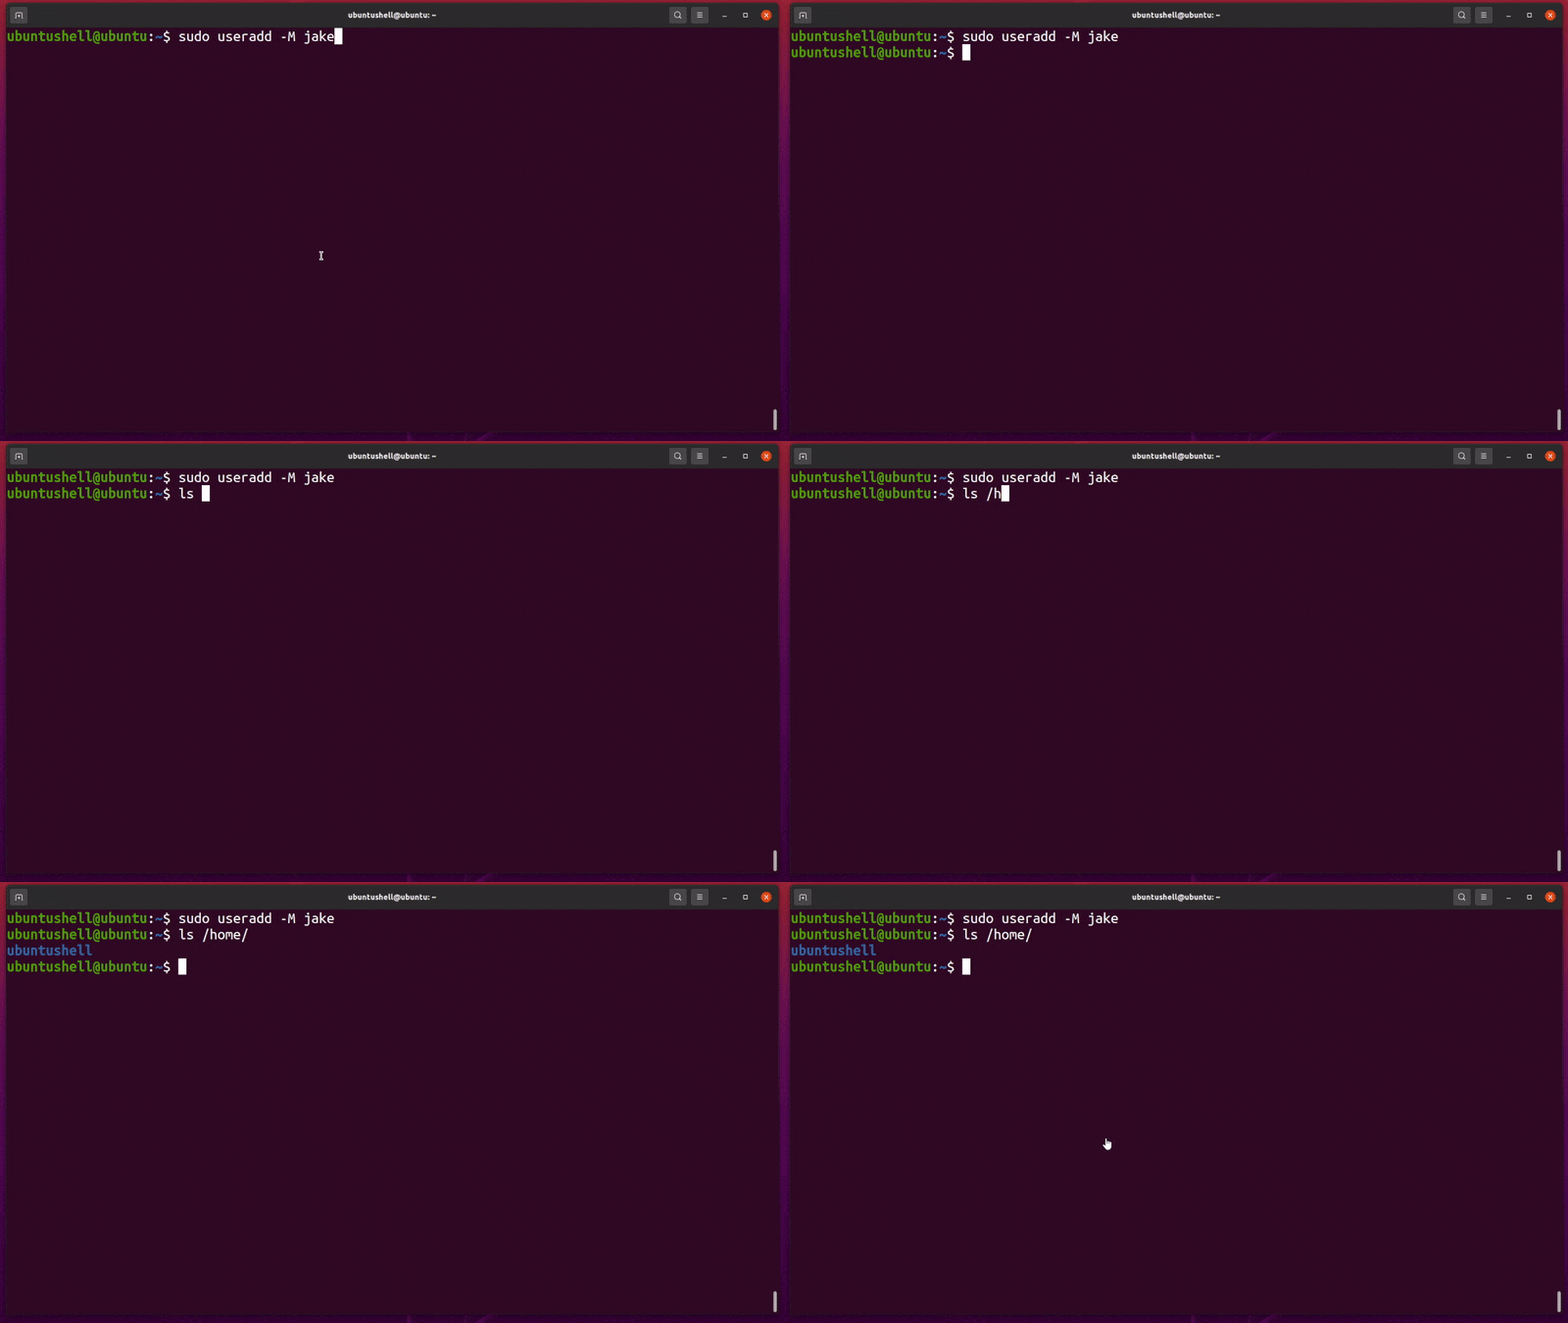
5. Create a New User without a Home Directory
For security reasons, if you do not want to attach a user to any home directory, then you can use the -M flag along with the useradd command.
📝 Note
On the next reboot, the user's new home directory will be root, and if the user uses the su command to login, then its login directory will be the previous user's home directory.
Use the below command to create a new user named "jake" without any home directory.
- sudo useradd -M jake
To verify, use the below command to check if any new home directory is created with the name "jake" or not.
- ls /home/
Below is the behavior of both commands.
6. Create a New User with an Account Expiration Date
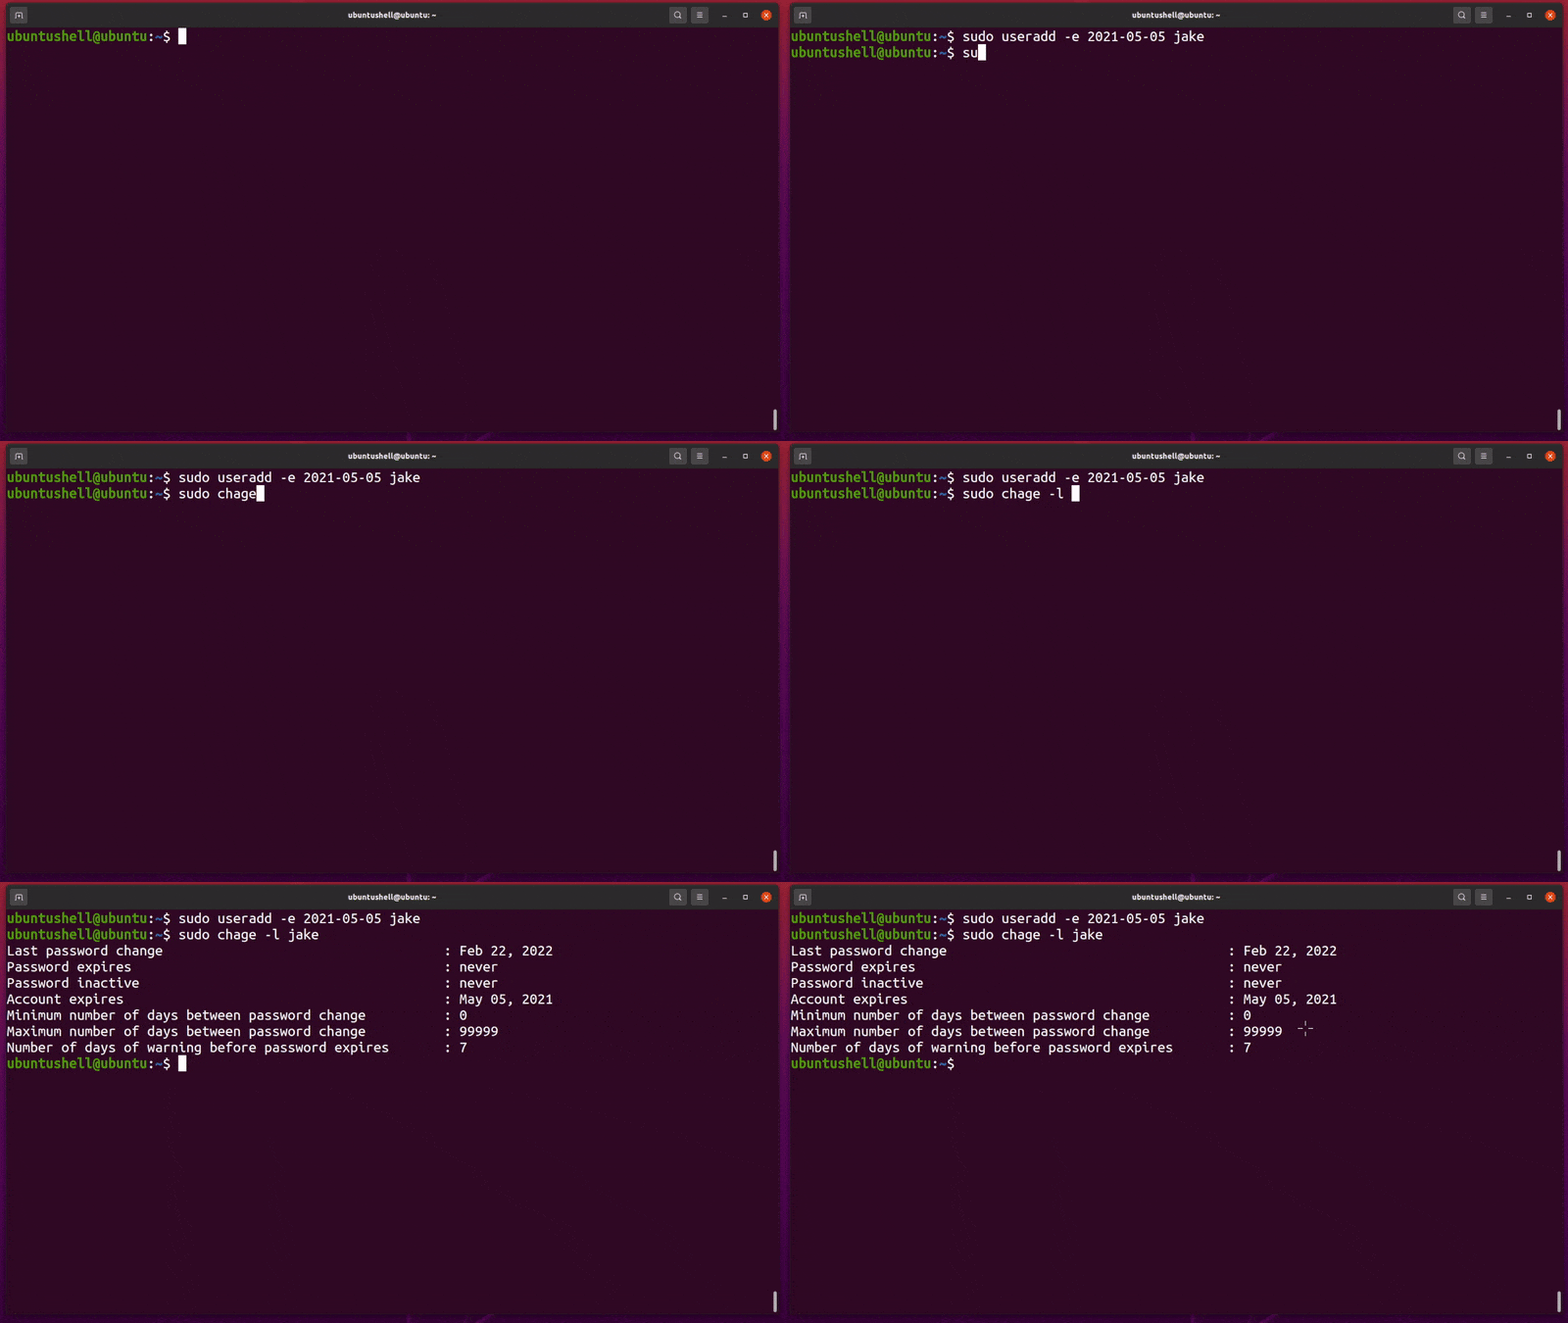
In Linux, when we create a new user account, it sets 0 as an expiration date (never expire). For security purposes, if you want to create a user account with a specific expiration date, you can use the -e flag to set the expiration date in YYYY-MM-DD format.
For example, I want to create a new user named "jake" with an account expiration date of 2021-05-05 in YYYY-MM-DD format. After it hits the expiration date, that account will automatically be removed from the system.
- sudo useradd -e 2021-05-05 jake
You can verify the expiry date for the user "jake" using the chage command as shown below.
- chage -l jake
Below is the behavior of both commands.
7. Create a New User with a Password Expiration Date
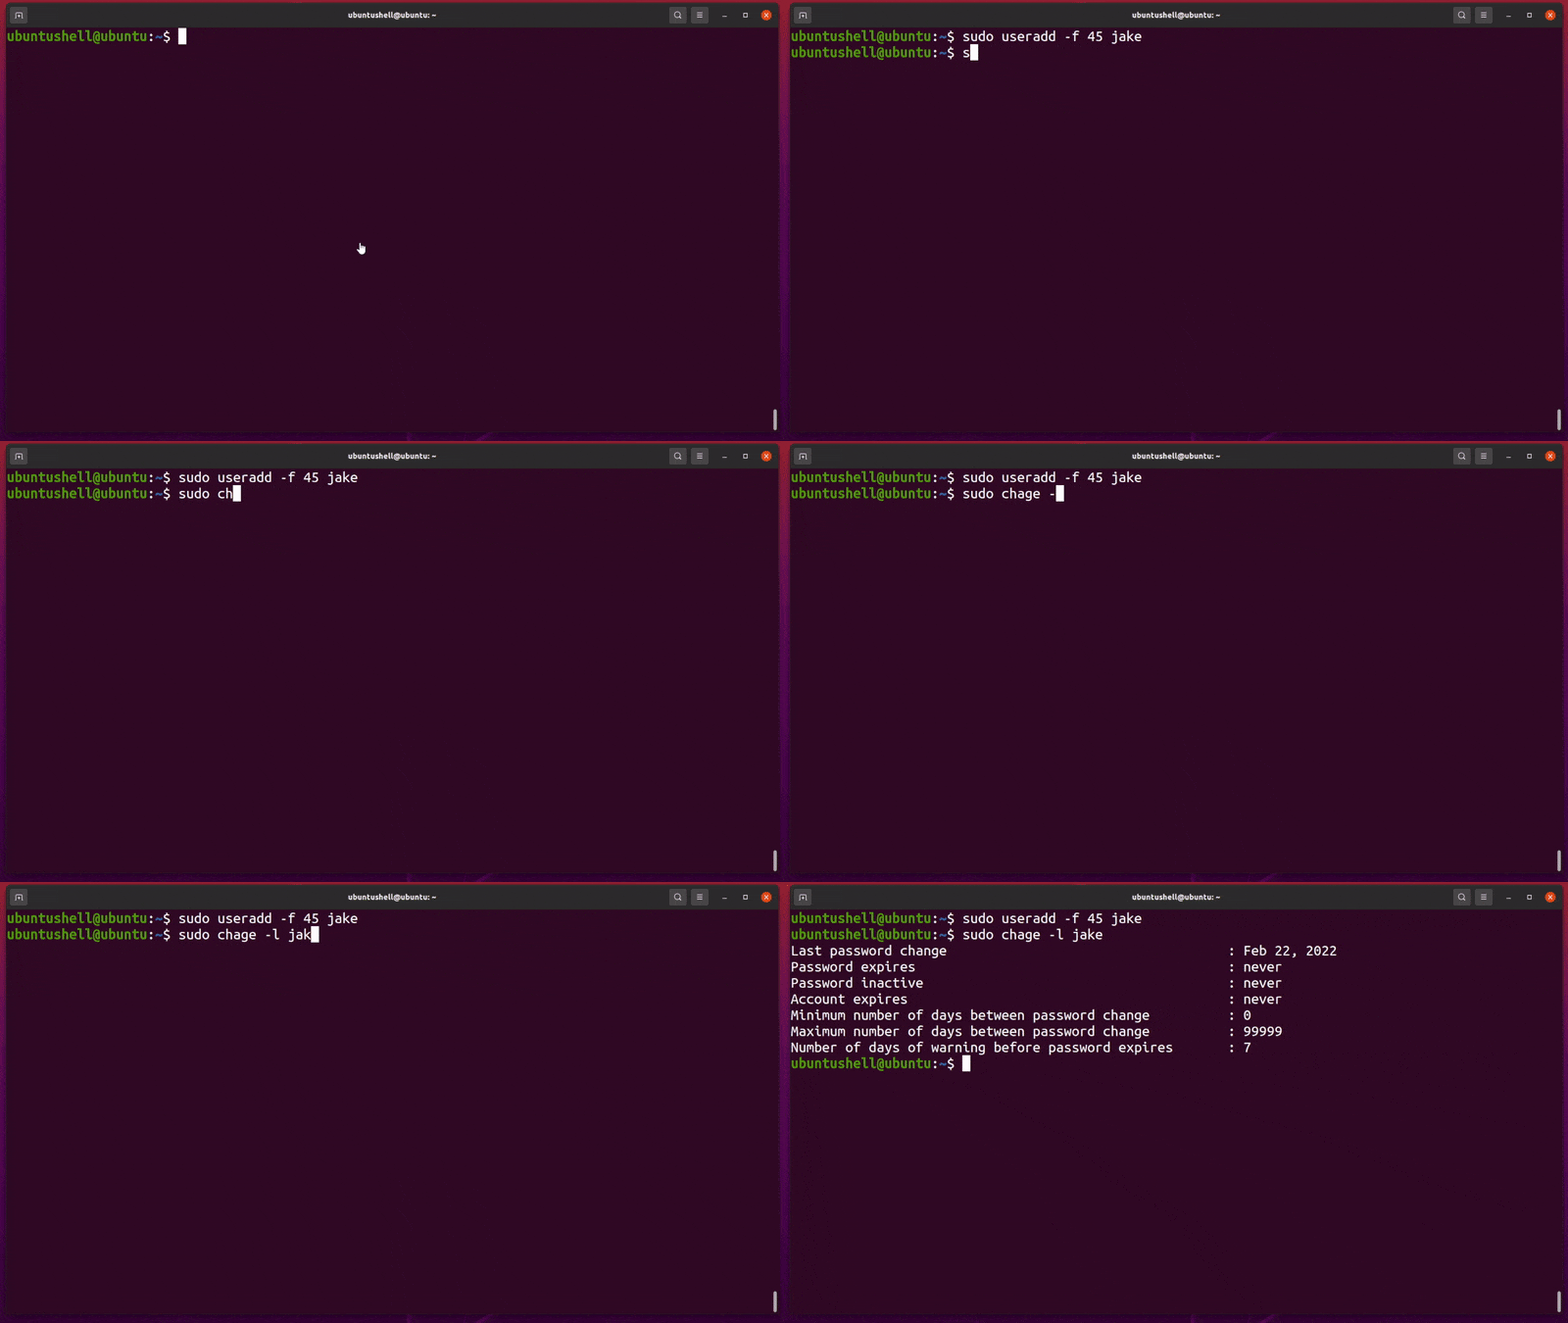
When we create a new user, their password is set to -1 (meaning immortal). If you want to force the user to change the password at a specific time, then you can use the -f flag along with the useradd command.
🔗 How to Force Users to Change Their Password at the Next Login in Linux
For example, if I want to set the password expiration date to 45 days for user "jake" after his creation, I will follow the below command.
- sudo useradd -f 45 jake
You can verify the expiry date for the user "jake" using the chage command as shown below.
- sudo chage -l jake
Below is the behavior of both commands.
8. Create a New User with Custom Comments
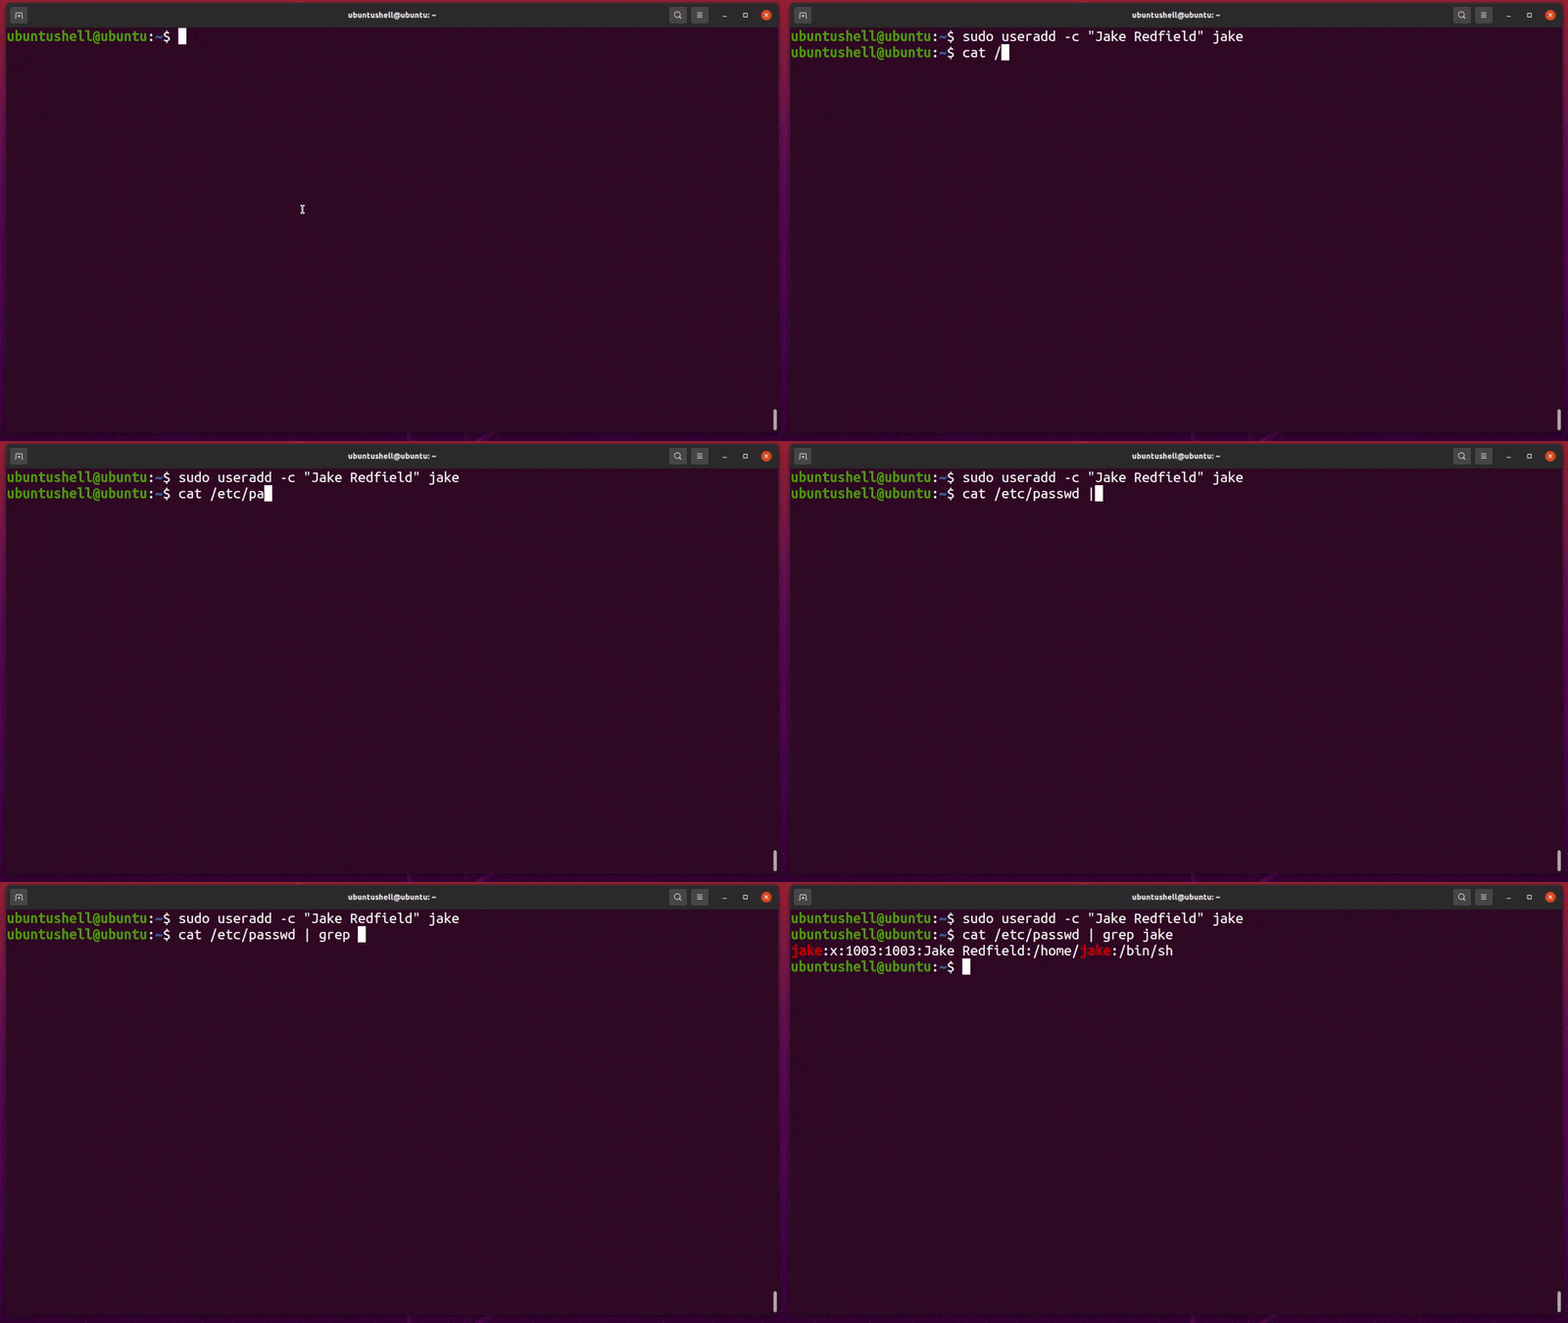
The -c flag helps you to add comments to the user in the /etc/passwd file. This information can be anything like user full name, phone number, location, etc.
For example, if I want to create a new user named "jake", with the comment "Jake Redfield" I will follow the below command.
- sudo useradd -c "Jake Redfield" jake
View the /etc/passwd to verify the comment is added or not to the new user, as shown below.
- cat /etc/passwd | grep jake
Below is the behavior of both commands.
9. Create New User with Different Login Shell
Sometimes, we do not want to assign any shell to users, such as bash. In that case, we attach users to a different shell, such as the nologin shell.
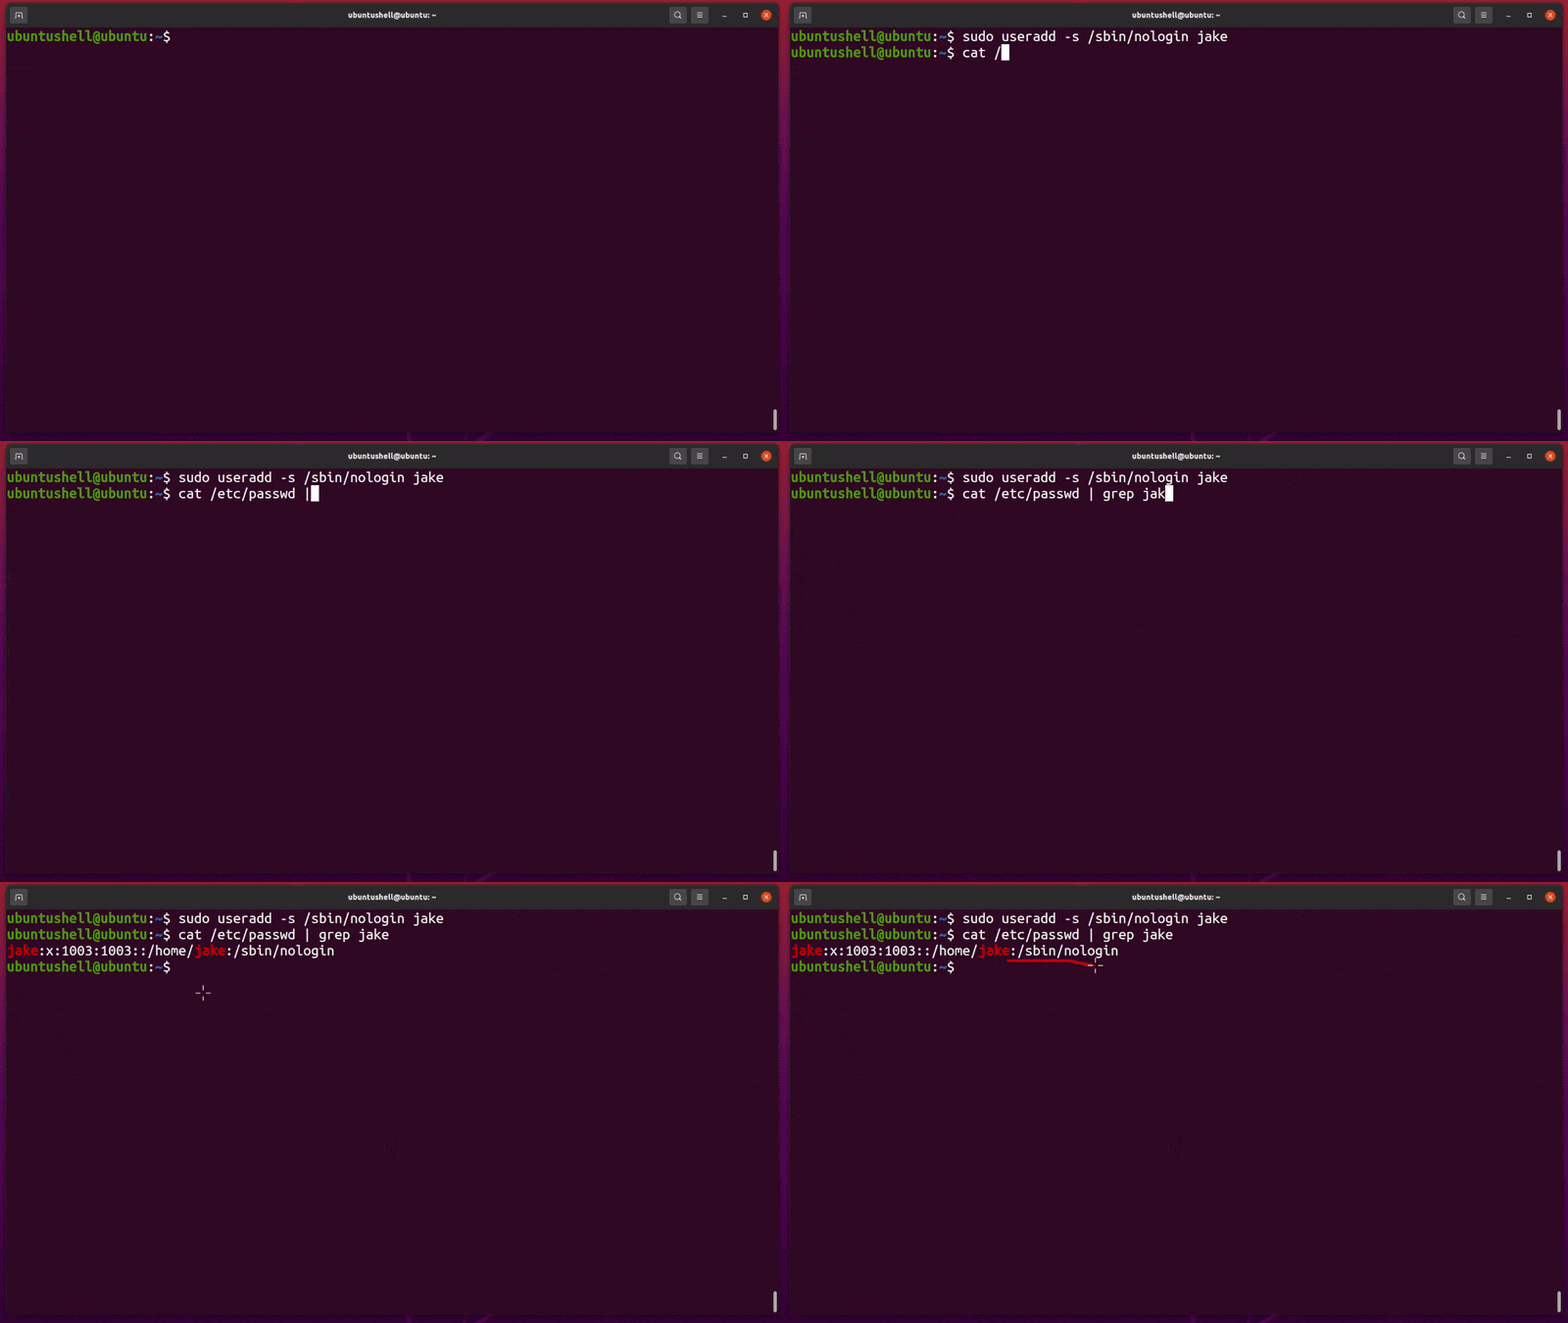
To attach a user to a different shell, in this case the /sbin/nologin shell, use the below command.
- sudo useradd -s /sbin/nologin jake
View the /etc/passwd to verify the shell is replaced or not for the new user, as shown below.
- cat /etc/passwd | grep jake
Below is the behavior of both commands.
10. Useradd Assemble
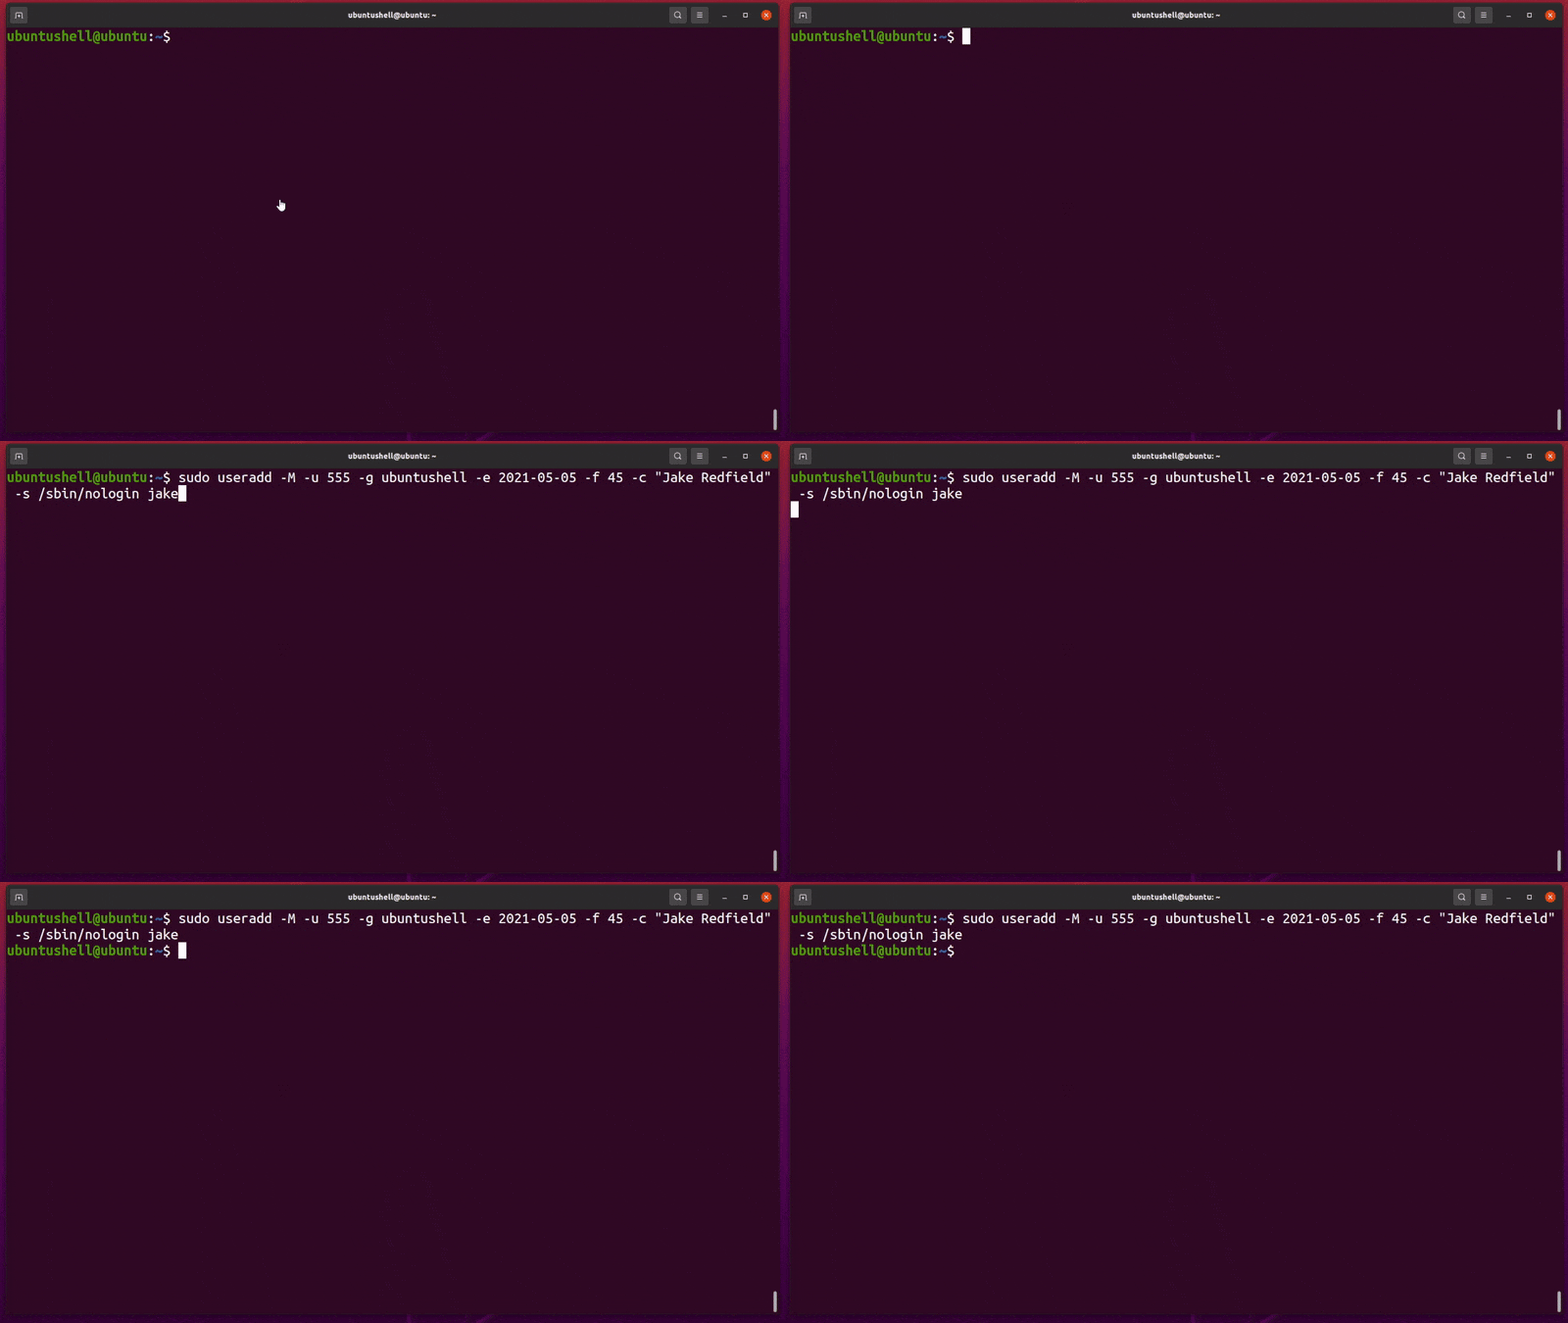
All the stuff we have learned can be used at the same time. Let's combine no home directory, different UID, different GID, account expiry date, password expiry date, comment, and separate login shell at the same time for user "jake", as shown below.
- sudo useradd -M -u 555 -g ubuntushell -e 2021-05-05 -f 45 -c "Jake Redfield" -s /sbin/nologin jake
Below is the behavior of both commands.
Finally: Deleting a User-Created Account
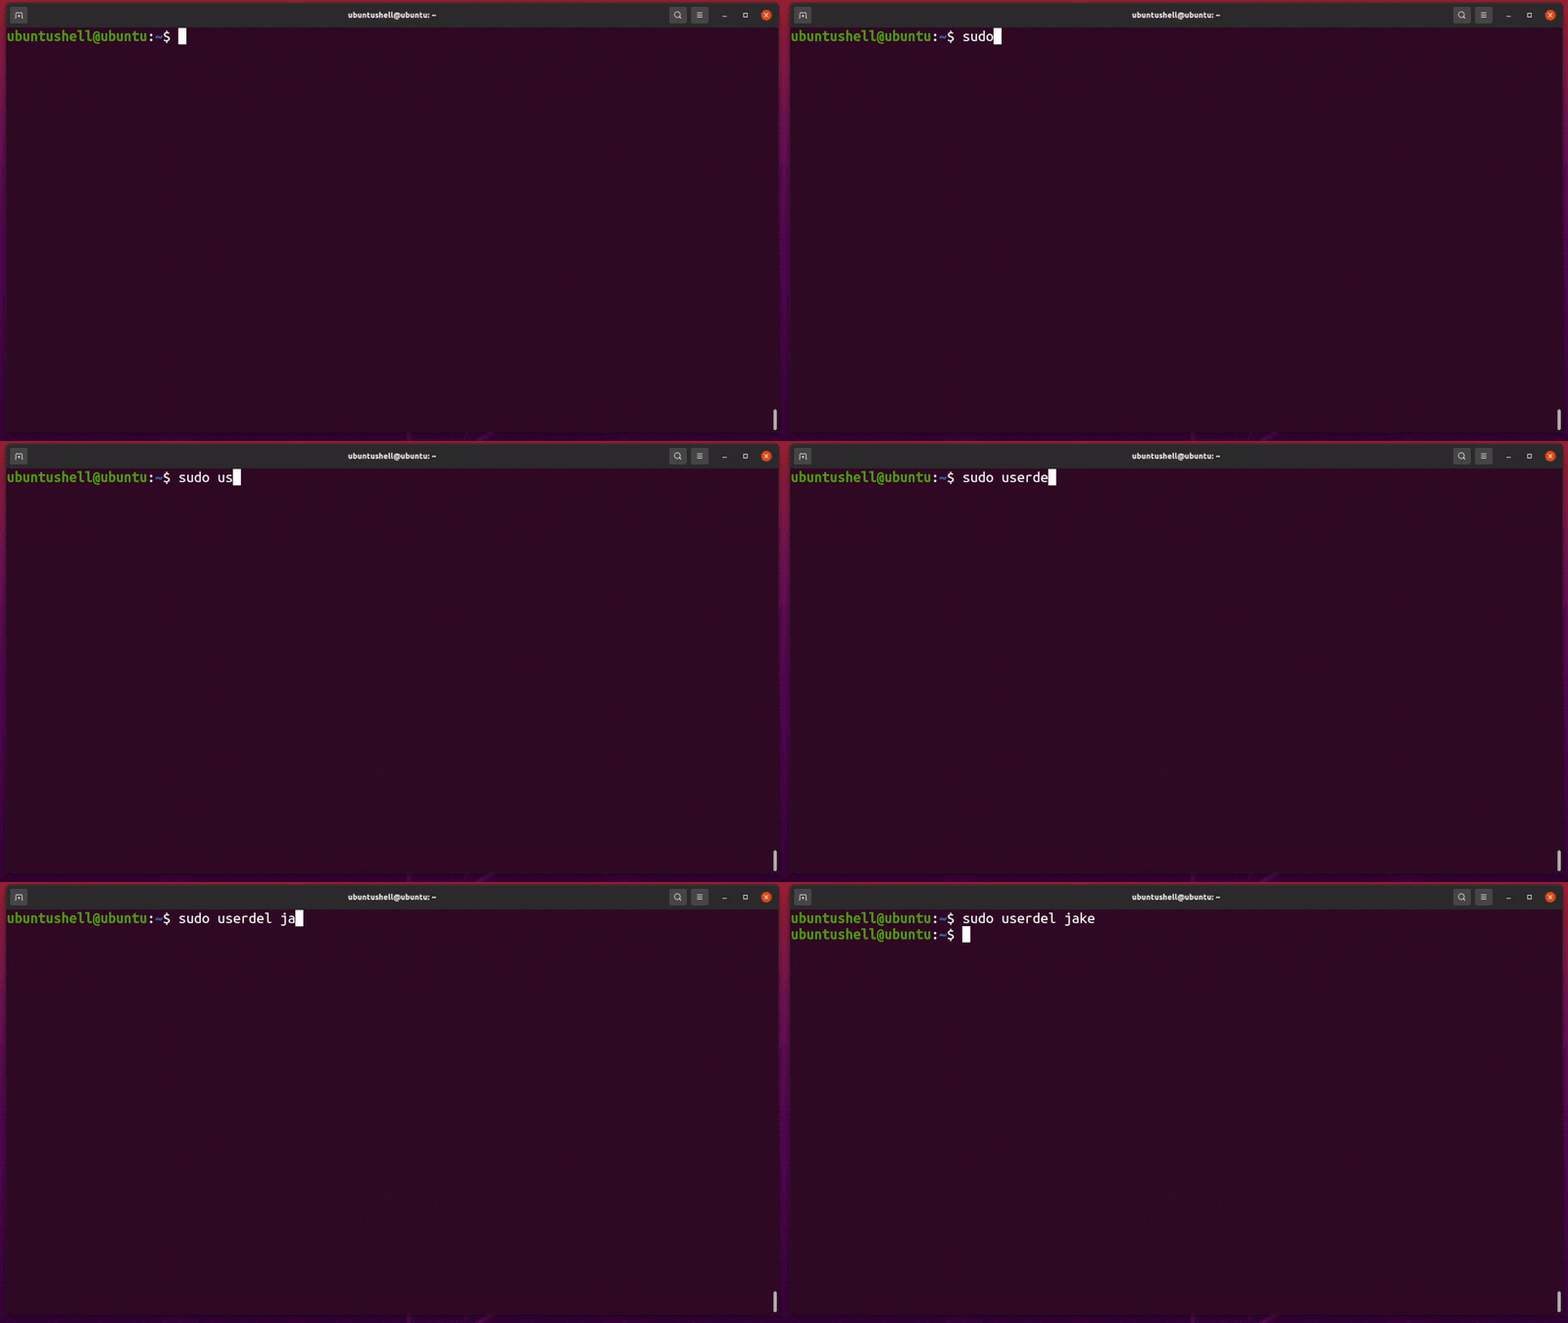
If you want to remove a newly created user from your system, you can use the userdel command with the user's username, as shown below.
- sudo userdel jake
Below is the behavior of both commands.
Final Word
I hope this guide will help navigate you in the right direction for useradd and adduser command usage.


