In this article, I'll show you how to test the microphone input connected to your Ubuntu system to ensure it's detected properly and listen to what you say using three quick methods.
How to Test Microphone on Ubuntu (via 3 Methods)
There are several ways to test the microphone on Ubuntu, but we'll primarily use system sound settings, Audacity, and the command-line methods.
You can choose any of these methods based on your preference, but let's begin with the most basic and straightforward approach using the system sound settings.
Method 1: Test Microphone from System Sound Settings
Open "Settings", navigate to "Sound", and locate the "Input" section.
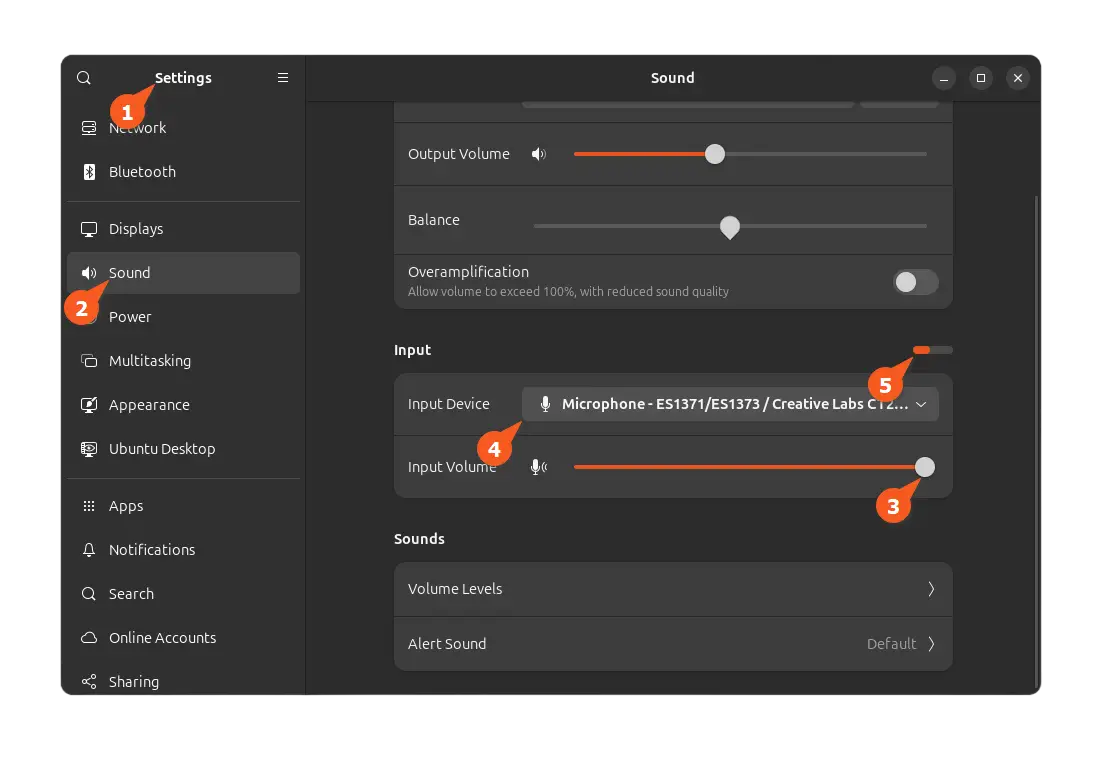
To test if your microphone is working, ensure the input volume is set to max (point 3), the correct input device is selected (point 4), and then speak into the mic while checking for changes in the activity indicator (point 5).
If you see the correct level of changes in the activity indicator, you are prepared to go; if there is no indicator, try replugging your input device or double-checking that you selected the correct input device (see point 4).
Lastly, if you want to hear yourself, you can check out the next two methods.
Method 2: Test Microphone Using Audacity
Audacity is a free and open-source audio editor available for Linux, Windows, and macOS. It is often used to record audio, add effects to recorded audio, or remove background noise.
To install it, you can run the following command or search for Audacity in the Ubuntu software center (or app center).
$ sudo apt install audacityOnce the installation is complete, you can launch it from the application menu, then click the red button (point 1) to start recording your voice (you will see some visual waves in the app); when you're done recording, stop it (point 2) and replay it to hear your voice (point 3).
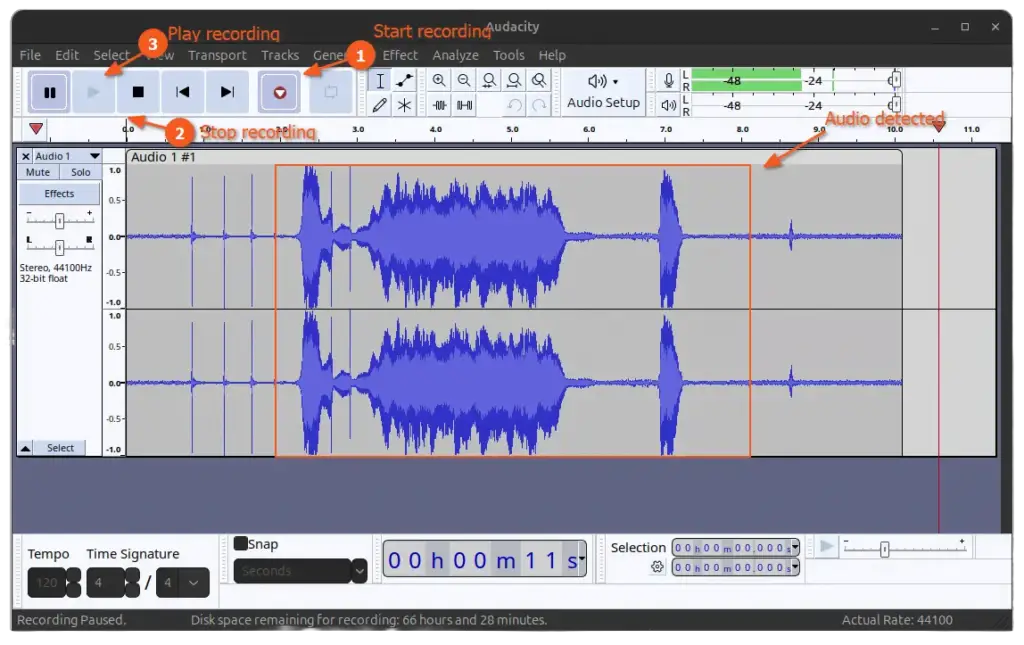
If you find your voice is not recorded (and there were no visual waves) during the audio recording, then re-check the input volume and input device as shown in the previous method.
Method 3: Test Microphone from Arecord Command
If you are inclined towards CLI and wish to test your mic via the command line, you can use the arecord command. It is pre-installed on Ubuntu. However, if you are using a minimal version of Ubuntu, you can install it using the following command:
$ sudo apt install alsa-utils Once installed, use this command to see if your device appears among the capture hardware devices:
$ arecord -lThen you can quickly record five-second audio using the following command, which will later automatically play and delete itself.
📝 Note
To adjust the recording duration, modify the "-d" option by specifying the number of seconds for recording.
$ arecord -d 5 test-mic.wav && aplay test-mic.wav && rm test-mic.wav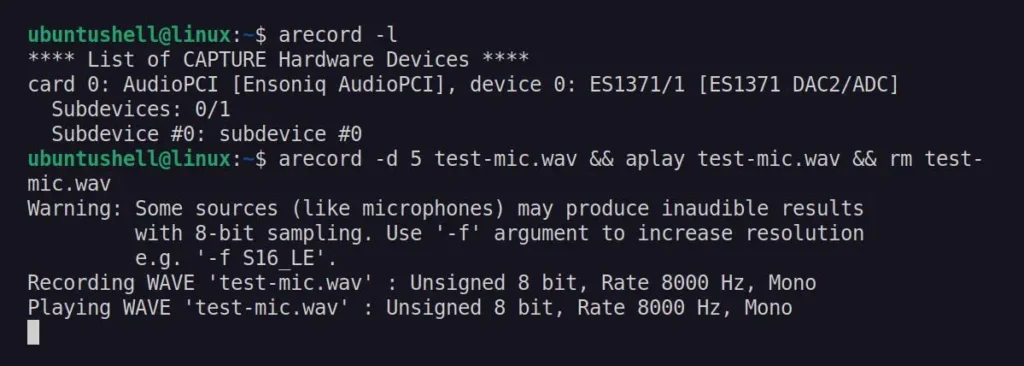
If you find the audio is not recorded, then try following the few troubleshooting tips listed in the following section.
Troubleshooting Tips
Troubleshooting a microphone that isn't recording audio can be a bit tricky, but most of the time, re-plugging the input device or ensuring the input volume and input device are correct in the system sound settings does the job.
However, if it's not helpful, you can check or try a few things mentioned below.
- Make sure the microphone is working (and not broken) by testing it on another system or operating system.
- Update your full system with the latest device drivers by running the
sudo apt update && sudo apt upgrade -ycommand. - Ubuntu 23.04, 24.04, and future releases come with PulseAudio as the server. So, you can use PluseAudio Volume Control (via the
pavucontrolpackage), then go to the input device tab and check if your external microphone is responsive there.
If none of these solutions work, you can describe the problem in the comment section so that we can assist you.


