direnv is an open-source extension to your current shell for UNIX-based operating systems like Linux and macOS. It supports hooks for multiple shell startup files, such as bash, zsh, or fish.
The main advantage of using direnv is having isolated environment variables for separate projects. The traditional method was to add all environment variables inside single shell startup files, which can be ~/.bashrc, ~/.zsh, and config.fish depending upon your Linux shell.
For direnv, you need to create a .envrc file inside each project directory and populate the project-specific environment variable. Then it loads and unloads environment variables depending on the current directory.
Why use Direnv?
Software developers can use direnv to load 12factor (a methodology for building software-as-a-service applications) app environment variables such as your application secrets files for deployment.
How does Direnv work?
Before shell loads a command prompt, direnv checks for the existence of a .envrc or .env files in your current and parent directories with the appropriate permissions. Suppose both files are present, then high priority is given to the .envrc file.
The following file is loaded into a bash sub-shell, and all variables inside the file are captured by direnv to make it available to the current Linux shell without user notice.
Installing Direnv on Linux Systems
The direnv package is available from the default repositories by installing it from your current package manager in most Linux distributions, as shown below.
- For Debian, Ubuntu, Mint, PopOS
- sudo apt install direnv
- For RedHat, Fedora, CentOS
- sudo dnf install direnv
- For Arch, Manjaro, EndeavourOS
- yay -Sy direnv
On other distributions, such as Red Hat or CentOS, you can take advantage of the direnv snaps package, as shown below.
📝 Note
While writing this article, the outdated v2.18.2 of direnv was available on the Snap Store with some issues. #440
- sudo snap install direnv
Hook Direnv into your Current Shell
After the installation, you need to hook up the direnv in your current Linux shell; it will not work without that. Each shell has its own mechanism for hooking extensions, such as direnv.
To find out your current shell, execute the following command in your terminal:
- echo $0
- bash
Follow any of the below-mentioned methods according to your present Linux shell.
For BASH Shell
Append the following line at the end of the ~/.bashrc file:
📝 Note
Make sure it appears above rvm, git-prompt, and other shell extensions that manipulate the prompt.
eval "$(direnv hook bash)"For ZSH Shell
Append the following line at the end of the ~/.zsh file.
eval "$(direnv hook zsh)"For Fish Shell
Append the following line at the end of the ~/.config/fish/config.fish file.
eval (direnv hook fish)Finally, close all the active terminal sessions and source the shell startup files, as shown below.
- For BASH Shell
- source ~/.bashrc
- For ZSH Shell
- source ~/.zshrc
- For Fish SHELL
- source ~/.config/fish/config.fish
How to Use Direnv
Let us see the practical usage of direnv. First, we will create a new directory on our current path for demo purposes with the name ubuntushell_project and move into it.
- mkdir ubuntushell_project
- cd ubuntushell_project/
Let’s check if the $TEST_VARIABLE variable is available on the current project path or not using the echo command as shown below.
- echo $TEST_VARIABLE
- Nope
Above, instead of a blank space, I replaced it with "nope", which means there is no global or local environment variable available for $TEST_VARIABLE.
Next, we will create a new file in the current project directory (referring to ubuntushell_project) with the .envrc name and add $TEST_VARIABLE inside the file using the echo command, as shown below.
- echo export TEST_VARIABLE=ubuntushell > .envrc
- direnv: loading ~/etw/.envrc
- direnv: export +TEST_VARIABLE
By default, the .envrc file is blocked. Therefore, we need to run the direnv allow . command to unblock and allow to load the .envrc content in our Linux shell, as shown below.
- direnv allow .
Let's recheck the $TEST_VARIABLE output as shown below.
- echo $TEST_VARIABLE
- ubuntushell
Below is the behavior of the above command.

Tada! We have successfully created a .envrc file and loaded the file’s content inside our shell using the direnv command.
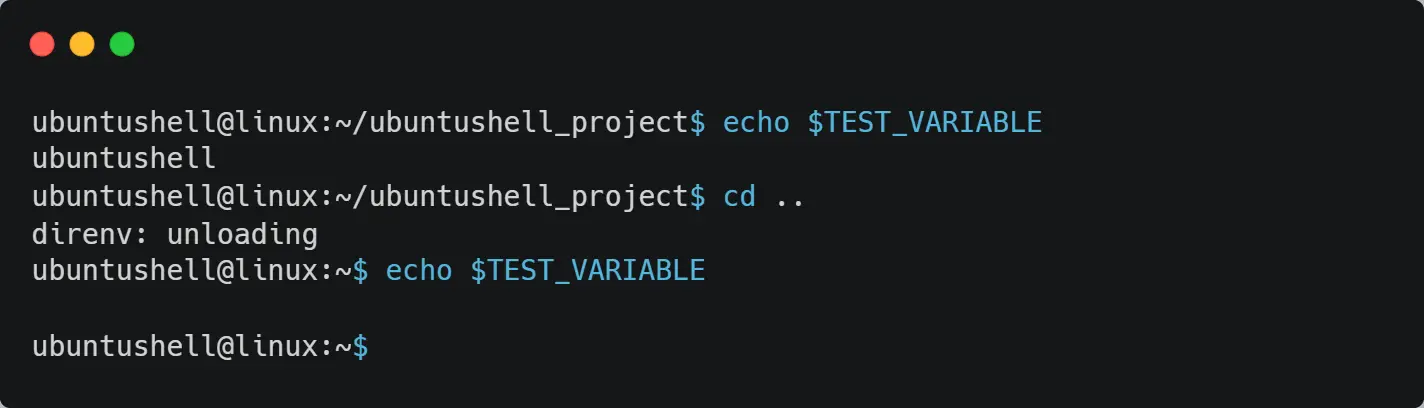
If you take one step back to get out of the current working directory (referring to ubuntushell_project) and execute the echo command for $TEST_VARIABLE, you will find the content is blank.
- echo $TEST_VARIABLE
- Nope
Below is the behavior of the above command.
Now that you re-enter the ubuntushell_project directory, the .envrc file will be loaded in your bash shell with its contents inside it.
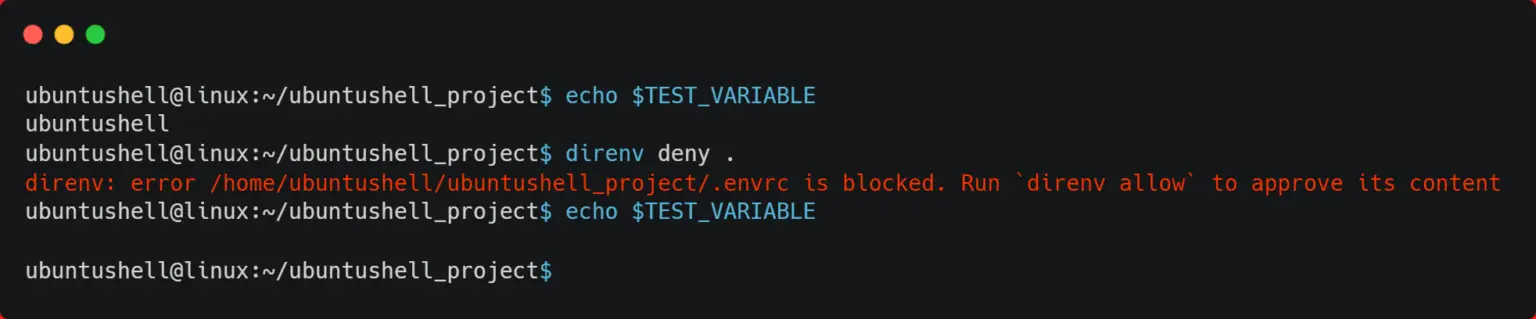
To revoke the authorization of the .envrc file and disallow content to be loaded into your current Linux shell, execute the below command.
- direnv deny .
Below is the behavior of the above command.
Remove Direnv
Suppose you don’t like direnv and want to remove it from your Linux system. Then use the below command to remove direnv from your system.
- For Debian, Ubuntu, Mint, PopOS
- sudo apt purge direnv
- For RedHat, Fedora, CentOS
- sudo dnf remove direnv
- For Arch, Manjaro, EndeavourOS
- yay -Rs direnv
Final Word
Since you now understand how the direnv command works, you can follow the above steps to create an isolated environment for a specific project on the Linux system.


