In this article, I'll show you how to enable automatic login in the default variant of Ubuntu that comes with the GNOME (DE) desktop environment, including other flavors, using both a GUI and a CLI method.
For those who have never heard of auto-login, it's a way to access your system after a boot without entering a password at the login screen, so you won't have to type your password every time you log in, although sensitive areas such as the root directory or sudo access will still require a password.
The auto-login feature is managed by the display manager service in most Linux systems, with popular options being gdm3, LightDM, and SDDM. The default display manager on your system depends on your desktop environment and user configuration.
For example, the default Ubuntu variant comes with the GNOME Desktop that uses the gdm3 display manager, and in this article, we will see how to enable auto-login in it using the GUI, including the CLI steps for all other display manager services.
Enable Auto-Login in Ubuntu Using GUI Method
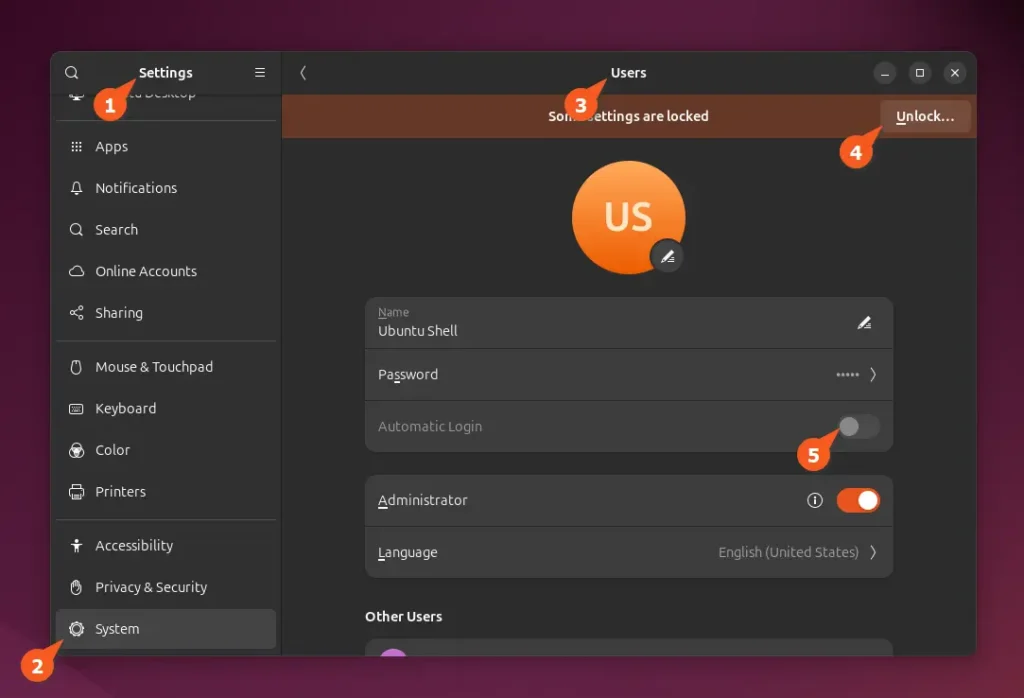
To enable auto-login on Ubuntu 23.04, 22.04, and all other versions, navigate to "Settings" -> "System" -> "Users", then click on the "Unlock" button and type your login password to authenticate. Finally, turn on the “Automatic Login” option for the current user.
📝 Note
On Ubuntu 22.04 and earlier versions, the "Users" setting is available on the left rather than the "System" page.
This will activate the auto-login feature for the current user. However, if you want to enable the auto-login for another user, scroll down to the "Other Users" section on the "Users" page.
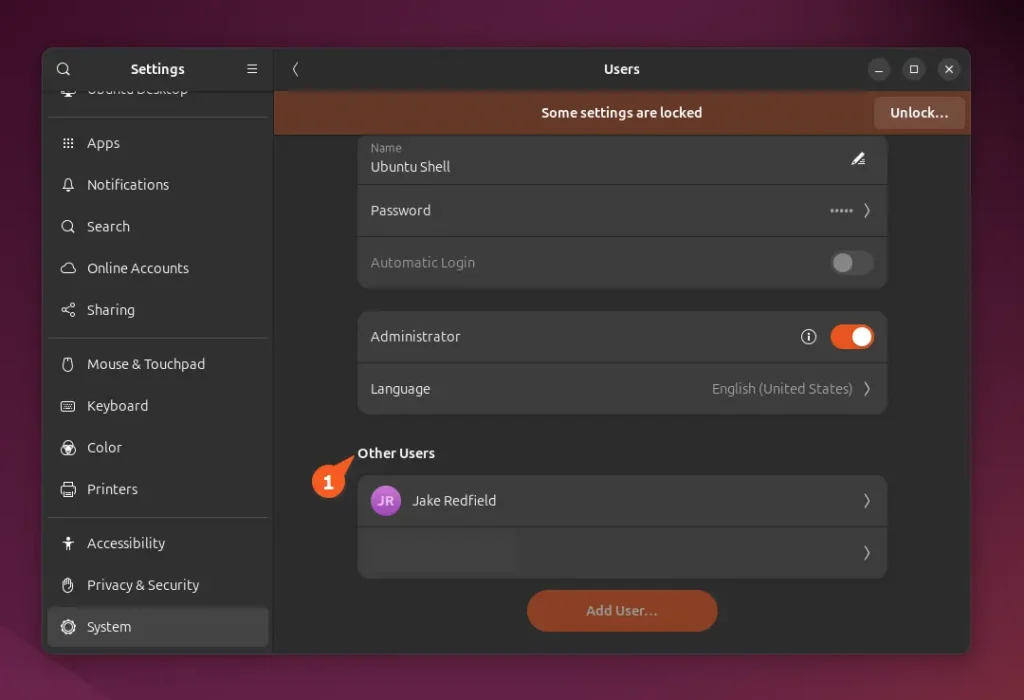
Select the preferred user for auto-login, which will lead you to their user page. There, click the "Unlock" button, enter the current user login password (for me, it's Ubuntu Shell) for authentication, and enable the "Automatic Login" option for that user.

In this manner, you can activate auto-login for either the current or another user via the GUI, but remember, if you're using other Ubuntu variants like Ubuntu Mate, XUbuntu, KUbuntu, Ubuntu Unity, or Ubuntu Cinnamon.
The "Automatic Login" option will be accessible on the "Users" page, but it might be in a different location, and sometimes the option is also referred to as "Log in again immediately after logging off", especially on KUbuntu.
If you're somewhat familiar with Linux, you shouldn't encounter much difficulty locating it; if needed, feel free to ask for help in the comments or check out the next method via the CLI, which covers enabling auto-login in nearly all display manager services.
Enable Auto-Login in Ubuntu Using CLI Method
If you're using the Ubuntu variant (without a desktop environment) or have removed DEs from the system, you can enable auto-login by editing the config file.
Therefore, you must identify the default display manager your Linux system is using among the ones listed below.
- gdm3: It's the default for the GNOME desktop environment (official Ubuntu variant).
- LightDM: It's the default in XUbuntu, Ubuntu MATE, Ubuntu Cinnamon, and Ubuntu Unity.
- SDDM: It's the default in KUbuntu, Ubuntu Studio, and LUbuntu.
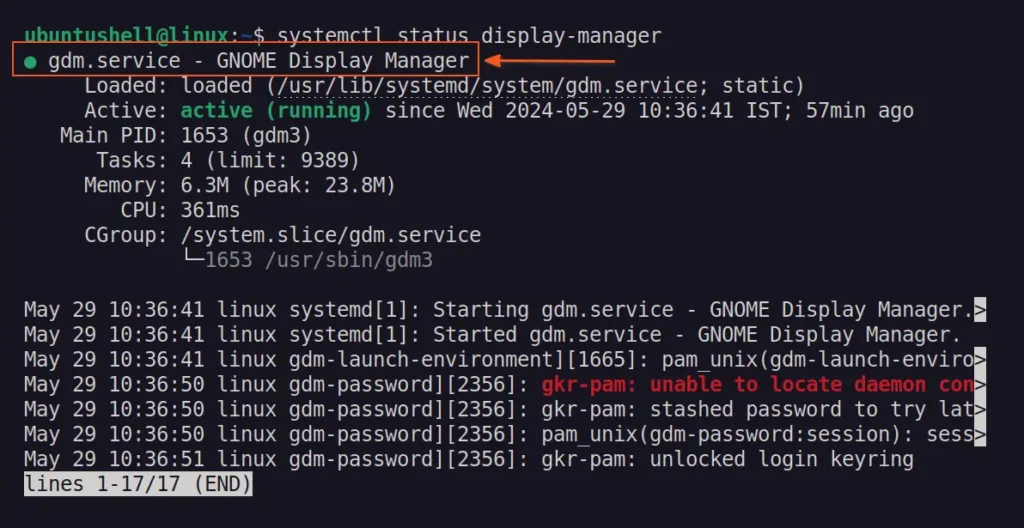
If you're a bit unsure about determining the default display manager or using a different Linux distribution, like Fedora, AlmaLinux, Arch, or Manjaro, you can use the following command to check which display manager is currently in use:
$ systemctl status display-managerOutput:
Once you have identified your display manager, proceed with the following instructions:
Enable Auto-login for gdm3 (default for official Ubuntu variant)
To enable auto-login for the gdm3 display manager used in the GNOME Desktop, open the terminal and execute the following command to modify the config file:
$ sudo nano /etc/gdm3/custom.confOnce the file is open, you need to find the following lines within the "[daemon]" section, then remove the "#" prefix to uncomment and replace "USERNAME" with the desired user for enabling auto-login.
AutomaticLoginEnable = true
AutomaticLogin = USERNAME
Alternatively, you can uncomment and modify the parameters for the lines below to add a delay in auto-login (in this case, ten seconds) to get a chance to login as another user.
TimedLoginEnable = true
TimedLogin = USERNAME
TimedLoginDelay = 10
After you finish, save and close the file, then reboot your system to see the changes.
Enable Auto-login for LightDM
To enable auto-login for the LightDM display manager that is default for XUbuntu, Ubuntu MATE, Ubuntu Cimmaon, and Ubuntu Unity, launch the terminal and execute the following command to modify the config file:
$ sudo nano /etc/lightdm/lightdm.conf.d/autologin.confOnce opened, insert the following lines and ensure to replace "USERNAME" with the preferred user to activate auto-login.
[SeatDefaults]
autologin-user=USERNAME
autologin-user-timeout=5
Here, the auto-login will occur after five seconds, during which the login screen will be displayed if you wish to log in as another user. Save, close the file, and reboot to see the changes.
Enable Auto-Login for SDDM
To enable auto-login for the SDDM display manager that is default for KUbuntu, Ubuntu Studio, and LUbuntu, execute the following command to modify the config file:
$ sudo nano /etc/sddm.conf.d/auto-login.conf

#Or

$ sudo nano /etc/sddm.conf
Once the file is open, add the following and make sure to replace the "USERNAME" with the preferred user to activate auto-login.
[Autologin]
User=USERNAME
Relogin=true
Here, "Relogin=true" will ensure that you auto-login back once you log out. Unfortunately, as of now, the SDDM does not support the auto-login delay option.
Once you've finished, save the file, close it, and restart your computer to see the changes.
That's it. This way, you enable auto-login for GNOME Desktop using the GUI method, and for others, you can follow the CLI method.


