Homebrew, originally the default package manager for macOS, is increasingly gaining popularity in the Linux community since its introduction to Linux.
It doesn't depend on any software infrastructure for backend support; instead, it provides its own library for compatibility, and in installation instructions for programs written in Rust, you will often find Homebrew as an option.
It provides the benefit of using a common package manager across Windows, Linux, and macOS, and the packages are also regularly updated and can be installed without requiring any root or sudo privileges.
In this quickstart guide, I'll show you the steps for Homebrew installation on Ubuntu and other Linux distros with command-line examples.
How to Install Homebrew on Ubuntu and Other Linux Distros
The Homebrew installation is a little trickier, but don't worry; I'll guide you through each step. So, just open your terminal and follow the below-mentioned steps one by one.
1. First, install the necessary tools, such as development tools, GCC, Glibc, Git, Curl, and Procps (used for monitoring the system process).
- On Debian and Ubuntu
- sudo apt-get install build-essential procps curl file git
- On RedHat and Fedora
- sudo yum groupinstall 'Development Tools'
- sudo yum install procps-ng curl file git
- On Arch and Manjaro
- sudo pacman -S base-devel procps-ng curl file git
2. Next, download the Homebrew installation script using Curl and begin the installation process.
- /bin/bash -c "$(curl -fsSL https://raw.githubusercontent.com/Homebrew/install/HEAD/install.sh)"
When asked for a RETURN key, press enter.
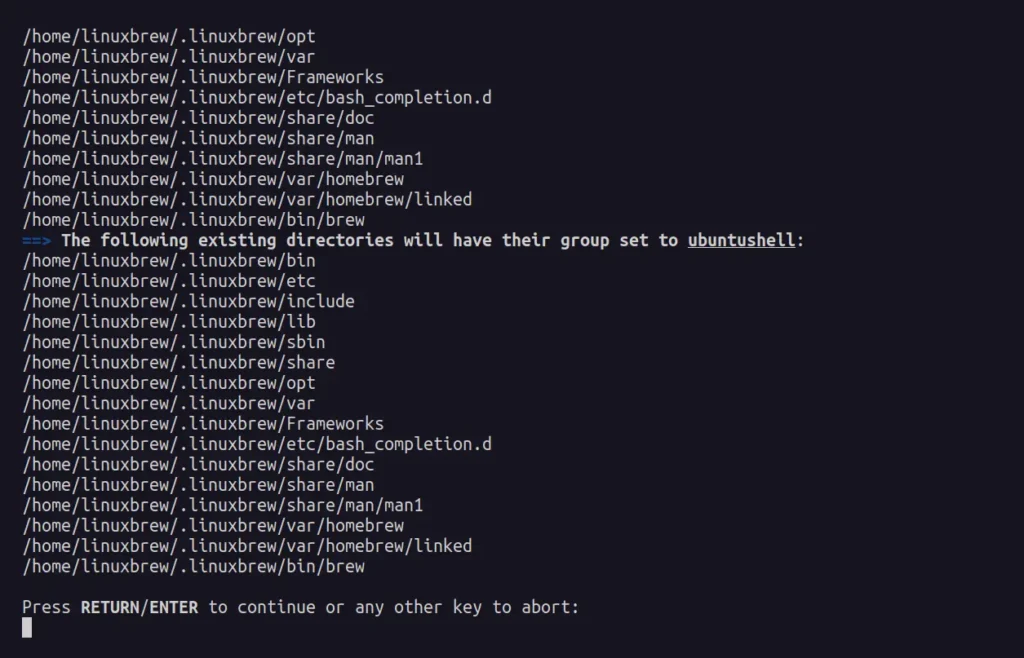
If you encounter the following error at the time of installation:
Error: /home/linuxbrew/.linuxbrew/Cellar is not writable. You should change the
ownership and permissions of /home/linuxbrew/.linuxbrew/Cellar back to your
user account:
  sudo chown -R $(whoami) /home/linuxbrew/.linuxbrew/Cellar
Failed during: /home/linuxbrew/.linuxbrew/bin/brew update --force --quiet
Then execute one of the following commands:
- sudo chown -R $(whoami) /home/linuxbrew/.linuxbrew/Cellar
- OR
- sudo rm -rf /home/linuxbrew/.linuxbrew
3. Once finished, it will ask you to run a few commands to add Homebrew to your PATH variable.
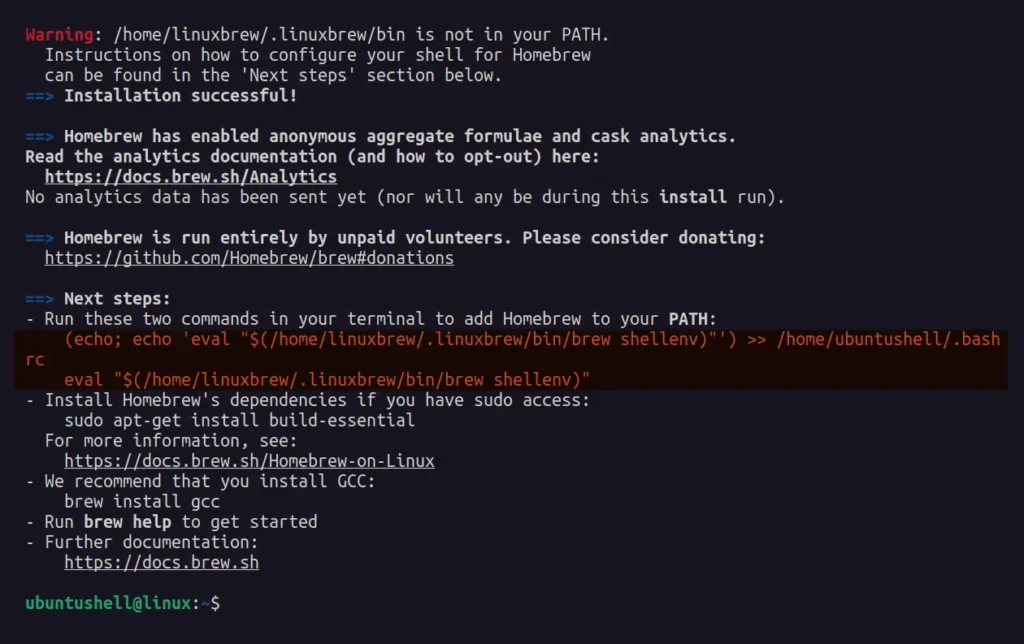
So, simply copy and paste the following two commands to continue:
- echo 'eval "$(/home/linuxbrew/.linuxbrew/bin/brew shellenv)"' >> $HOME/.bashrc
- eval "$(/home/linuxbrew/.linuxbrew/bin/brew shellenv)"
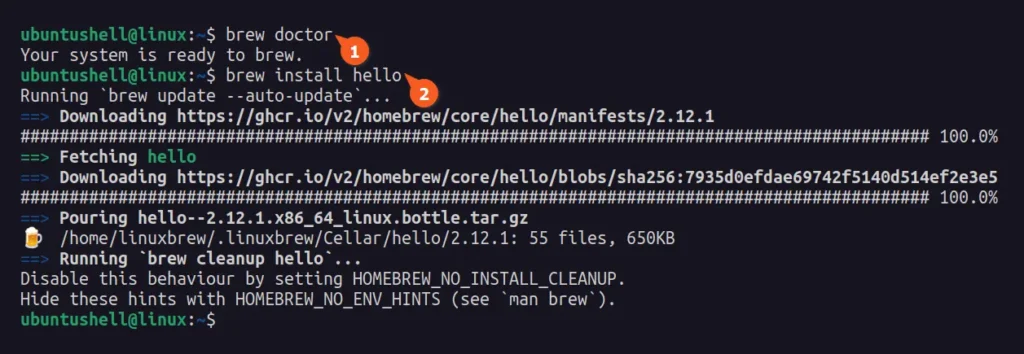
4. Finally, verify access to the brew command by running:
- brew doctor
If there are any issues, they will appear in the output, or you can double-verify by installing the sample Hello project.
- brew install hello
Output:
Usage of Homebrew
Once the installation is finished, you can start using the brew command if you are familiar with it from macOS, but if you are a new user, you can check out the following table of different command options that can be used with Homebrew for package management.
| Command | Description |
|---|---|
$ brew search package_name | Search for the package. |
$ brew info package_name | Get the description of the package before installing. |
$ brew install package_name | Install the package. |
$ brew update | Update database (same as $ apt update). |
$ brew upgrade package_name | Update the package. |
$ brew uninstall package_name | Remove the package. |
$ brew autoremove | Remove the unneeded dependencies. |
$ brew list | List the installed packages. |
How to Remove Homebrew from Ubuntu and Other Linux Distros
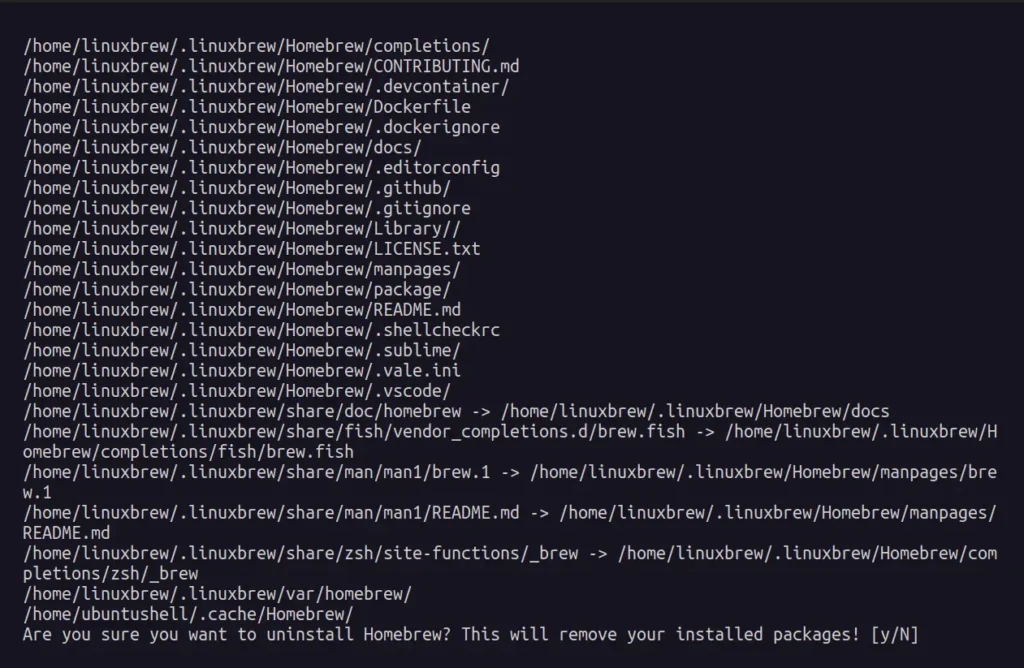
To remove Homebrew from your Linux system, you can simply utilize the uninstallation script provided by Homebrew by running.
- /bin/bash -c "$(curl -fsSL https://raw.githubusercontent.com/Homebrew/install/HEAD/uninstall.sh)"
You’ll be asked to confirm the removal by entering the Y key.
Once the uninstallation of Homebrew is complete, it will list the files and directories that were not removed.
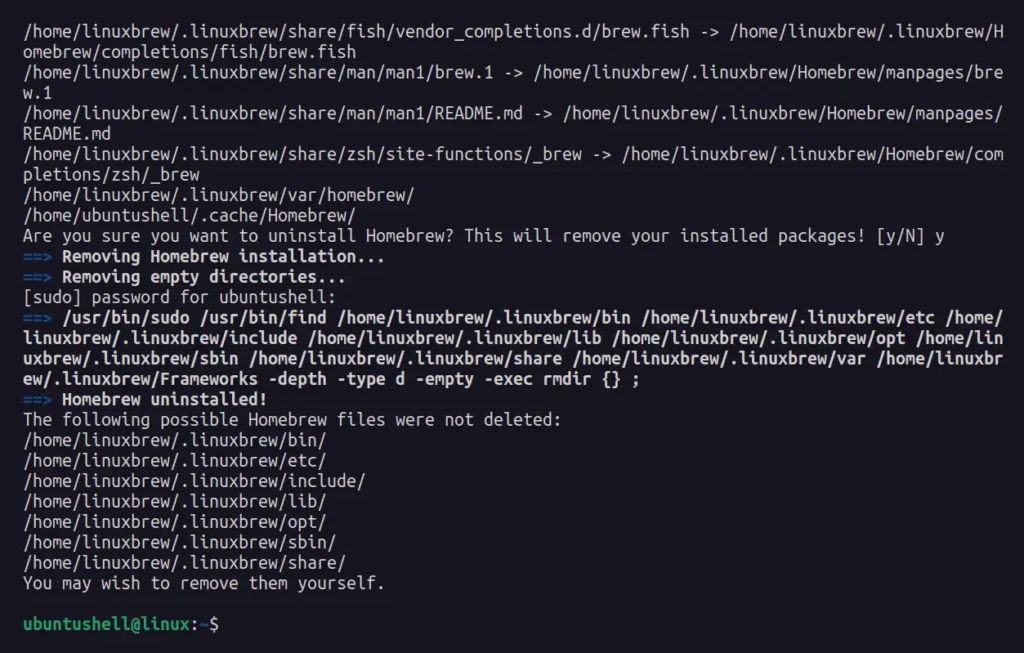
To manually remove them all, execute the following command:
- sudo rm -rf /home/linuxbrew/.linuxbrew
