The kernel is one of the most important components in a computer, and sometimes people misunderstand Linux as an operating system, when in fact it is a kernel rather than an OS.
Now, the kernel is a crucial part that sits between your hardware and operating system and provides a mechanism for smooth communication between these two components.
Every kernel release introduces new features, fixes, performance enhancements, hardware support, and numerous other things that can significantly enhance the user experience.
However, with Linux, there is a problem: the latest kernel is not immediately available to users for use. Instead, it is first rigorously tested, and once it is fully stable and ready for release, Linux distributions add it to their repository so that on the next update, users can obtain the latest kernel.
In this process, time flies like a blink of an eye; users like me, who are eager to try it beforehand, have to wait for a long time, but not today.
In this article, I'll guide you through two different methods to install and use the latest mainline kernel on your Ubuntu system, with practical examples.
How to Install Latest Mainline Kernel on Ubuntu (GUI & CLI)
There are two ways to install the latest mainline kernel on Ubuntu: one is the GUI method, and the other is the CLI method.
In my opinion, I suggest that beginners who are not confident with command-lines should follow the GUI method, while experienced users can opt for the CLI method confidently.
⚠️ Warning
It's advisable to maintain backups of your files and a system snapshot due to the potential for system failure during mainline kernel updates.
Method 1: Installing Latest Mainline Kernel on Ubuntu via GUI
This method involves using an external tool named "Mainline Ubuntu Kernel Installer" that is not available in the Ubuntu repository, but you can separately add its PPA to your system and then install it using the APT package manager.
- sudo add-apt-repository ppa:cappelikan/ppa
- sudo apt update && sudo apt upgrade -y
- sudo apt install -y mainline
Once the installation is complete, you can find and launch it from the application menu.

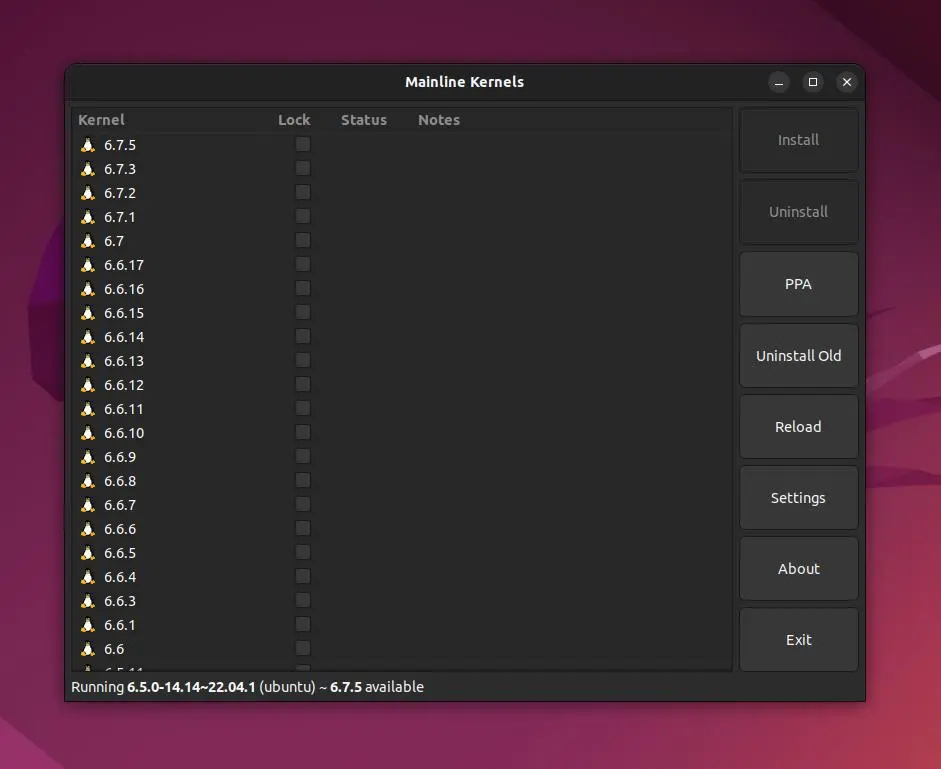
When you launch it for the first time, it will take a few seconds to fetch the latest kernel information, and then you will be presented with the following window with the list of kernel versions.
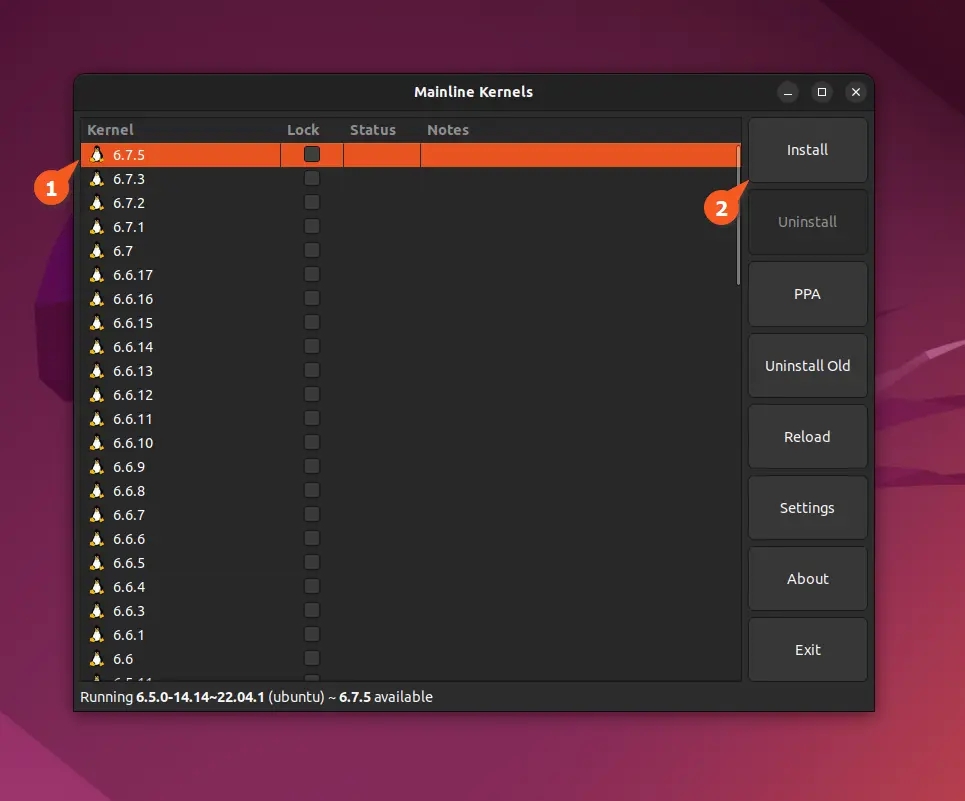
Select your desired kernel version (in my case, 6.7.5) and click on the "Install" button on the right side to install it.
It will begin the process of downloading, compiling, and installing the specific kernel version you've selected.
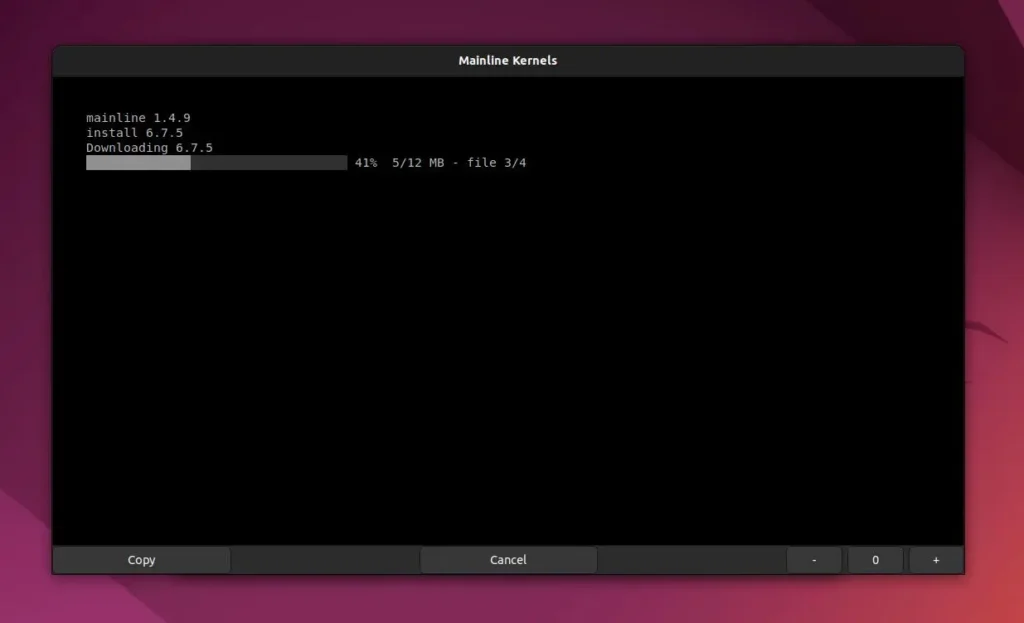
Now, you can wait and have a coffee break as this process will take some time, and once it's done, make sure to reboot your system to apply the change, then issue the following command to verify the current kernel version.
- uname -a
Output:

Method 2: Installing Latest Mainline Kernel on Ubuntu via CLI
This method is only recommended for experienced users who have been using Linux for a long time and have a good understanding of commands, as it requires more manual effort.
However, the method itself holds an advantage, primarily because if your desired kernel version isn't listed in the mainline kernel tool, you can manually download and install it from the official Ubuntu Mainline Kernel PPA archive.
And if, for some reason, your system crashed while installing the latest kernel and you did not take a snapshot, you can use TTY mode in Linux to revert back to the original or a different kernel version.
For explanation, I'll demonstrate a step to install the Linux kernel 6.7.5 on 64-bit (amd64) systems. So, firstly, create a new directory in your home directory, and then visit this page and download the required kernel deb packages in that directory.
This is how it would look once the download process has been completed.

Now, execute the following command to begin the installation of the kernel.
- sudo dpkg -i *.deb
Output:

Once the installation is finished, you can reboot your system to apply the changes and then check the kernel version using the uname command.
Wrap Up
Today, you've learned two different ways to install the latest Linux kernel; both methods are effective, but if you are a beginner, I suggest following the first method. If you are not confident, please don't attempt it.
If you've made a mistake or need any help, feel free to tell me in the comment section.


