Umami is a simple, lightweight, privacy-focused analytics software known for its ease of use, cookie-free tracking, GDPR and CCPA compliance, custom event tracking for user behavior, powerful filters, and robust reporting.
It is free and open-source, and you can use it directly from their platform for hobby projects. However, for larger projects, you may need to enroll in the Pro package, which costs $9 per month, or you can self-host it on your own server for free if you prefer.
In this tutorial, I'll guide you through the steps to install and configure Umami on Ubuntu 25.04, set up Umami with Nginx, configure an SSL certificate, and add a new website for tracking in Umami Analytics.
Step 1: Install Umami on Ubuntu
There are multiple ways to install Umami on Linux, but we will use the Docker method, which is quite beginner-friendly. So, to begin, open your terminal, connect to your server via SSH, and execute the following commands to update the package list and outdated packages:
$ sudo apt update
$ sudo apt upgrade
When done, install the required dependencies for Docker using the following command:
$ sudo apt install apt-transport-https ca-certificates curl gnupg lsb-releaseYou can now add the Docker GPG key and Docker repository key, which will allow us to install the latest version of Docker.
# Add the Docker GPG Key
$ curl -fsSL https://download.docker.com/linux/ubuntu/gpg | sudo gpg --dearmor -o /usr/share/keyrings/docker-archive-keyring.gpg

# Add the Docker Repository Key
$ echo "deb [arch=amd64 signed-by=/usr/share/keyrings/docker-archive-keyring.gpg] https://download.docker.com/linux/ubuntu $(lsb_release -cs) stable" | sudo tee /etc/apt/sources.list.d/docker.list > /dev/null
Once done, update the package list and install Docker along with its required packages:
# Update the Package Information
$ sudo apt update

# Install Docker with Docker Compose
$ sudo apt install docker-ce docker-ce-cli containerd.io
Now that we have installed Docker on our system, we can use the following command to pull the Umami Git repository and then move into the pulled directory:
$ git clone https://github.com/umami-software/umami.git && cd umami/
Now, we need to make a slight adjustment to the Umami Docker Compose file. First, run the following command to generate a random string of letters and numbers, and then copy it to your clipboard.
$ openssl rand -base64 32
Next, edit the Umami Docker Compose file using your preferred text editor, locate the APP_SECRET variable under the "environment:" category, and replace its value with the random string of characters you copied to your clipboard.
$ nano docker-compose.yml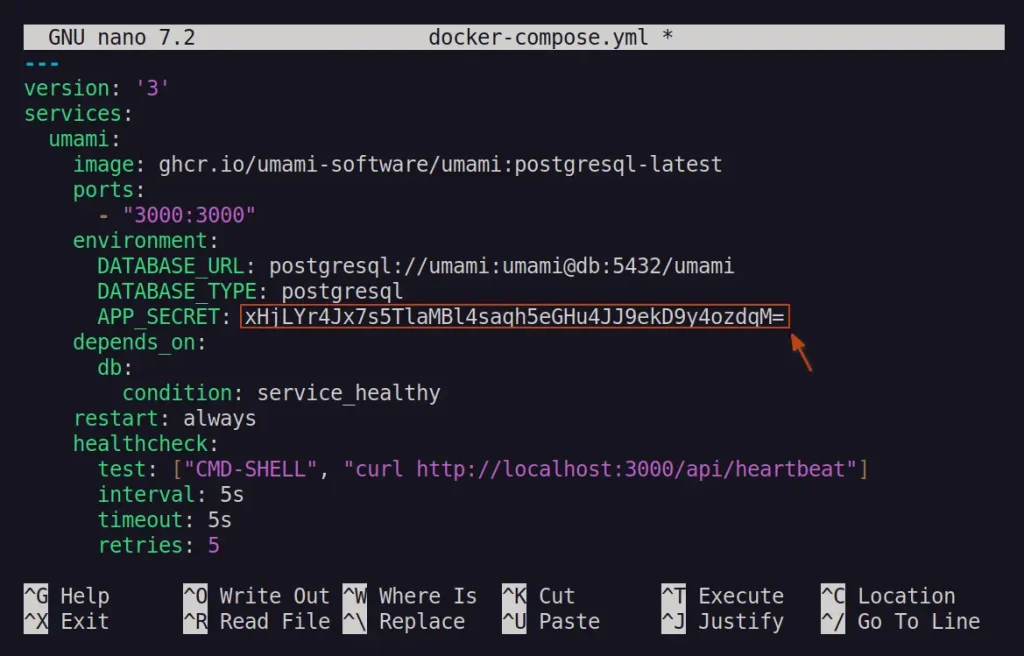
That's it. You can now save and close the file, then start the Umami container in detached mode using the following command:
$ sudo docker compose up -d
Once the container has finished launching and you return to your shell, verify that the Umami instance is running by listing the available Docker containers on your system with the following command:
$ sudo docker ps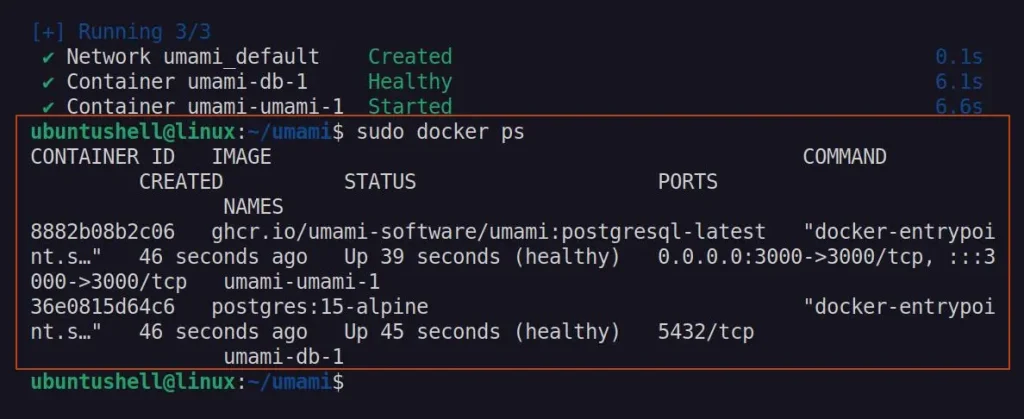
You can now access the Umami web interface using the server's public IP address followed by port number 3000. However, before proceeding, I recommend configuring Umami with Nginx in the next step.
Step 2: Configure Nginx Web Server
Nginx is a popular web server known for its powerful and dynamic features, such as reverse proxying, load balancing, caching, compression, TLS/SSL configuration, and many more. To utilize these features, we will install and configure Nginx with Umami.
To begin, first install the Nginx web server using the following command:
$ sudo apt install nginxThen create an Nginx configuration file for Umami named "umami.conf" in the "/etc/nginx/sites-available" directory.
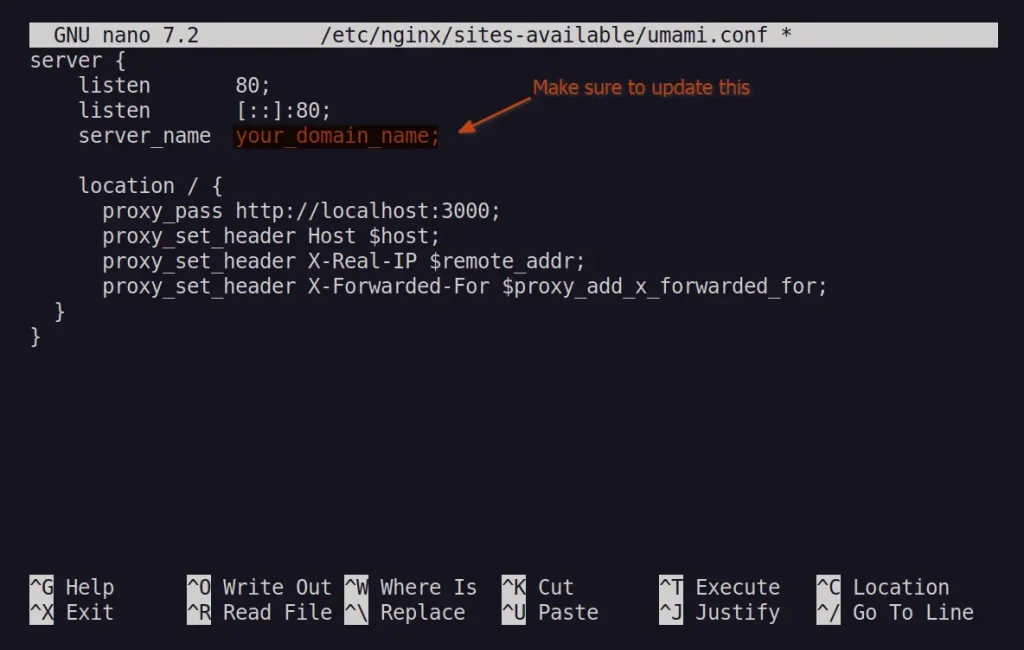
$ sudo nano /etc/nginx/sites-available/umami.confCopy and paste the following lines of code into the configuration file, and make sure to replace "your_domain_name" with your root domain or subdomain that you will later point to your Umami server.
server {
    listen       80;
    listen       [::]:80;
    server_name  your_domain_name;

    location / {
      proxy_pass http://localhost:3000;
      proxy_set_header Host $host;
      proxy_set_header X-Real-IP $remote_addr;
      proxy_set_header X-Forwarded-For $proxy_add_x_forwarded_for;
  }
}
After making the necessary changes, your configuration file should look like the one below:
Save and close the file, then enable the configuration by creating a symbolic link at the "/etc/nginx/sites-enabled" path.
$ sudo ln -s /etc/nginx/sites-available/umami.conf /etc/nginx/sites-enabled/
Verify that the configuration syntax is correct by using the following command:
$ sudo nginx -t
Now, restart the Nginx service to apply the updated configuration changes.
$ sudo systemctl restart nginx
$ sudo systemctl status nginx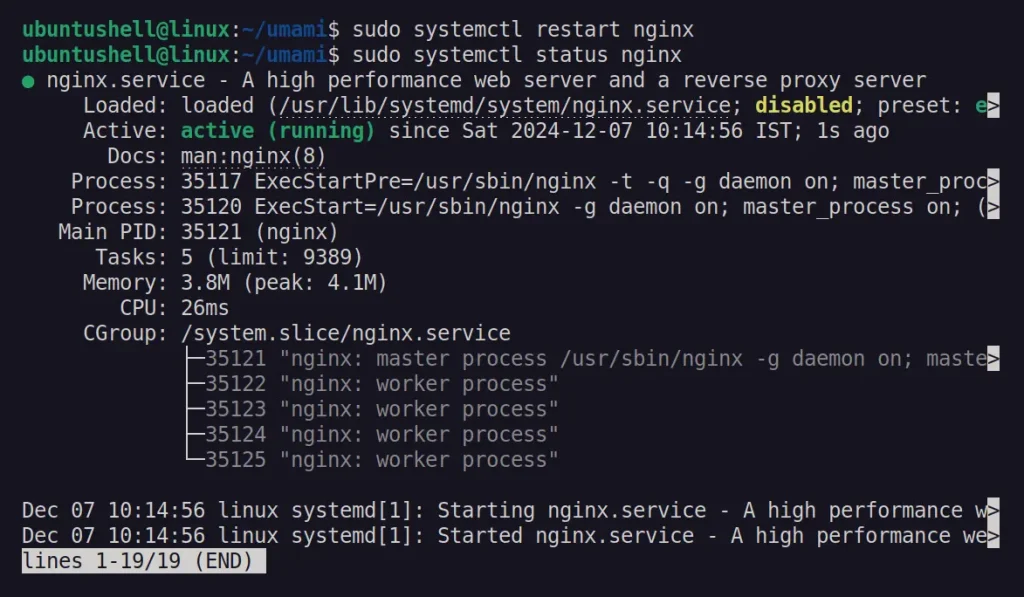
Finally, if you're using the Uncomplicated Firewall (UFW), ensure you allow the necessary ports for Nginx using the following command:
$ sudo ufw allow "Nginx Full"
Next, we'll configure our Umami server in the DNS records.
Step 3: Setup DNS Records
So far, we can only access the Umami web interface through the server’s public IP address, which is not ideal. If you have a root domain or subdomain available, navigate to that domain’s DNS settings and assign the Umami server's public IP address in the Content field of the Type A record.
For example, I use Cloudflare to manage my domain DNS records. To achieve this, I can navigate to the desired domain DNS settings and make the necessary changes to DNS records, as shown below.

One advantage of using Cloudflare DNS that I want to particularly highlight is that enabling the Proxied connection will automatically activate the HTTPS protocol for your domain. However, if you are using a different service, follow the next method to set up secure SSL certificates for your domain.
Step 4: Setup SSL Certificates
To secure our domain, we will now set up a secure SSL certificate using the Let's Encrypt free certificate authority. To begin, first install the following list of required packages:
$ sudo apt install certbot python3-certbot-nginx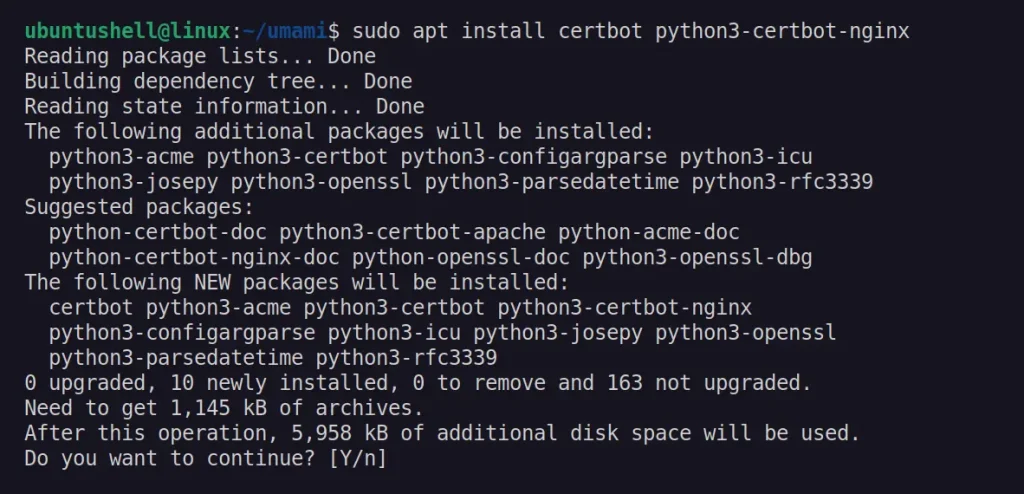
Next, generate the SSL certificate for your domain by replacing the "your_domain_name" field with your domain that points to the Umami server in the following command.
$ sudo certbot --nginx -d your_domain_nameDuring the process, you will be prompted to enter an email address, agree to the terms and conditions, and choose whether to accept or reject an email newsletter.
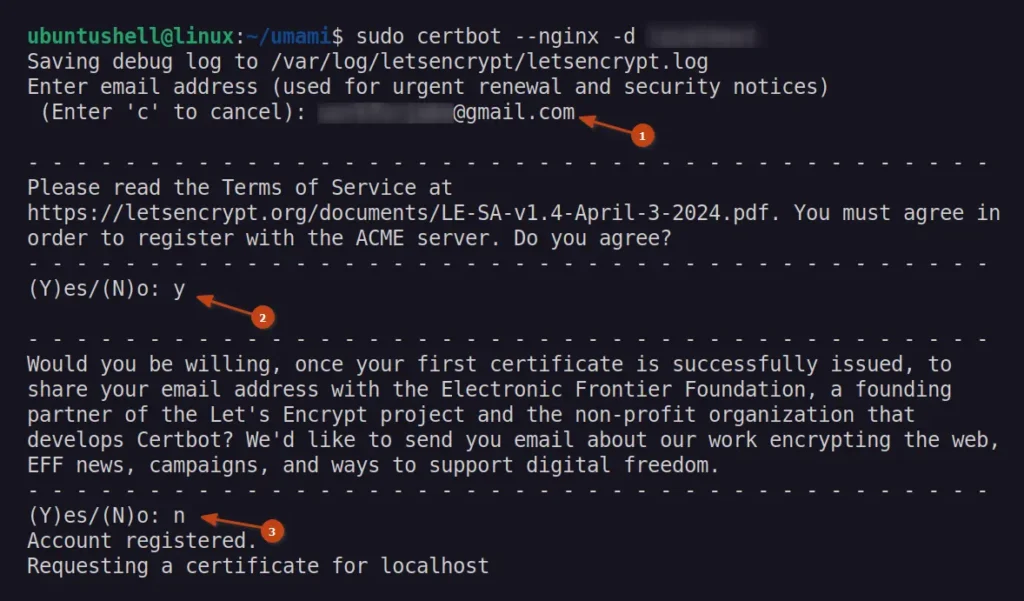
When completed, your request will be verified, and then Certbot will download your certificate and place it in the destination directory. Afterward, you can access your Umami web interface using your domain.
Step 5: Change the Default Password
When you navigate to your domain to access the Umami web interface, you'll encounter a login page where you can use the default "admin" username and "umami" password for authentication.
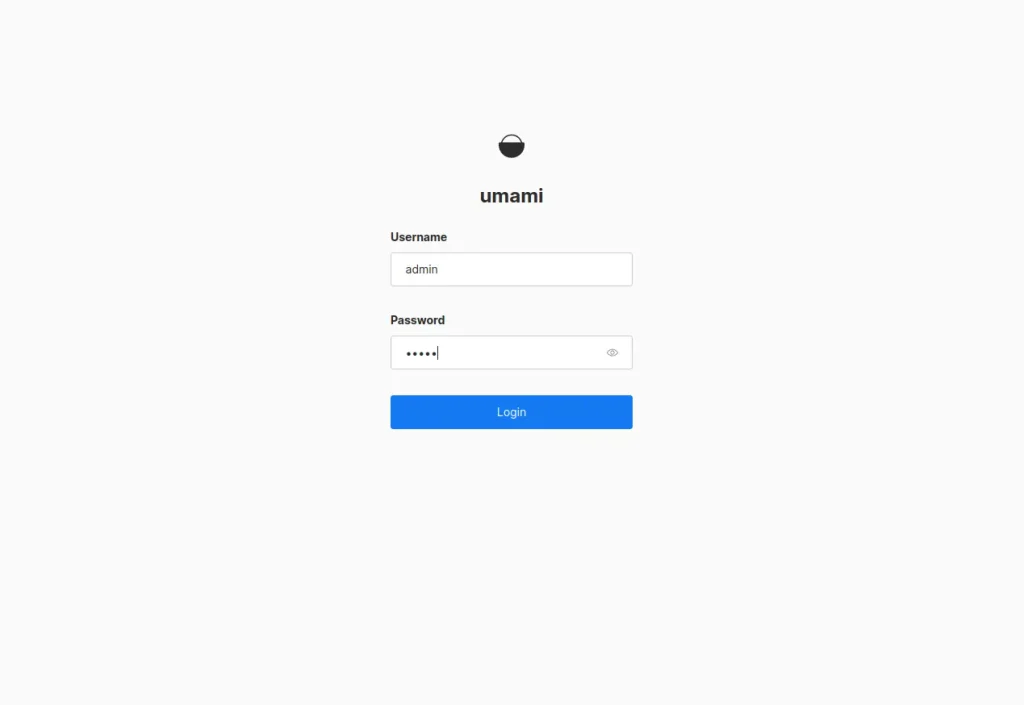
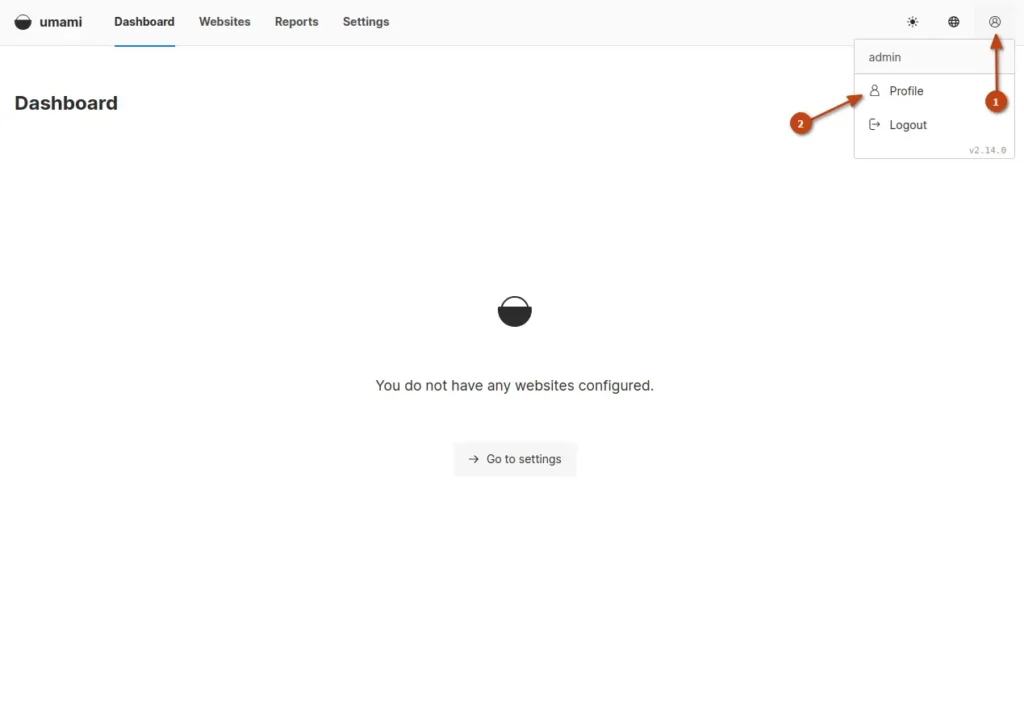
Since the default password is insecure, we will change it by navigating to the Profile page from the top right corner.
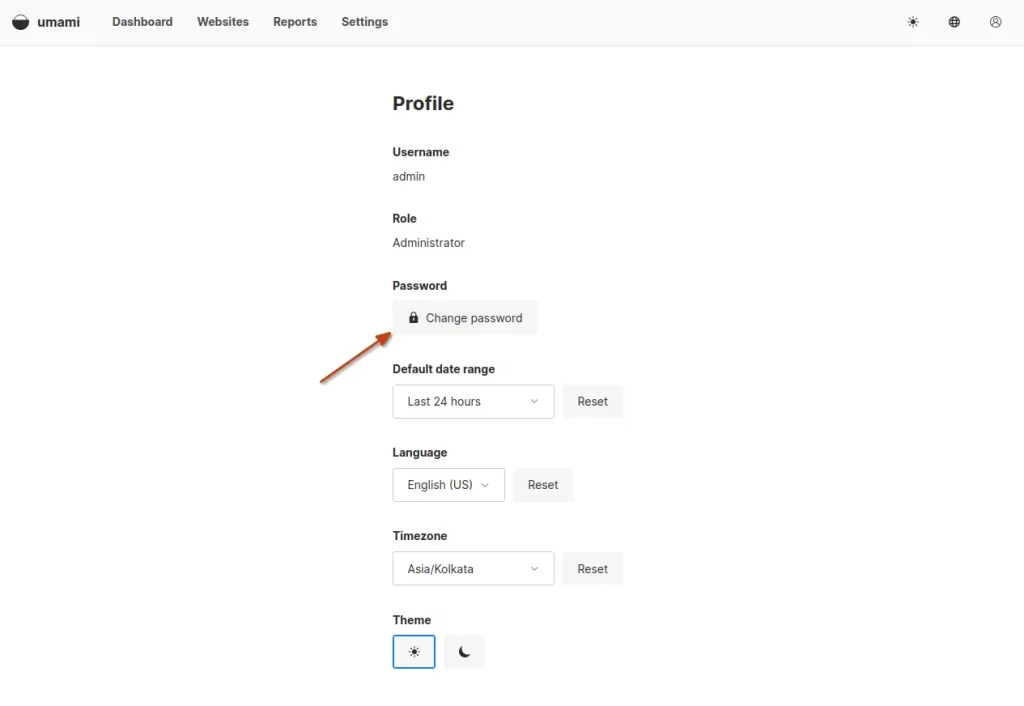
Next, click the "Change password" button.
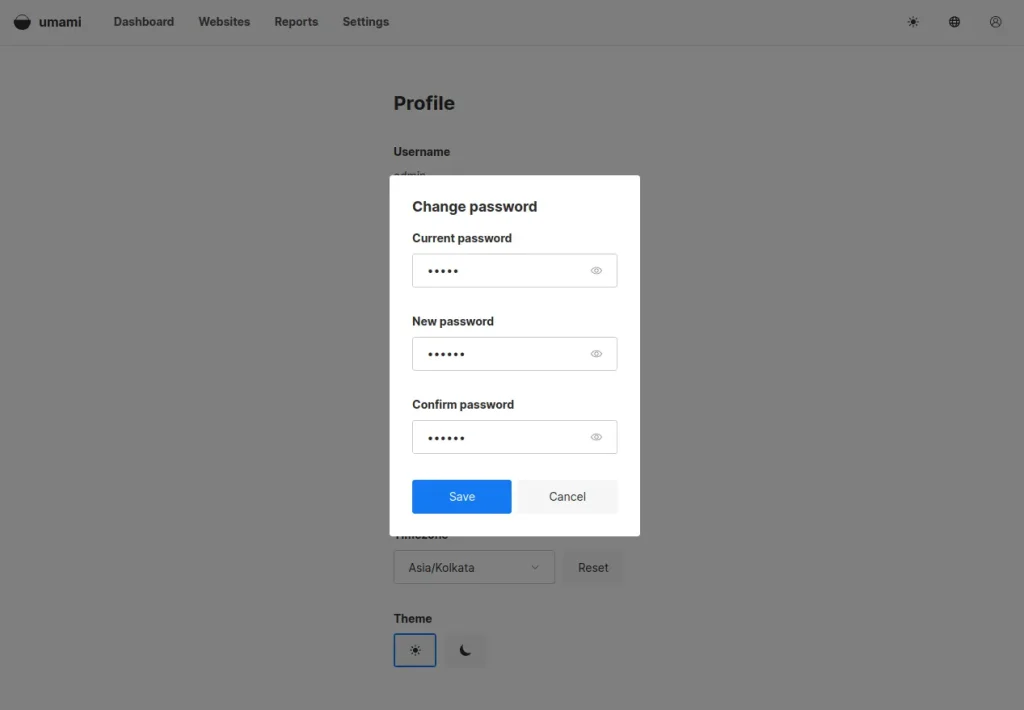
When the "Change Password" prompt appears, enter the default "umami" password in the "Current Password" field, and your new (secure) password in the "New Password" and "Confirm Password" fields; then click the "Save" button to confirm.
Once the password is changed, you will need to log in again using the same username and your new password.
Step 6: Add New Website
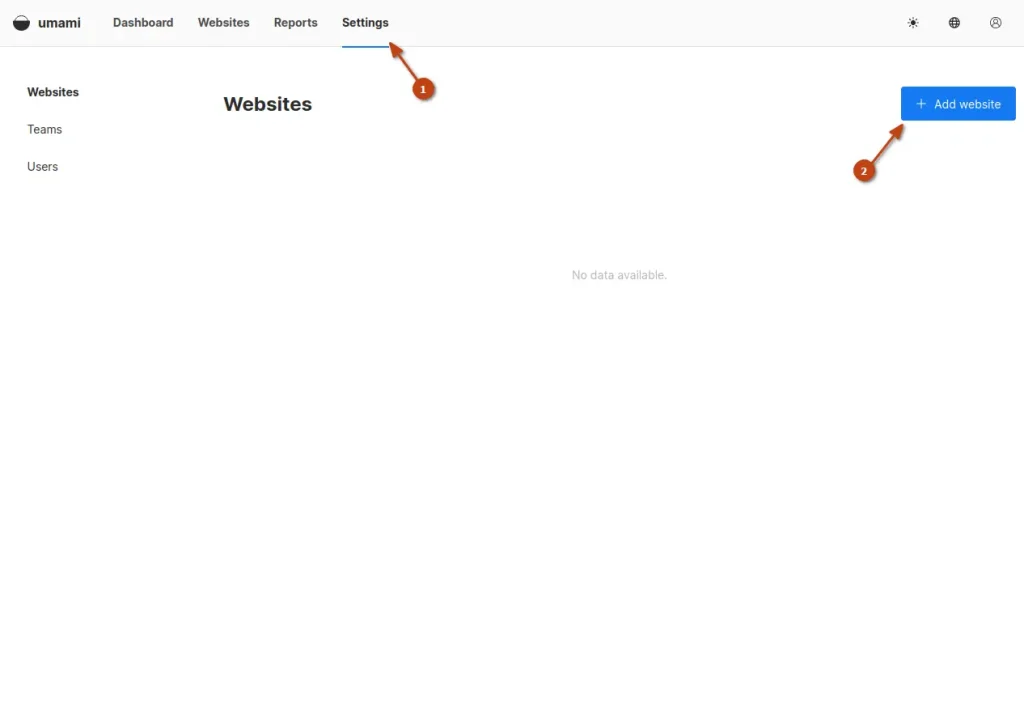
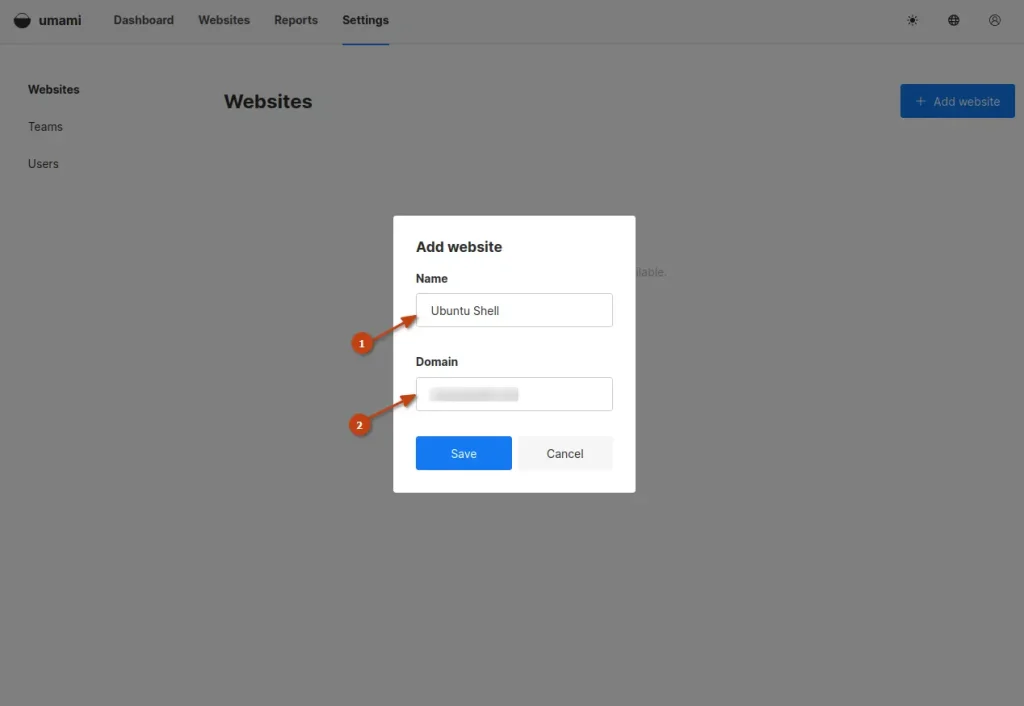
We are finally ready to add a new website to Umami Analytics. To begin, navigate to "Settings" and click the "Add website" button that appears in the top right corner under the navigation bar.
The "Add website" prompt will appear, requiring you to provide your website details, such as "Name" and "Domain", after which you can click the "Save" button to confirm.
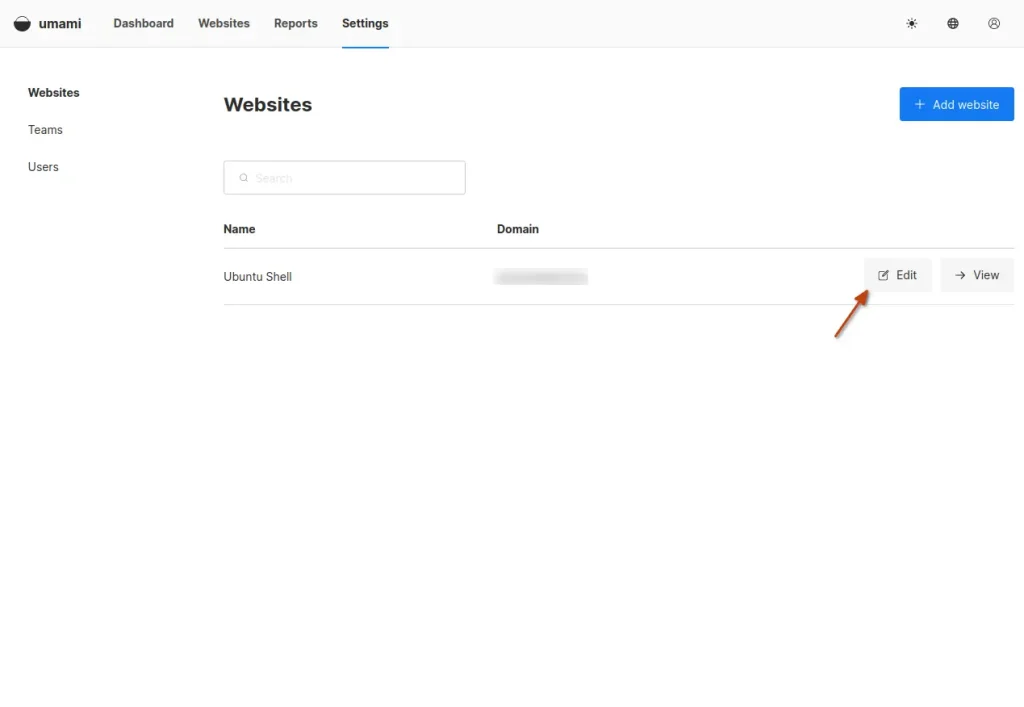
Next, click the "Edit" button beside your website entry.
Go to the Tracking code tab, then copy the HTML snippet to your clipboard.
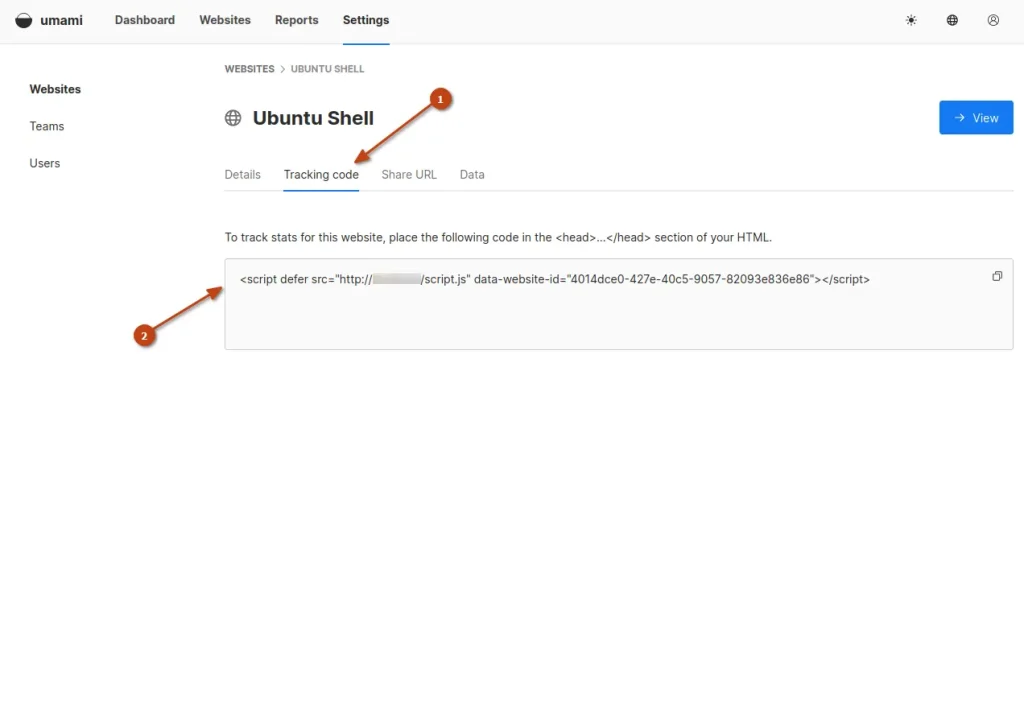
You now need to paste the HTML snippet inside the <head> section of every page on the website. If you're using WordPress, you can use freely available plugins for this task. If you're running your site on PHP or Hugo, you might have a global header file where you can add this HTML snippet.
Alternatively, you can add this HTML snippet directly inside the <head> section of a single file, as shown.

Step 7: View the Analytics of Your Website
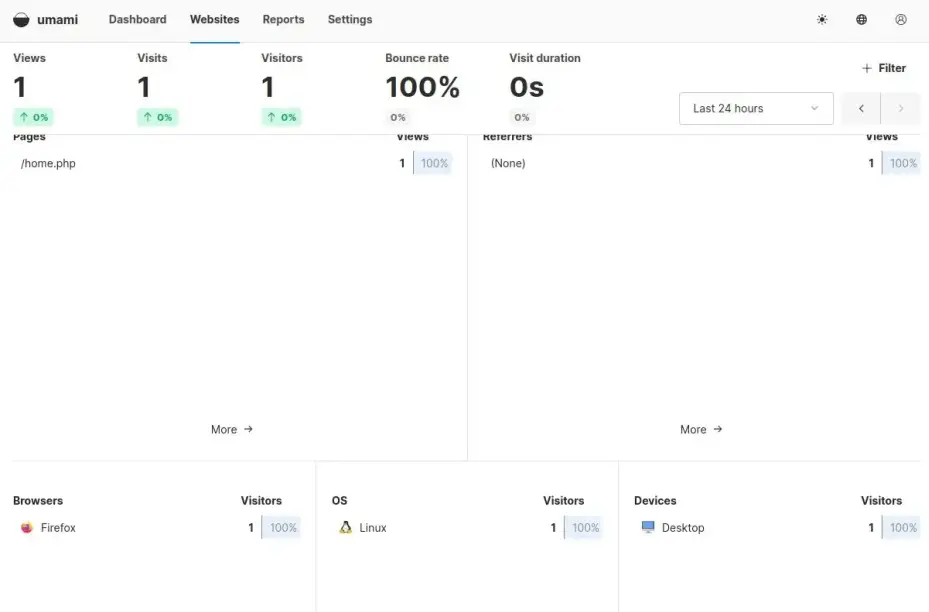
Once the tracking code is added to your website, you can navigate to the Umami Websites tab to start monitoring your website analytics, such as views, active visitors, bounce rate, visit duration, visitor browser, visitor operating system, and many more.
Conclusion
That's it! In this article, you learned how to install and configure Umami on Linux, secure Umami with an SSL certificate, and add a new website for Umami Analytics. If you have any questions or queries related to the article, feel free to ask in the comment section.
