Tiny File Manager is a single PHP script that anyone can upload to their web server or system for remotely managing files and directories via the HTTP/S protocol.
Despite being lightweight and fast, it contains all the essential file manager functionalities, such as uploading, downloading, renaming, permissions, user authentication, etc.
Before this, I was using a directory lister, which was quite decent, but, to be honest, Tiny File Manager is just a single PHP file and offers more options than other available file managers.
To discover its features and functionalities, check out this section.
Features of the Tiny File Manager
The following is a list of features offered by Tiny File Manager that set it apart from other alternatives.
- Free, open-source, lightweight, and user-friendly.
- Core functionalities are file creation, deletion, modification, viewing, downloading, copying, and moving.
- Leveraging Ajax for upload support, drag & drop, URL uploads, and multiple file uploads with file extension filtering.
- Capability to compress and extract files (
zip,tar). - Incorporating a flexible user permissions system based on session and user root folder mapping.
- Integration with the Cloud9 IDE, offering syntax highlighting for over 150+ languages and a selection of 35+ themes
- Multi-language support (32+ languages) with a built-in translation feature, requiring no additional files.
And the feature list keeps expanding if I start pointing out each one. So, I suggest you give it a try to discover for yourself how interesting and helpful this tool could be.
How to Setup and Use Tiny File Manager
The Tiny File Manager is a simple single PHP file; thus, to use it, you must fulfill certain prerequisites on your system as listed below.
- PHP 5.5.0 or higher.
- Fileinfo, iconv, zip, tar, and mbstring extensions are installed and enabled.
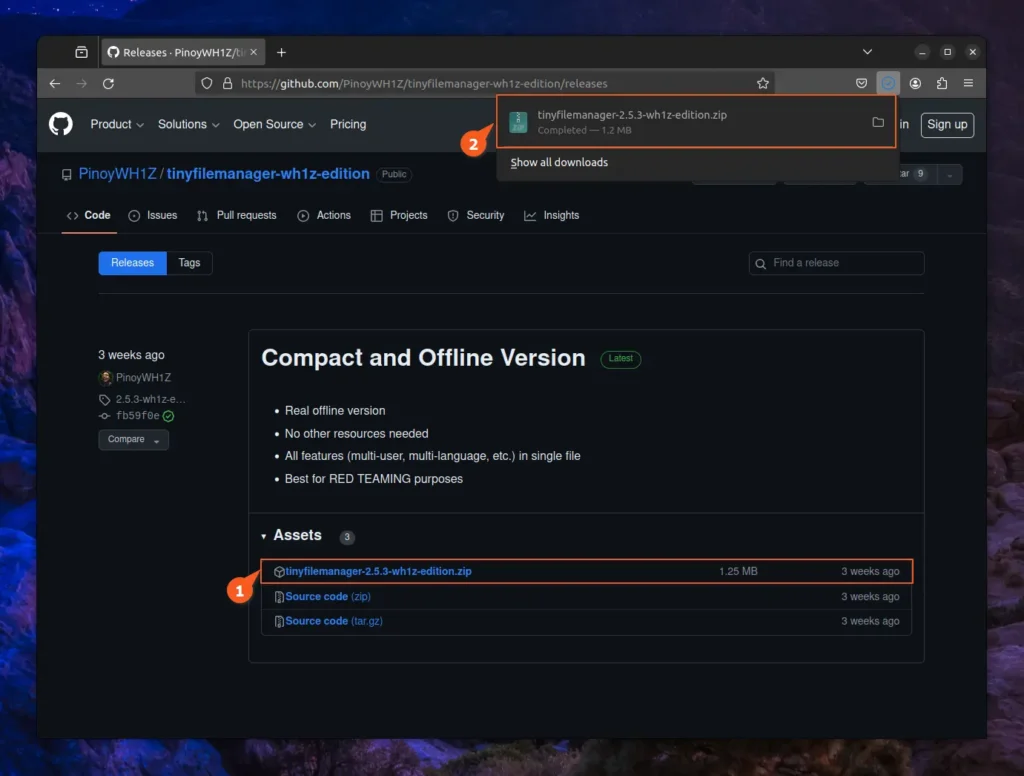
Once the required conditions are fulfilled, you can visit the release page and download the Tiny File Manager zip file.
Once the file is downloaded, navigate to the download location, extract the compressed file, and enter the extracted directory, where you will find four files, focusing only on tinyfilemanager-wh1z.php and tinyfilemanager-wh1z-mini.php.
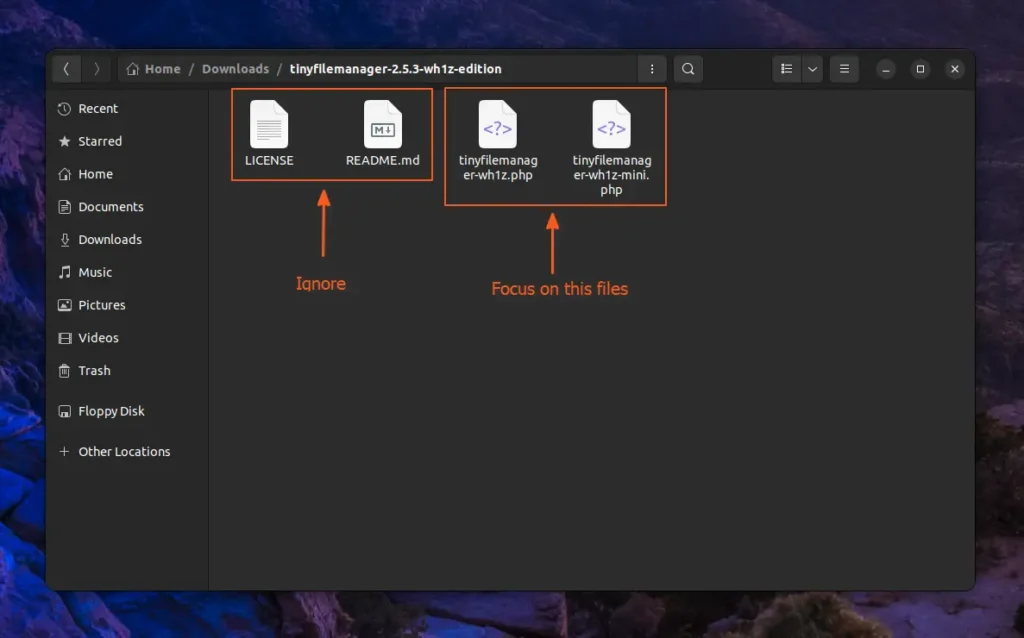
Between the two mentioned PHP files, you can choose either one according to your current needs; for now, I'll opt for tinyfilemanager-wh1z.php. Then, either SSH into your remote web host, access the file manager, or, if you need it for your local system, place the file in the web host directory.
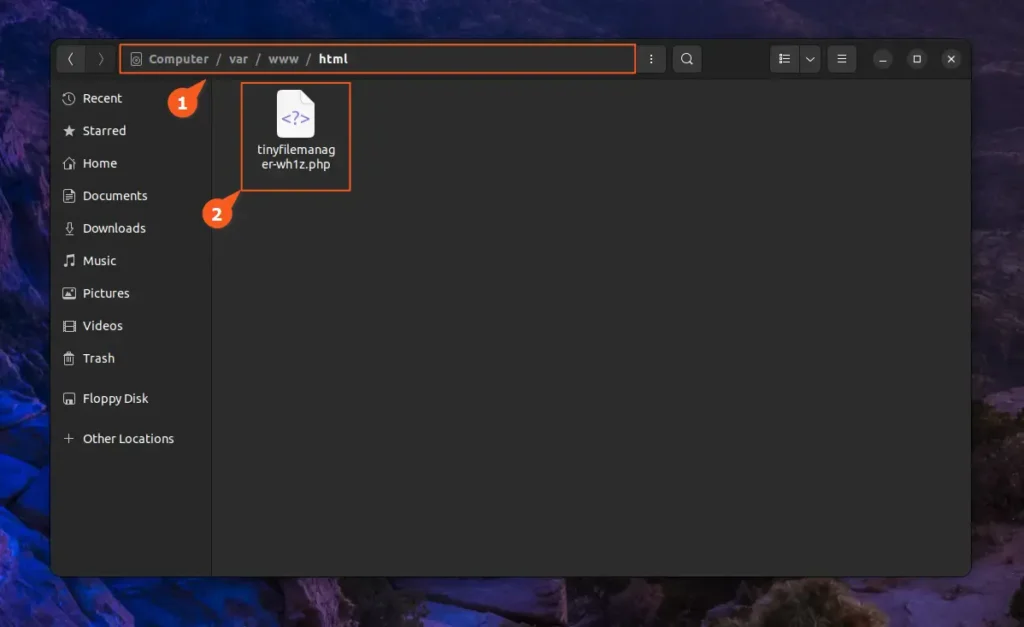
In my case, I'll want to access my local system via this file manager, so for that, I'll copy and paste this file into the /var/www/html directory.
When you are done, access your server or system via the IP address or hostname.
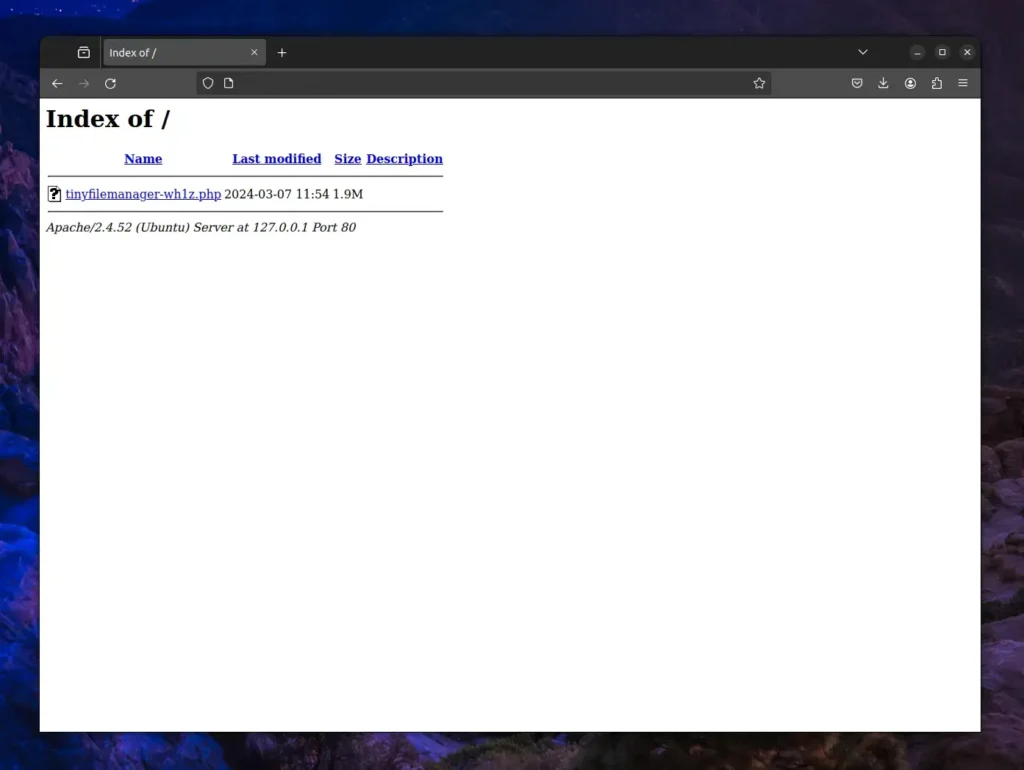
Note that accessing the Tiny File Manager requires clicking on the PHP file; to automate access without clicking, rename the file to index.php.
The default username and password for Tiny File Manager's normal user and administrator accounts are as follows:
| Username | Password |
|---|---|
| admin | WH1Z@1337 |
| user | WH1Z123 |
📝 How do I change the default password for Tiny File Manager?
Changing the default password for both admin and user from the $auth_user array in the PHP file is recommended. The password should be encrypted using password_hash(), but you can generate a new password from the Tiny File Manager admin interface by navigating to Admin -> Help -> Generate new password hash.
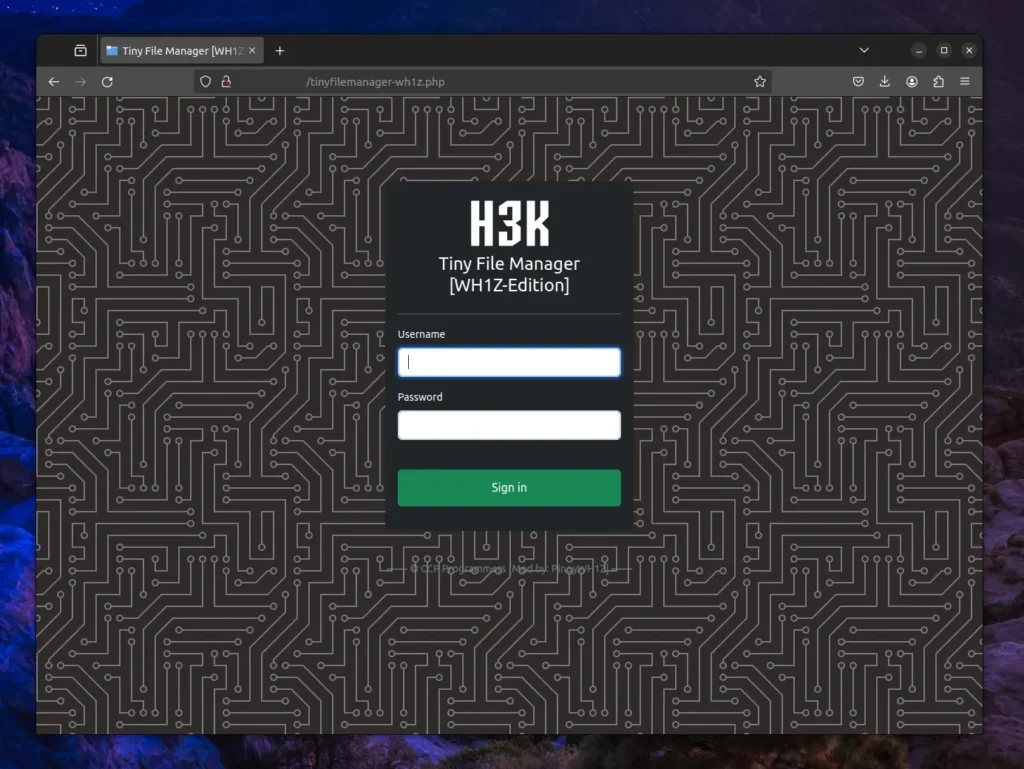
Now, when you access the Tiny File Manager for the first time, you will interact with the following login screen, through which you can easily log in with the provided credentials.
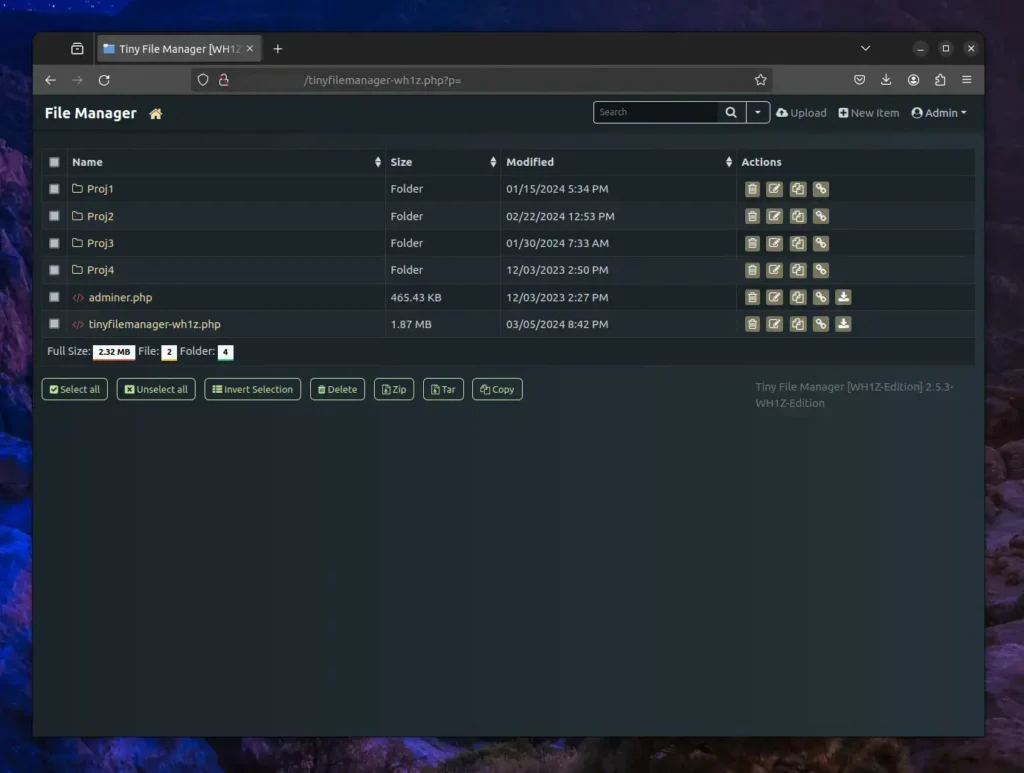
Once you successfully login to the admin page, you will interact with the following Tiny File Manager dashboard, where all the files and directories in your web host directory will be listed, and options to create or upload a new file, change permissions, rename files, copy direct links, compress files, and many more will become available.
Here, your journey with Tiny File Manager begins—a great tool for managing remote host files and directories with an easy process, simply by placing a single PHP file.


