Deluge is a free, open-source, lightweight BitTorrent client application that is available for Linux, FreeBSD, macOS, and Windows. Its standout feature is its support for plugins, which enhances its capabilities.
You can access it via a GUI application, from a CLI, or set up a desktop service on a server and manage downloads remotely. It also comes with built-in encryption and offers many privacy-related features.
If bandwidth is limited, you can effectively manage it by allocating a reasonable amount to each download or upload. If you have RSS feeds for torrent releases, utilize its RSS plugin to automate the downloading process of your favorite shows or movies as soon as they become available.
There are numerous features in Deluge, but my favorite is its simplicity and ad-free nature. Today, I'll show you how to install Deluge on Ubuntu and other Linux distributions.
How to Install Deluge BitTorrent Client on Ubuntu and Other Linux Distros
Deluge is typically found in the majority of Linux repositories, allowing installation via the default package manager. However, these repositories often contain outdated versions, and to get the latest version, you need to wait until the version in the repository is updated.
However, if you are using Ubuntu, you can use the official Deluge PPA to get the most recent version as soon as possible. So, for that, you can open your terminal and execute the following series of commands to add the PPA and install Deluge from it.
- Install software properties.
- sudo apt install software-properties-common
- Add PPA to the list of sources.
- sudo add-apt-repository ppa:deluge-team/stable
- Install Deluge.
- sudo apt install deluge
The above commands will install the latest Deluge on Ubuntu. However, if you still insist on installing it from the official repository on Ubuntu or other Linux distributions like Debian, Redhat, Fedora, AlmaLinux, Arch, etc., then execute one of the following commands corresponding to your Linux distribution.
- On Debian, Ubuntu, Mint, Pop!_OS, etc.
- sudo apt install deluge
- On RHEL, CentOS, Fedora, Rocky Linux, AlmaLinux, etc.
- sudo dnf install deluge
- On Arch, Manjaro, EndeavourOS, Garuda, etc.
- sudo pacman -S deluge
- On OpenSUSE Linux.
- sudo zypper install deluge
That's it; you have successfully installed the Deluge BitTorrent client app.
How to Use Deluge BitTorrent Client on Linux
Once the installation is complete, you can find and launch Deluge from the application menu.

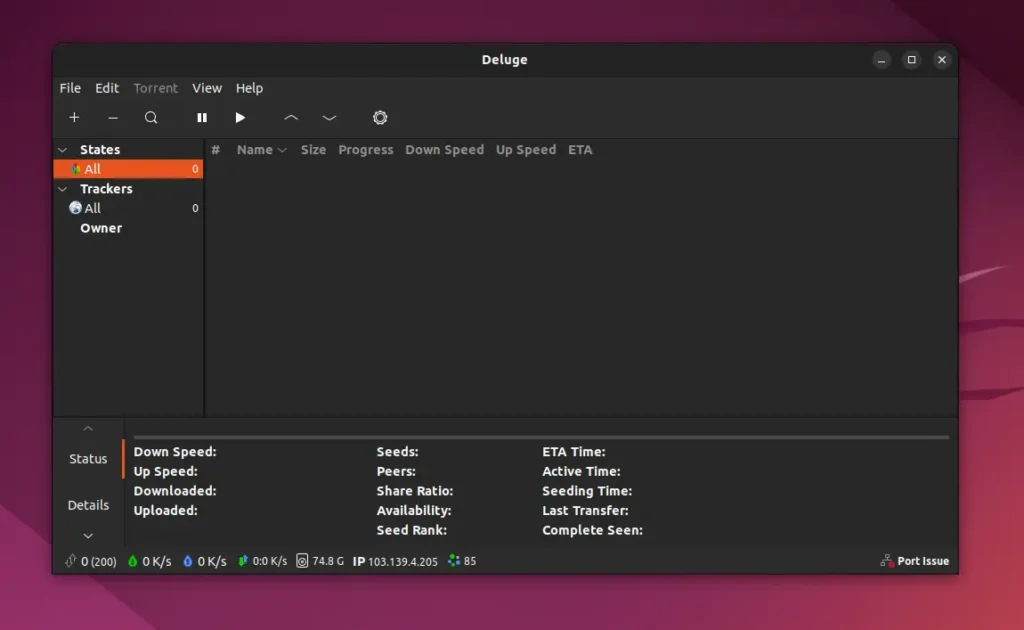
When you launch it for the first time, you'll interact with the following Deluge window:

Here, you can start using Deluge like any other BitTorrent client application. The learning curve is almost zero; after navigating to a few options, you can quickly understand its usage.
From the settings, you can change the download location, manage connection settings, install and manage plugins, set an application password, specify minimum and maximum simultaneous downloads, configure a web server, and much more.
How to Uninstall Deluge BitTorrent Client on Linux
To remove the Deluge from your system, open your terminal and execute one of the appropriate commands based on your Linux distribution.
- On Debian, Ubuntu, Mint, Pop!_OS, etc.
- sudo apt remove deluge
- On RHEL, CentOS, Fedora, Rocky Linux, AlmaLinux, etc.
- sudo dnf remove deluge
- On Arch, Manjaro, EndeavourOS, Garuda, etc.
- sudo pacman -R deluge
- On OpenSUSE Linux.
- sudo zypper remove deluge
Once the application is removed, make sure to execute the following command to remove its configuration files:
- rm -rf ~/.config/deluge
That's it. In this article, you've learned how to install the Deluge BitTorrent client on Ubuntu and other Linux distros, how to use it, and then how to remove it.


