UrBackup is an open-source client/server backup system that you can install on your remote server or on-premises system to regularly take backups of other systems.
Once set up and the system that needs to be backed up is added, it will start monitoring the changes, and when new changes are detected, an immediate backup action will be taken without interrupting any other process.
The backup can be taken in two ways: either a full file or an image backup. If you opt for a file backup, you can restore it later through the web interface, while backups of drive volumes can be restored with a bootable USB stick.
So stick with this article till the end to learn how to install and configure the UrBackup server and client system on Ubuntu with practical examples.
How to Install and Configure UrBackup [Client/Server] System on Ubuntu
The UrBackup server can be installed on any system; just ensure that the other systems, whose backups you are planning to take, are accessible to the UrBackup server system.
Once it is installed and configured, it will provide you with a web address for the web interface, which you can access to add systems on your local or remote network and manage their backups.
To demonstrate the process, I'll use Ubuntu as the UrBackup server and Windows as the UrBackup client. So, follow the below steps one by one to correctly install and configure UrBackup on this system.
Step 1: Install UrBackup Server on Ubuntu
1. First, open your terminal or SSH into the Ubuntu system where you wish to install the UrBackup server, add the UrBackup-provided PPA, and then begin the installation.
- sudo add-apt-repository ppa:uroni/urbackup
- sudo apt update
- sudo apt install urbackup-server
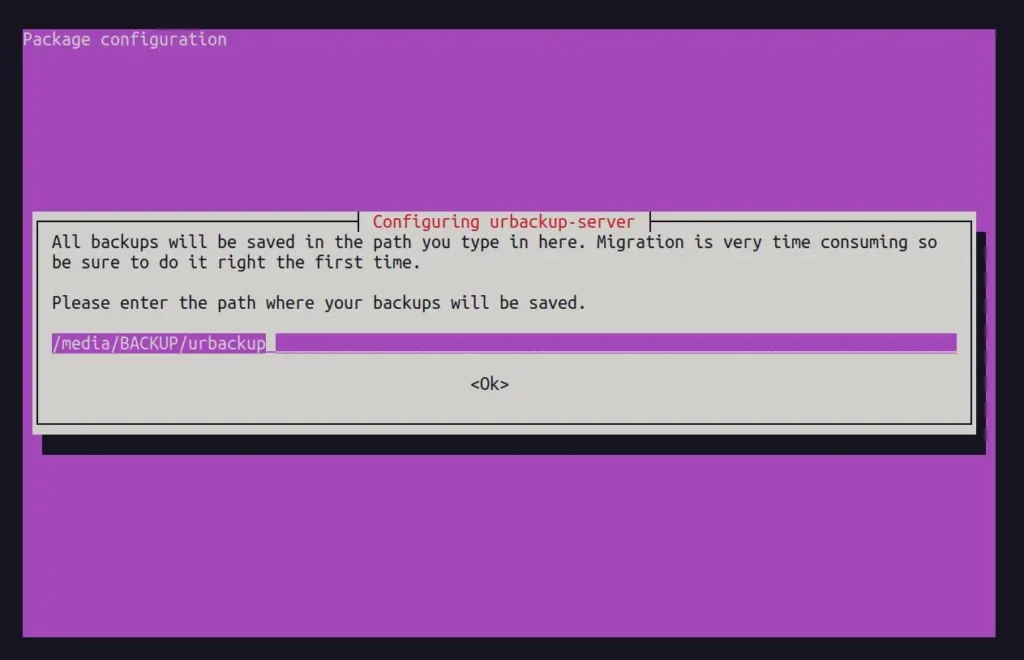
During installation, you may be asked to specify the path where your backups will be saved. The default path is /media/BACKUP/urbackup, but you can change it to suit your needs. For now, I'll keep the default path and proceed by clicking on "Ok".
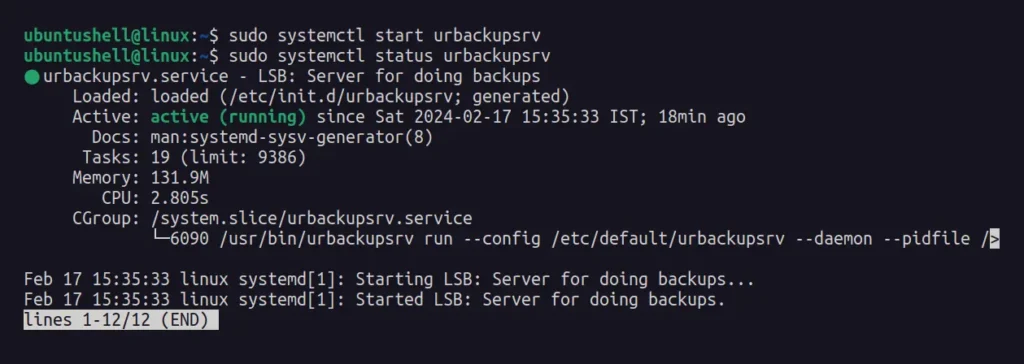
2. Once the installation is complete, start the UrBackup server and check its status using the systemctl command.
- sudo systemctl start urbackupsrv
- sudo systemctl status urbackupsrv
Output:
3. It's also suggested to enable it to autostart on system boot.
- sudo systemctl enable urbackupsrv
Output:

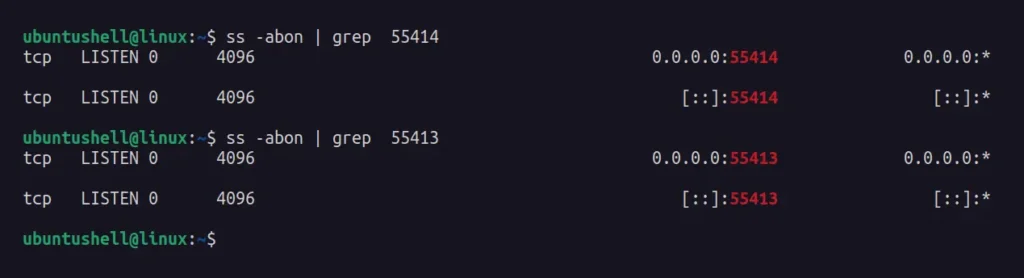
4. The default ports 55414 and 55413 are used by the UrBackup server for the web interface, which you can confirm using the ss command.
- ss -abon | grep 55414
- ss -abon | grep 55413
Output:
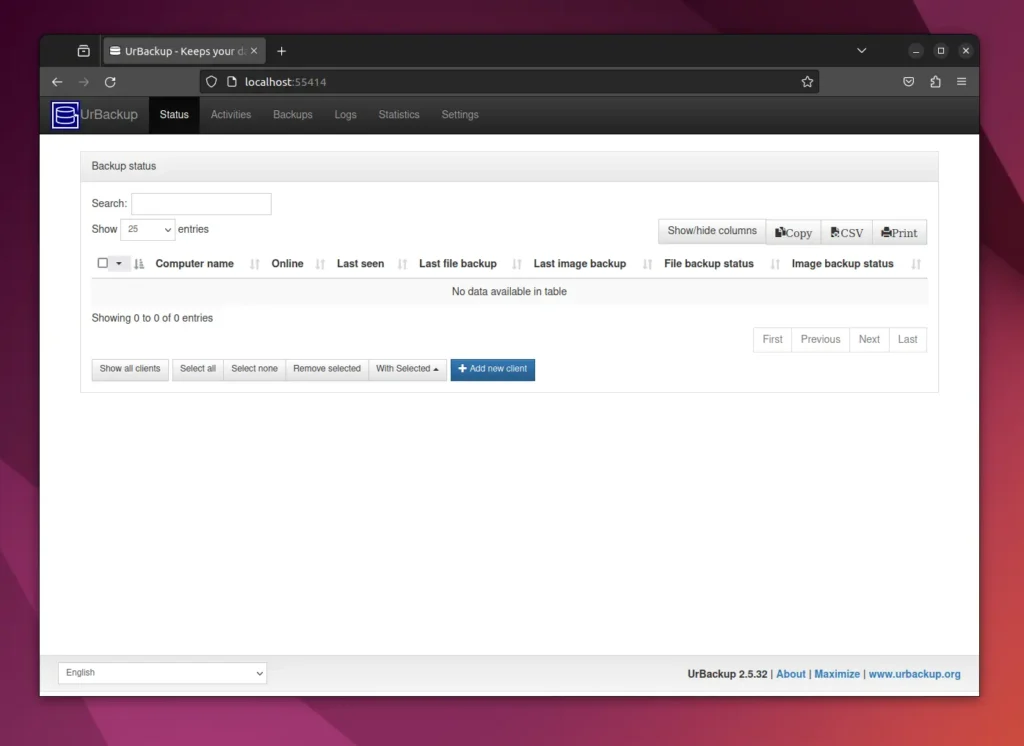
5. You can now access the UrBackup server via the web interface by specifying your server's local or global IP address.
http://ip-address:55414Output:
Step 2: Create an Admin User on the UrBackup Server
When accessing the UrBackup web interface, you might have noticed that it was directly accessible without any user verification, which makes it less secure.
So, the next step would be to create an admin user on the UrBackup server to ask for user verification each time someone tries to access the UrBackup web interface.
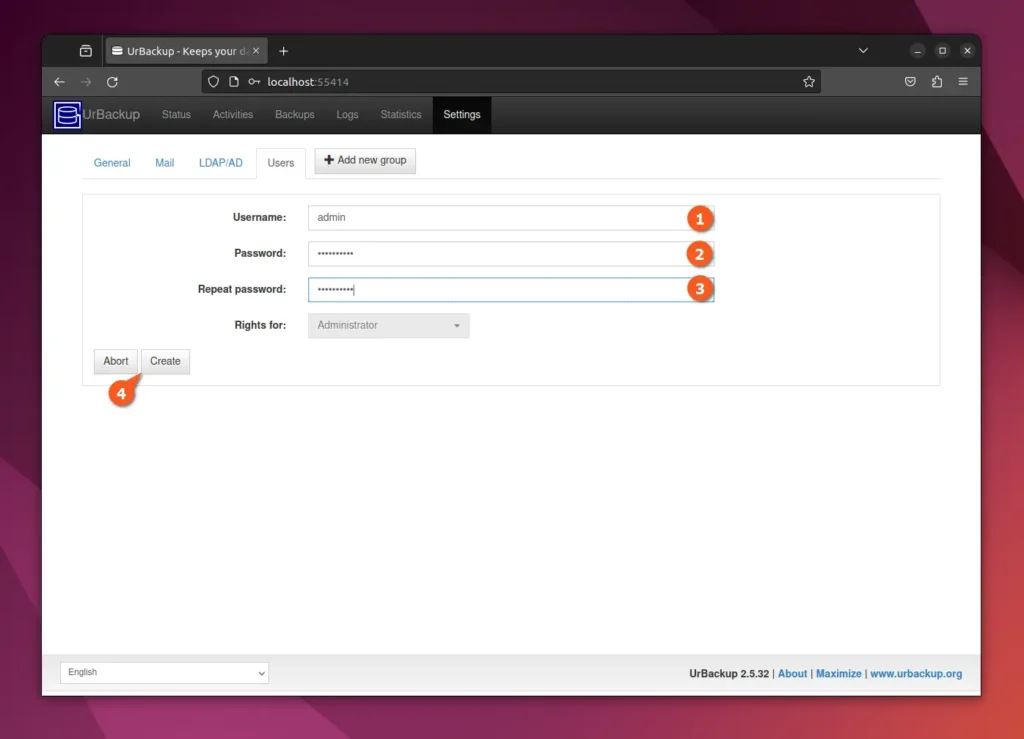
1. On "Web UI" -> "Settings" -> "Users" -> "Create user".

2. Assign a username (the default is admin) and password, and then click on the "Create" button.
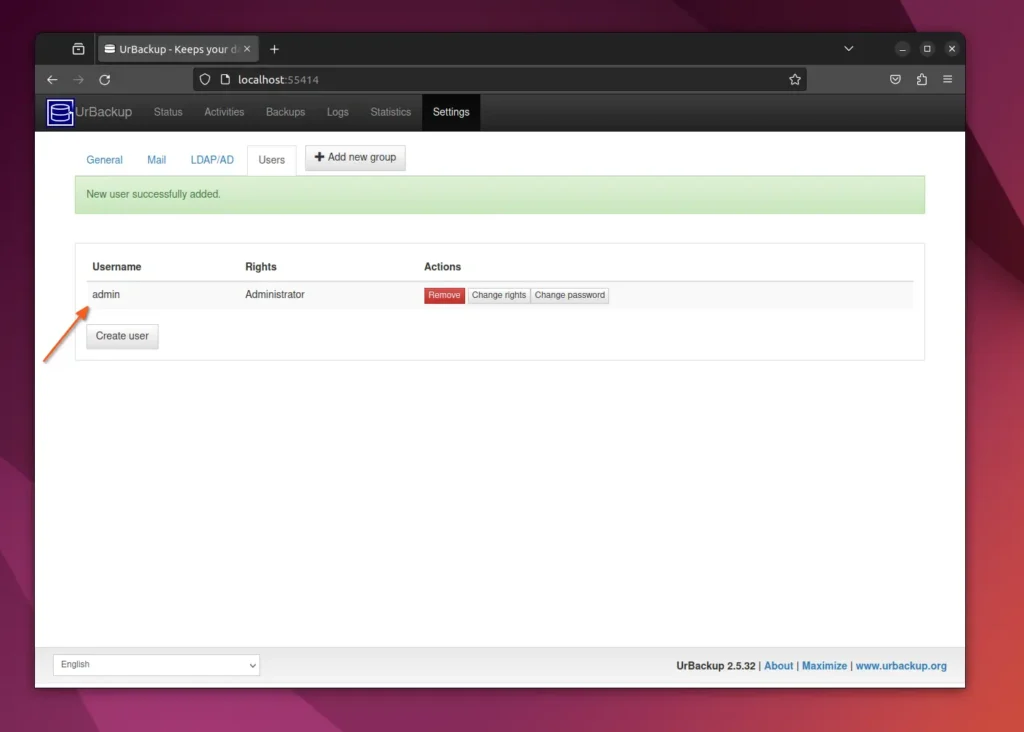
3. Once done, the new user entry will be listed on the dashboard.
Step 3: Add a New Client System for a Backup in UrBackup Server
Once the UrBackup server is installed, configured, and an admin user created, you can start adding new systems (or clients) whose files and directories will be backed up on the server.
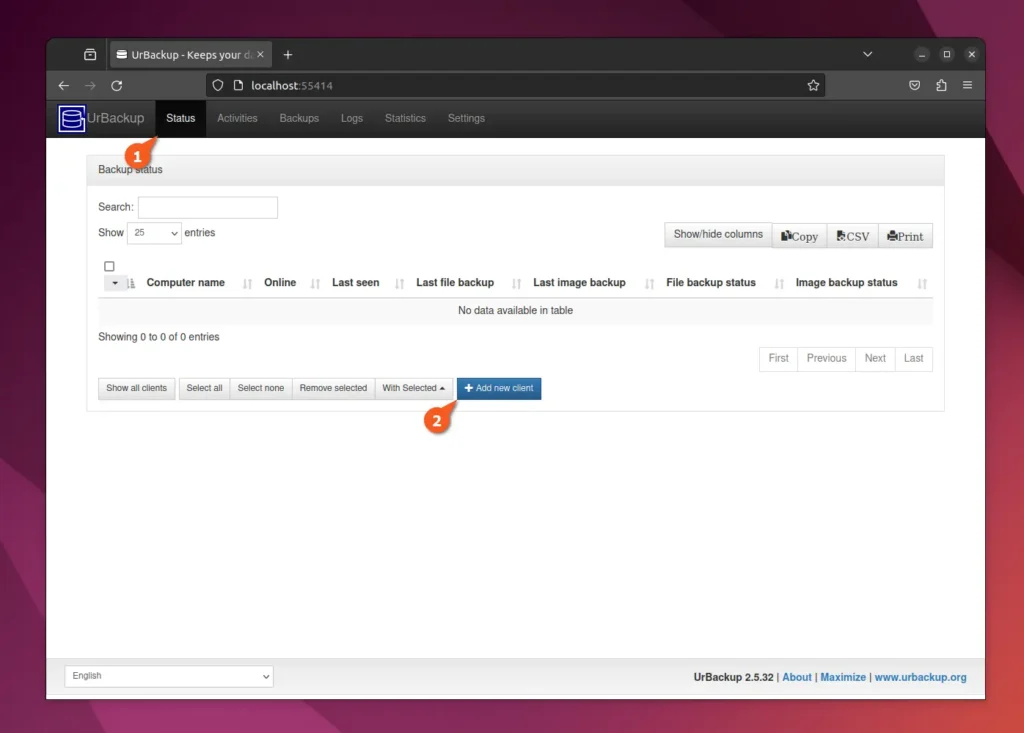
1. On "Web UI" -> "Status" -> "Add new client".
2. On the client page, add the details of the client system, such as the name for the reference and the IP/hostname of the client to be used for searching.

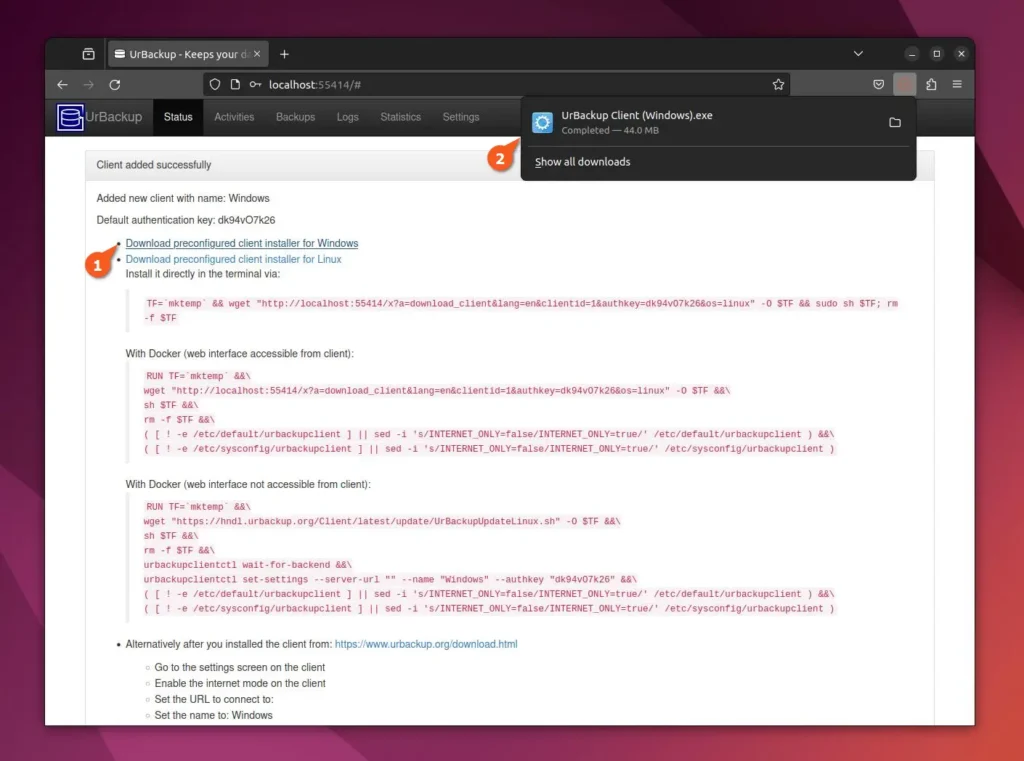
3. Once the client is successfully added, you will be redirected to the next page, where you will find multiple options to install the UrBackup client application. In my case, I am using the Windows system as an example, so I will click on the "Download preconfigured client installer for Windows" button, and it will begin the download process.
Step 4: Configure the Urbackup Client Application
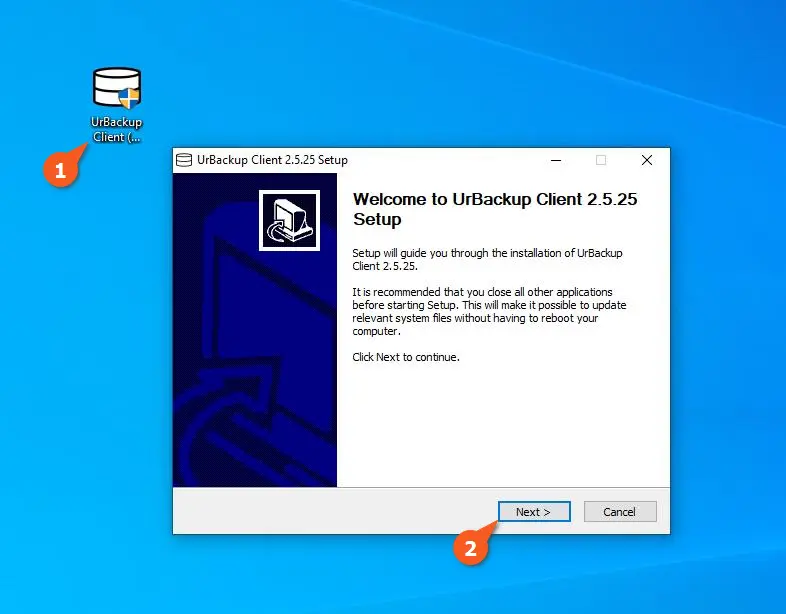
1. Once the file is downloaded, transfer it to the client system (in my case, Windows), and run the executable file on the client system to begin the UrBackup client installation.
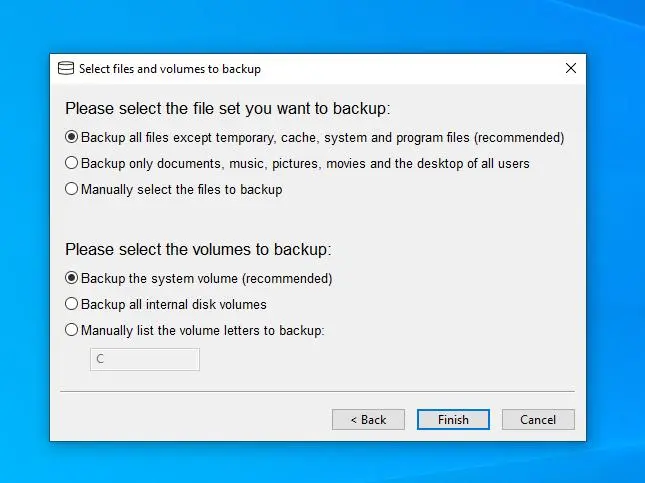
2. Once the installation is finished, it will ask you what to backup from the client system (referring to Windows) to the UrBackup server system (referring to Ubuntu). For now, I am going with the default backup setting to backup all files except temporary, cache, system, and program files from the system volume.
3. Now, an UrBackup client application has started the backing-up process on the remote UrBackup server system; you can check the status by clicking on the UrBackup icon in the taskbar.

4. You can also track the backup progress from the UrBackup web UI.
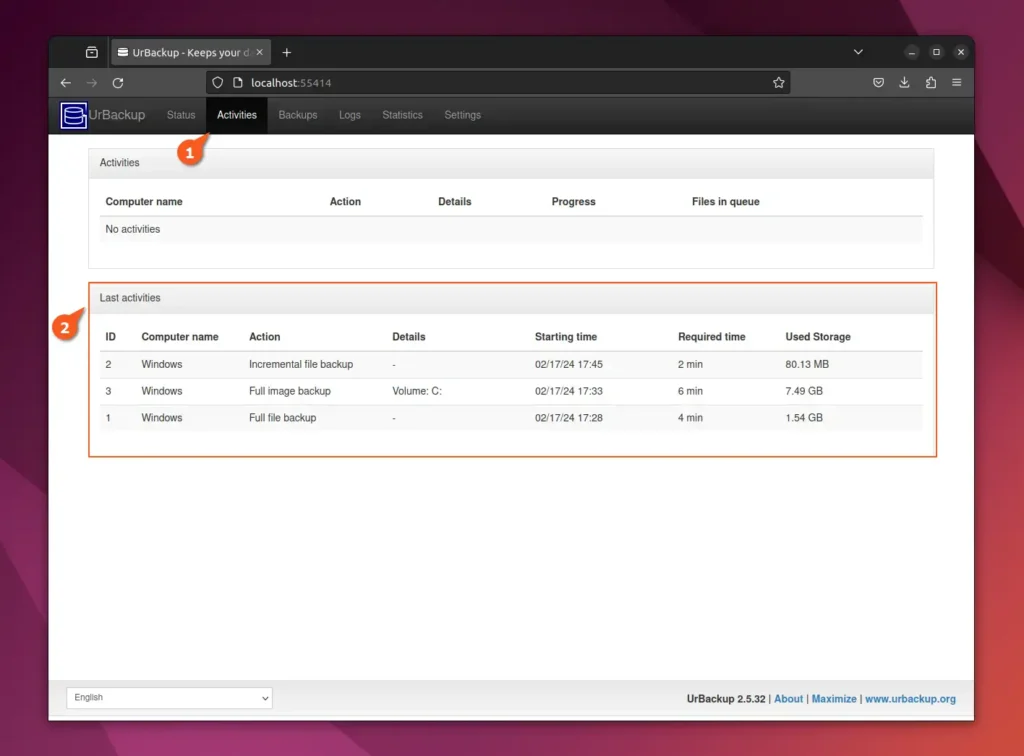
5. To monitor all backup activity, check out the "Activities" window.
That's it. Here, you can further dig deeper to better understand the usage of UrBackup. I would recommend checking out the documentation section to learn more.


