Ghost is a stunning, modern, open-source platform designed for creating blogs and websites. It's written in Javascript, built upon Node.js, and managed by the Ghost Foundation.
It comes with several features out of the box, including simplicity, speed, SEO optimization, a unique editor, native image editing, advanced user management, rich media & dynamic cards, a built-in newsletter, native analytics, and many more.
When compared to WordPress, Ghost is notably more modern and faster (up to 1,900%). However, WordPress has its own benefits, such as community support and a wide range of features and customization options.
If you're a blogger or journalist gearing up to launch a website, give Ghost some thought. In this article, I'll walk you through installing, setting up, and using Ghost on Ubuntu 25.04, 24.04, and other versions.
How to Install, Setup, and Use Ghost on Ubuntu
This article performs all steps on the local system using the localhost web address. However, if you have a server, you can check its public IP address and specify it in your DNS record.
Wait for DNS changes to propagate, which might take some time. Then, proceed to follow the steps mentioned in this article. If you don't have a server but are looking for one, consider DigitalOcean, which offers $100 credit for the first 3 months.
Beside this, make sure you are using Ubuntu 25.04; however, 24.04 and 23.04 are also acceptable, though the latest version guarantees no future issues. So, let's begin with...
Step 1: Install Required Dependencies
To install Ghost, you must first update the repository information and all pending updates on your system, as well as install dependencies like Node.js, NPM, and MySQL server.
$ sudo apt update && sudo apt upgrade
$ sudo apt install nodejs npm mysql-server
Step 2: Create a MySQL Database for Ghost
Once the MySQL server is installed, ensure to secure your MySQL installation by enforcing a certain password strength requirement, removing anonymous users, disallowing remote root login, removing the test database, and setting a password for the root user.
$ sudo mysql_secure_installationThen run one of the following commands to log into the MySQL console:
# MySQL root user without password
$ sudo mysql
# MySQL root user with custom password
$ sudo mysql -u root -p
Lastly, create a MySQL user and database for Ghost.
📝 Note
Make sure to replace your_password with your own password in the second MySQL command.
mysql> CREATE DATABASE ghost_db;
mysql> CREATE USER 'ghost_user'@'localhost' IDENTIFIED BY 'your_password';
mysql> GRANT ALL PRIVILEGES ON ghost_db.* TO 'ghost_user'@'localhost';
mysql> FLUSH PRIVILEGES;
mysql> EXIT;
Step 3: Install Ghost CLI on Ubuntu
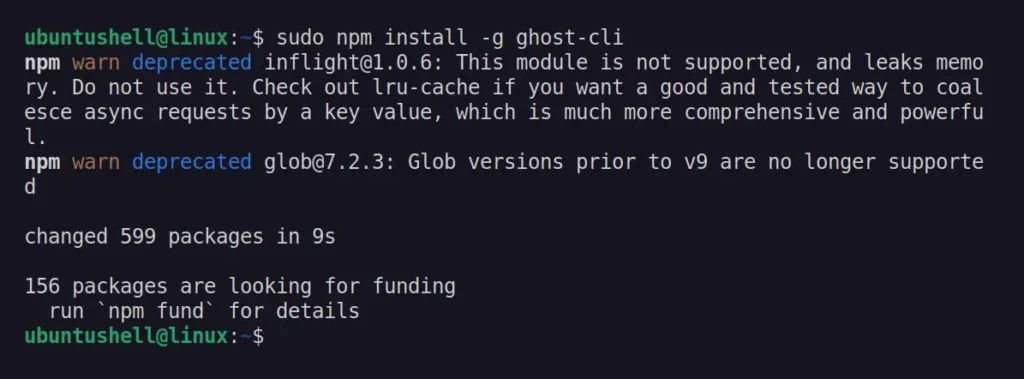
Now that we have installed the required dependencies and set up the MySQL database, you can install the Ghost CLI globally using the NPM command, which can later be used to install, update, and manage Ghost CMS from the command line.
$ sudo npm install -g ghost-cliOutput:
Step 4: Create a New Ghost Blog
Once the Ghost CLI is installed, you can move forward and create a directory for your Ghost blog with appropriate permissions.
$ sudo mkdir -p /var/www/ghost
$ sudo chown $USER:$USER /var/www/ghost
$ sudo chmod 775 /var/www/ghost
Navigate to the directory and install Ghost.
$ cd /var/www/ghost
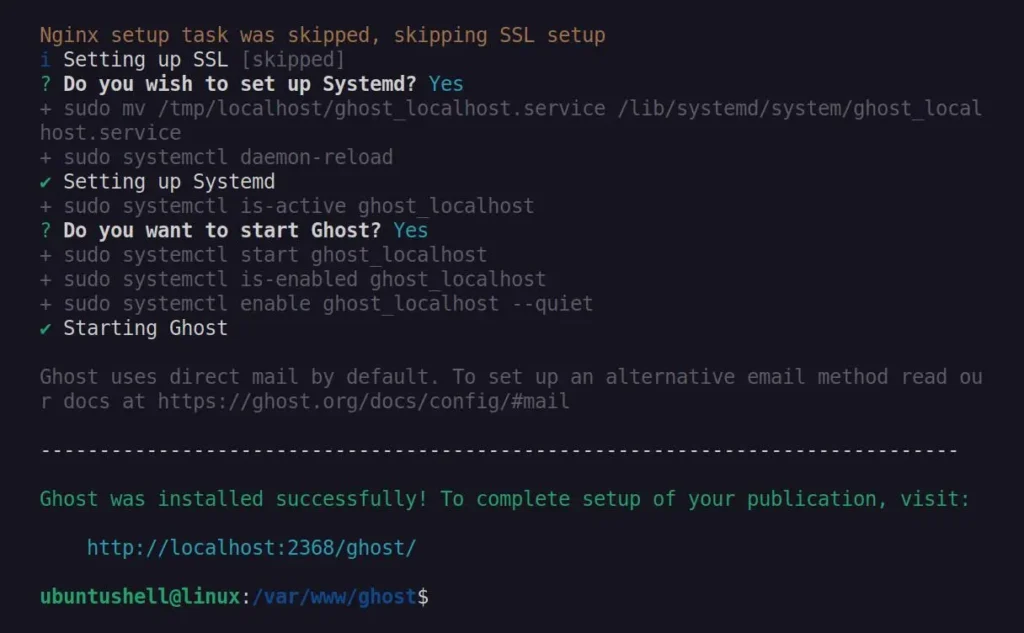
$ ghost installThe installation will take a few seconds, after which it will ask a few setup questions for Ghost, such as blog URL, MySQL hostname, MySQL username (in our case, ghost_user), MySQL password (the one specified in step 2), and Ghost Database (in our case, ghost_db).
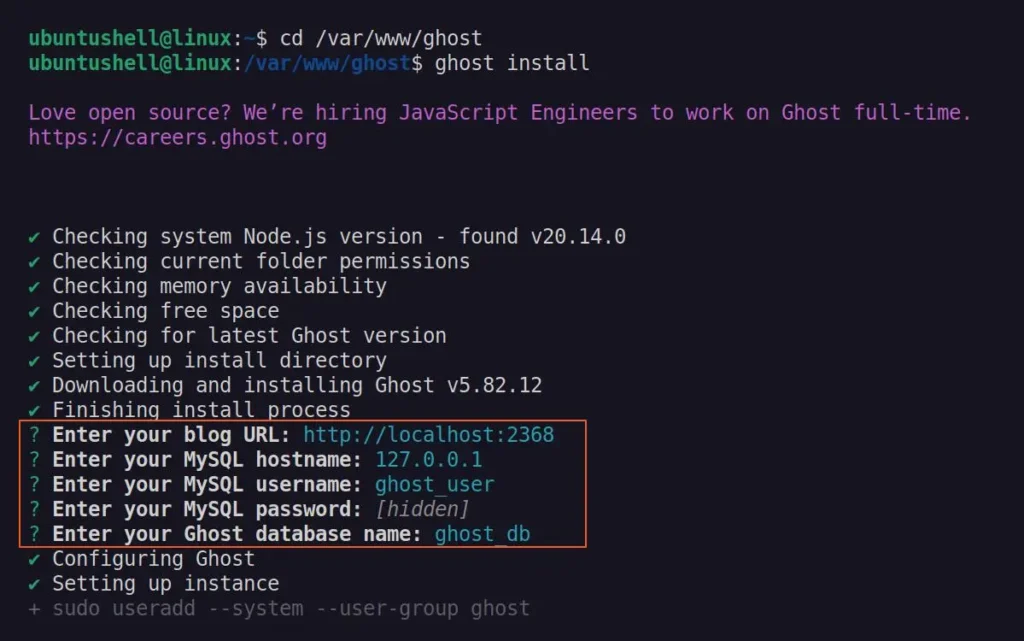
Later, it will ask for a few more questions, for which you can simply press Enter to continue with the default option.
Step 5: Install and Configure Nginx
The next step is to install and configure Nginx to host your blog, allowing internet connections on port 80 to be redirected to the port where Ghost is running, so others can easily discover and access your Ghost blog.
So, first, execute the following command to install Nginx:
$ sudo apt install nginxCreate a Ghost Nginx configuration file.
$ sudo nano /etc/nginx/sites-available/ghostCopy and paste the following Nginx configuration template for Ghost, and make sure to replace "your_domain.com" (highlighted in red) with your actual domain name (or "localhost"). Adjust the proxy settings according to your needs.
server {
    listen 80;
    server_name your_domain.com;
    access_log /var/log/nginx/your_domain.log;
    location / {
        proxy_set_header X-Real-IP $remote_addr;
        proxy_set_header X-Forwarded-For $proxy_add_x_forwarded_for;
        proxy_set_header X-Forwarded-Proto $scheme;
        proxy_pass http://127.0.0.1:2368;
        proxy_set_header Host $host;
    }
}
Create a symlink to activate the configuration.
$ sudo ln -s /etc/nginx/sites-available/ghost /etc/nginx/sites-enabled/Finally, test the Nginx configuration and restart the server.
$ sudo nginx -t
$ sudo systemctl restart nginx
Step 6: Setup SSL Certificate for Ghost Blog
📝 Note
Only individuals using a custom domain and server should use this method to configure their Ghost blog. If you are using localhost, proceed to the next method.
You can now install Certbot, which simplifies the process of obtaining and renewing SSL/TLS certificates for Nginx servers.
$ sudo apt install certbot python3-certbot-nginxObtain a new SSL certificate for your domain.
$ sudo certbot --nginx -d your_domain.comStep 7: Access Your Ghost Blog
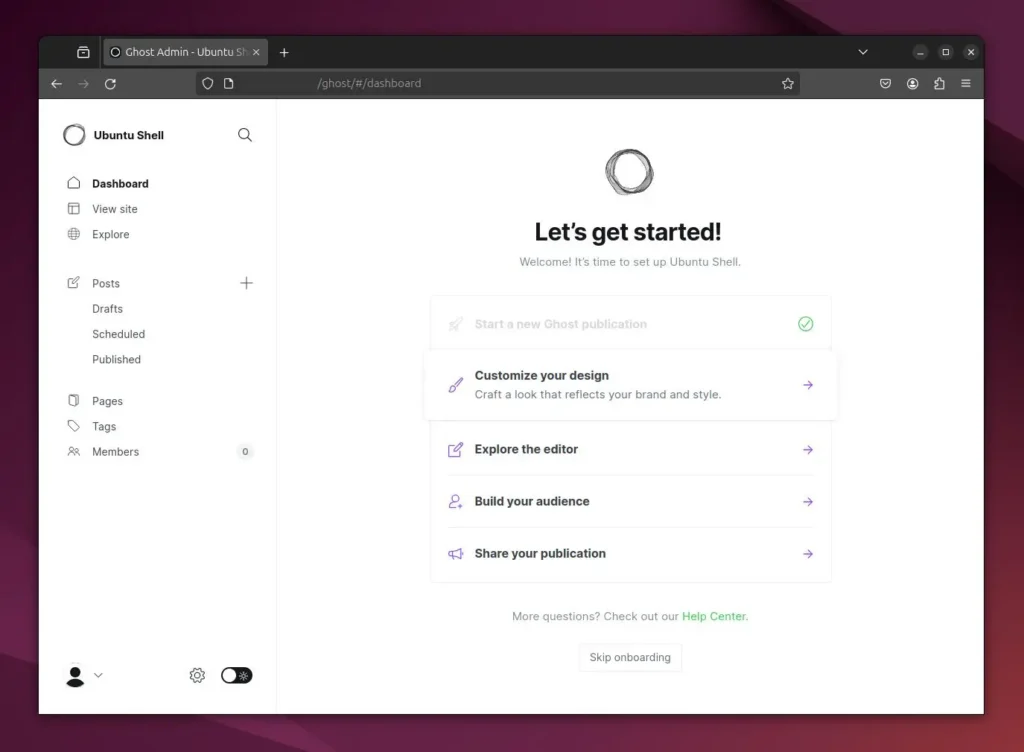
To access your Ghost Blog, enter the domain or "localhost" followed by "/ghost" (for admin dashboard) in the URL address bar of your favorite web browser, and then start setting up a new Ghost site.
http://your_domain.com/ghost
http://localhost.com/ghost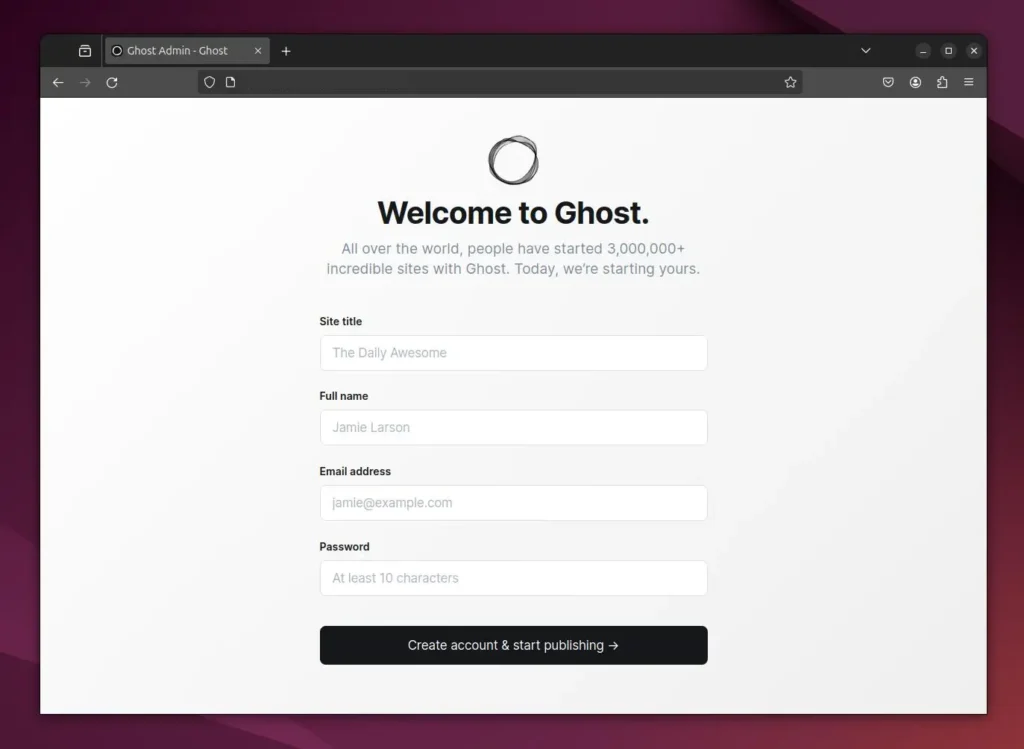
Once you've set up the new Ghost site, you can create new posts, pages, and users, configure settings, and make sure to check out the beautiful Ghost themes.
Wrap Up
That's it. In this article, you have learned how to install Ghost on Ubuntu, create and set up a new Ghost site, and configure Ghost with Nginx.


