Perl is a popular programming language used for scripting, text processing, system administration, and many more tasks by popular companies such as Amazon, cPanel, Cisco, and many others.
It comes pre-installed in most Linux distributions or is available in their repositories, but if the Perl version offered by those Linux distributions is not the one you are looking for, then Perlbrew could be a helpful tool for you.
What is Perlbrew?
Perlbrew is a popular tool to install and manage multiple versions of Perl on your system. Each installed Perl version is completely isolated in their working area and has no relation to the system Perl or to each other.
This way, you can take advantage of many things that are not possible with natively installed Perl on your Linux distribution.
- Install the CPAN modules without root or sudo privileges.
- Try out the different or bleeding-edge version and discover new features in it.
- Test your written code in Perl to see if it is working in different Perl versions.
I hope you understand what Perlbrew is and how useful it can be in your Perl programming journey. Stick with this article to learn the steps of Perlbrew installation, and then we’ll see how to install different versions of Perl using it on Ubuntu and other Linux distros.
How to Install Perlbrew on Ubuntu and Other Linux Distros
1. The Perlbrew installation is quite easy. First, launch your terminal and execute the following command to install the curl utility:
- On Debian, Ubuntu, Mint
- sudo apt install curl
- On RedHat, Fedora, AlmaLinux
- sudo dnf install curl
- On Arch, Manjaro, EndeavourOS
- sudo pacman -S curl
- On OpenSUSE
- sudo zypper install curl
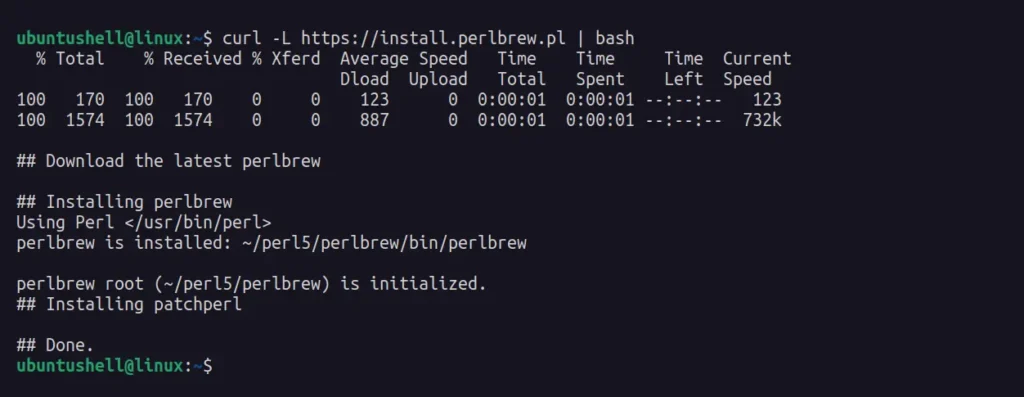
2. Then execute the following curl command to begin the installation of Perlbrew.
- curl -L https://install.perlbrew.pl | bash
Output:
3. Finally, append the following line to your shell configuration file; for example, in Bash, it could be ~/.bashrc or ~/.profile.
- source ~/perl5/perlbrew/etc/bashrc
Once you're done, restart your terminal session to apply the changes.
How to Install Perl with Perlbrew
Once Perlbrew is installed, you can easily install a different version of Perl using it. For example, first execute the following command to list the available versions of Perl that you can install.
$ perlbrew availableOutput:
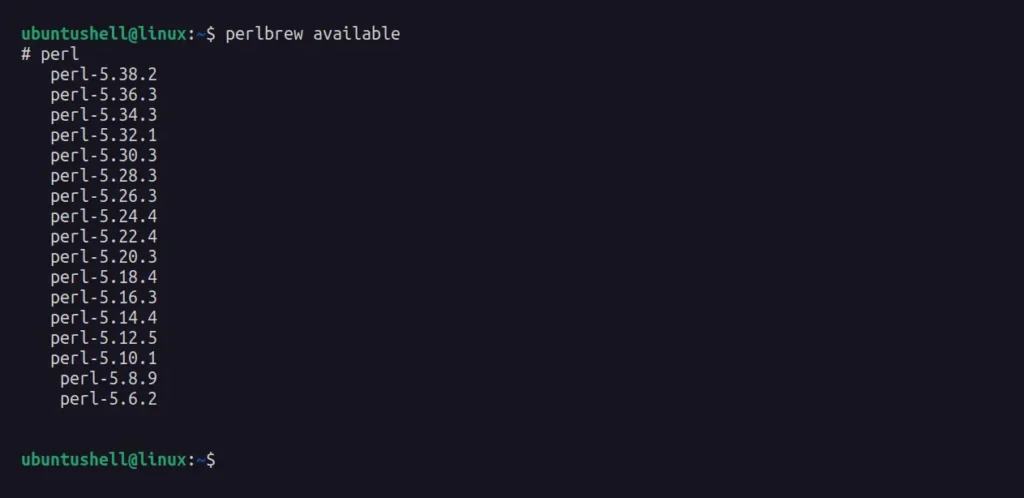
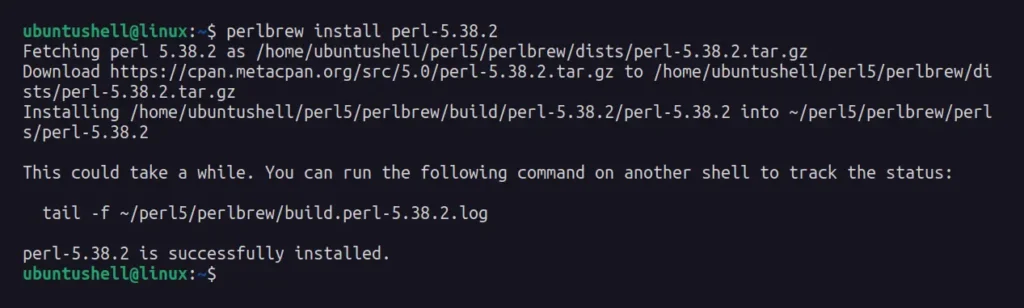
From the above list of available Perl versions, you can choose the one you want to install. For example, the following command will install the most recent Perl version, 5.38.2.
📝 Note
The installation is done by downloading and compiling the Perl version from the source, which could take some time.
- perlbrew install perl-5.38.2
Output:
To install the bleeding-edge version of Perl, run.
- perlbrew install perl-blead
Once the installation is complete, you can run the following command to list all the installed versions of Perl via Perlbrew:
- perlbrew list
Output:

To use a particular version of Perl, you either use the perl switch command to set the desired version default for all shell sessions or the perl use command to use the specified version in the current shell session.
- The following command will set Perl 5.38.2 as the default for all terminal sessions.
- perlbrew switch perl-5.38.2
- The following command will only set the Perl bleading edge in the current terminal session.
- perlbrew use perl-blead
Output:

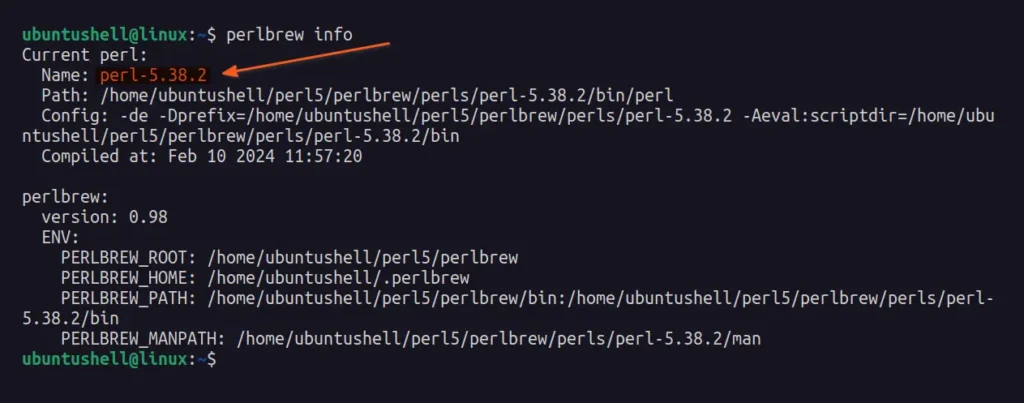
You can reassure yourself that the current set version is the one you desire by running the following command:
- perlbrew info
Output:
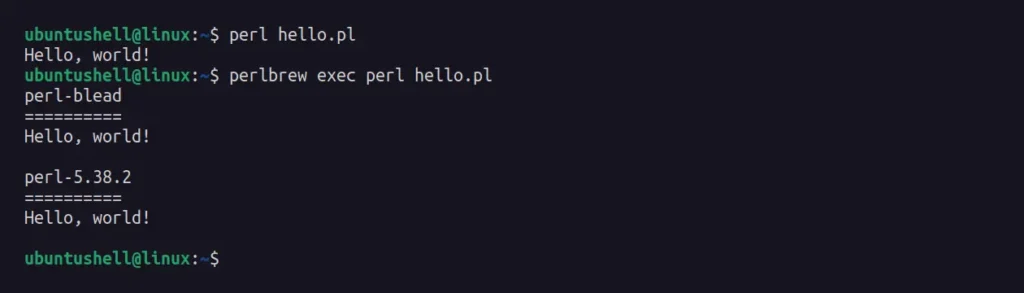
To run a program using the Perl installed via Perlbrew, you can use your existing Perl script or create a new script by copying the following content into it and saving it as the hello.pl filename.
use strict;
use warnings;

print "Hello, world!\n";
Once you saved the script, navigate to that location and execute the following command to run the script in default (Perl version sets using perlbrew switch or perlbrew use commands) or all installed versions of Perl using the perlbrew exec perl command.
- The following command will run the Perl script in the default Perl version.
- perl hello.pl
- The following command will run the Perl script in all the Perl installed versions via Perlbrew.
- perlbrew exec perl hello.pl
Output:
To update a particular version of Perl to its latest release, including the CPAN modules, specify the version in the following command:
- perlbrew upgrade-perl perl-5.38.2
Output:

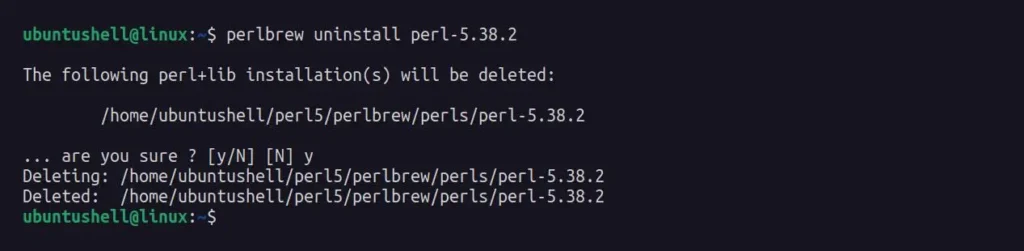
When you want to remove a particular installed version, simply specify the Perl version with the following command:
- perlbrew uninstall perl-5.38.2
Output:
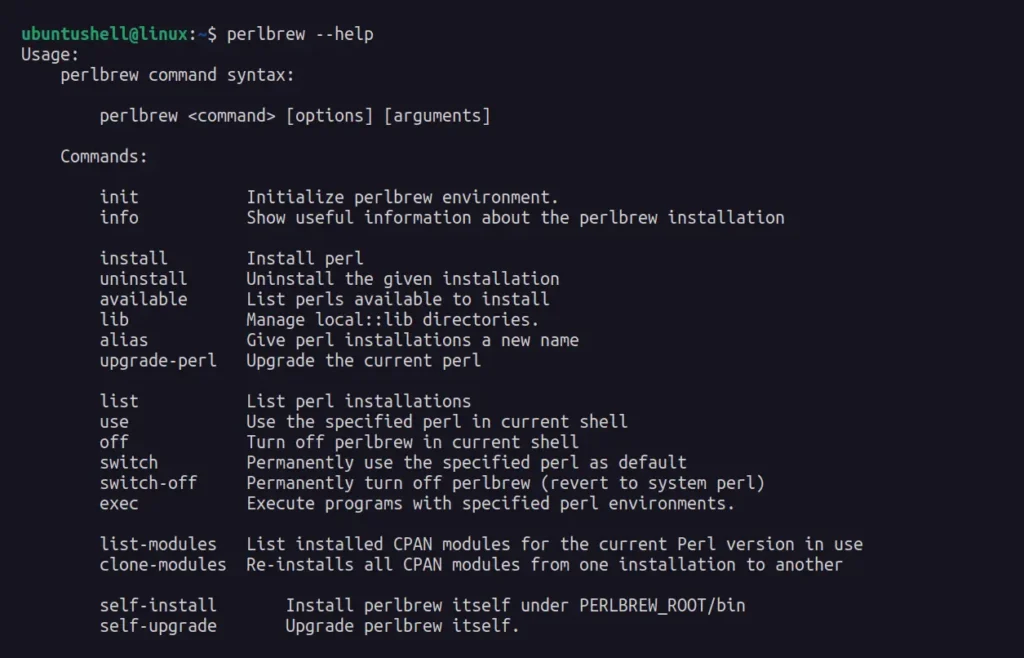
To learn more about Perlbrew and its different options, check out the help section.
- perlbrew --help
Output:
Lastly, to remove Perlbrew from your system, make sure to first remove all installed Perl using the previously mentioned command, and then run the following command to remove the Perlbrew directory.
- rm -rf perl5/
Output:

Also, make sure to remove the following added line from your shell configuration.
source ~/perl5/perlbrew/etc/bashrc

