TeamViewer is a freemium, cross-platform, and proprietary tool by Microsoft that allows users to remotely connect with other computers that have TeamViewer installed.
This way, you can receive or provide technical assistance to individuals anywhere in the world with just an internet connection, TeamViewer installed on both systems, and sharing credentials such as a partner ID and password.
Despite being closed-source, you can still use this tool to perform tasks like sharing desktop, clipboard, and file transfers between computers without registering with Microsoft.
In this article, I'll show you how to install TeamViewer on Ubuntu 24.04, Ubuntu 23.04, Ubuntu 22.04, Ubuntu 20.04, or other versions.
How to Install TeamViewer in Ubuntu
In just three simple steps, you can quickly install the latest version of TeamViewer on your Ubuntu system.
Step 1: Update System Packages
It's always advisable to update your package list and installed packages to make sure everything is proper. Therefore, open your terminal and execute this command:
$ sudo apt update && sudo apt upgrade -y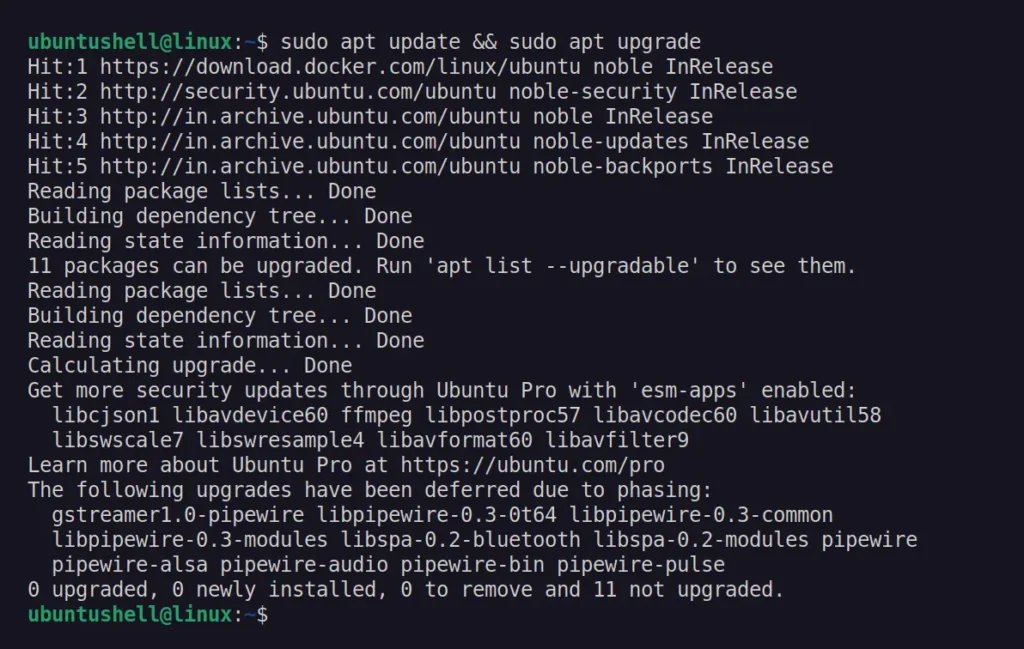
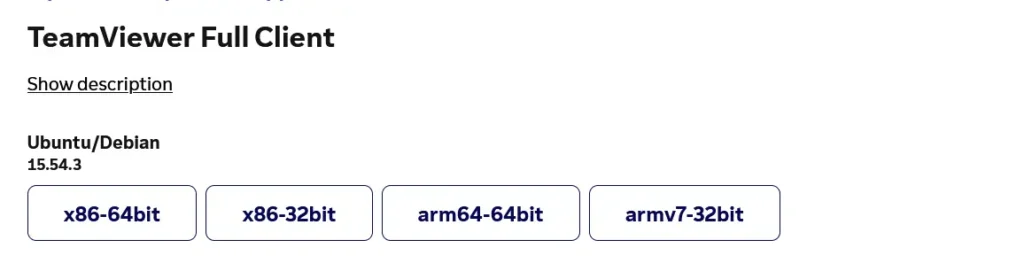
Step 2: Download TeamViewer DEB Package
You need to now visit the TeamViewer download page and download the Teamviewer Full Client DEB package for Ubuntu/Debian that comes for x86-64-bit, x86-32-bit, and ARM devices (e.g., Raspberry Pi).
📝 Note
If you are confused among these different variants, and if you are running Ubuntu on the latest desktop or laptop, simply download the "x86-64bit" package.
Alternatively, you can also download TeamViewer using the wget command-line tool from your Linux terminal.
# For latest desktop and laptop running on 64-bit architecture.
$ wget https://download.teamviewer.com/download/linux/teamviewer_amd64.deb

# For older desktop and laptop running on 32-bit architecture.
$ wget https://download.teamviewer.com/download/linux/teamviewer_i386.deb

# For ARM devices running on 64-bit architecture.
$ wget https://download.teamviewer.com/download/linux/teamviewer_arm64.deb

# For ARM devices running on 32-bit architecture.
$ wget https://download.teamviewer.com/download/linux/teamviewer_armhf.debStep 3: Install TeamViewer in Ubuntu
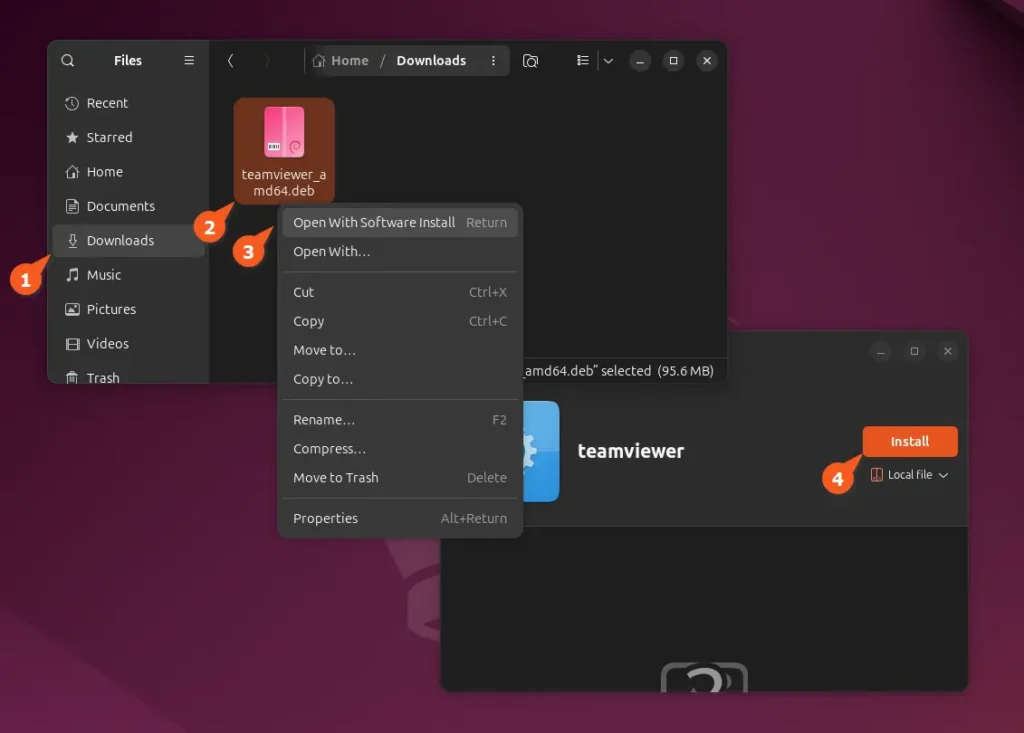
Once you've downloaded the TeamViewer DEB package for your Ubuntu system, open the file manager, navigate to the downloads directory, right-click on the downloaded package, and select "Open With Software Install". This will open a new window where you need to click on the "Install" button to proceed with TeamViewer installation.
Alternatively, you can also open your Linux terminal, go to the downloads directory, and install TeamViewer using the command line.
$ cd ~/Downloads/
$ sudo apt install ./teamviewer_*.deb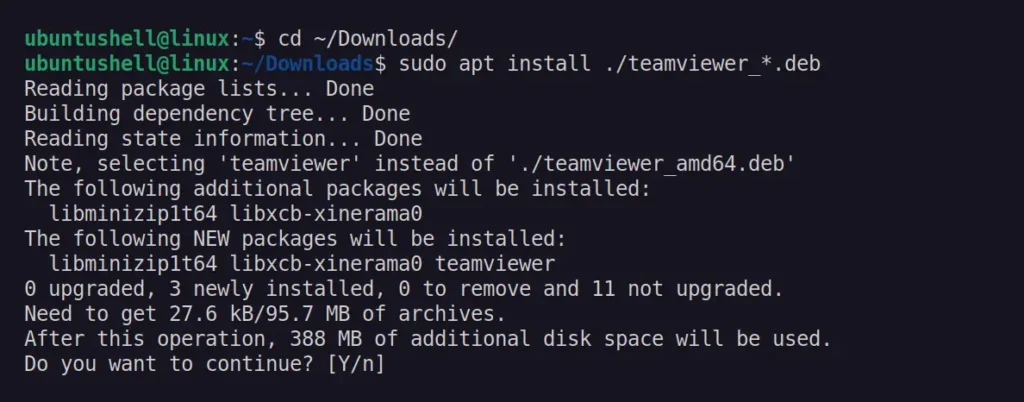
How to Launch and Use TeamViewer in Ubuntu
Once the installation is complete, you can launch TeamViewer from the application menu or use the teamviewer command to start it from your Linux terminal.

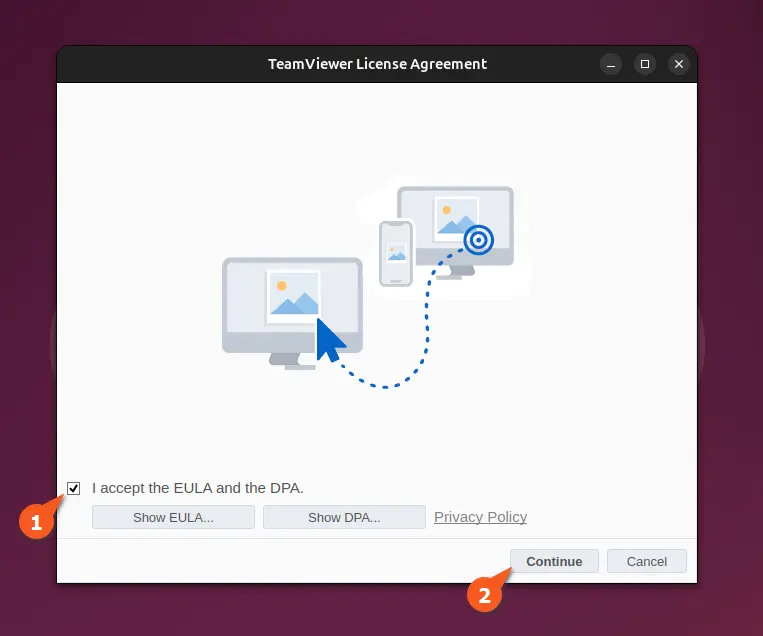
When you launch it for the first time, it will ask you to agree to its terms and conditions. You can continue by clicking on the "I accept the EULA and the DPA" checkbox, followed by the "Continue" button.
A TeamViewer main window will now appear, showing your unique ID and password, which you can share with others to allow them to connect to your system.
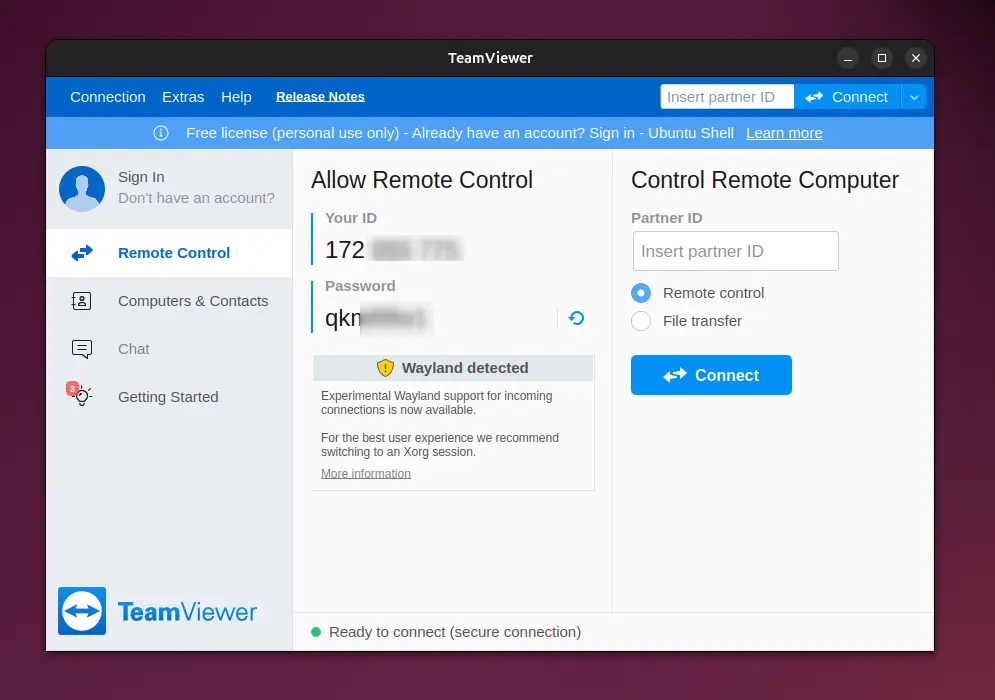
To connect to someone else, ask them for their credentials and enter the unique ID under the "Partner ID" field, followed by the password when prompted.
How to Uninstall TeamViewer in Ubuntu
To remove TeamViewer from your Ubuntu system, use this command:
$ sudo apt remove --purge teamviewerIt will remove TeamViewer along with its configuration.
Wrap Up
The installation of TeamViewer on Ubuntu is pretty simple; if you encounter any difficulty during installation, you can ask for assistance in the comment section.


